WARMACHINE: Magnetizing your Heavy Vector Kit
6 Minute Read
Aug 5 2013

Advertisement

When I picked up the brand-spanking-new Convergence Battlebox and Heavy Vector kits, I knew the first step was going to be magnetizing them to make sure I could get the most bang for my buck.
I’m a college student, and that means that money is an issue, especially in an expensive hobby like wargaming.
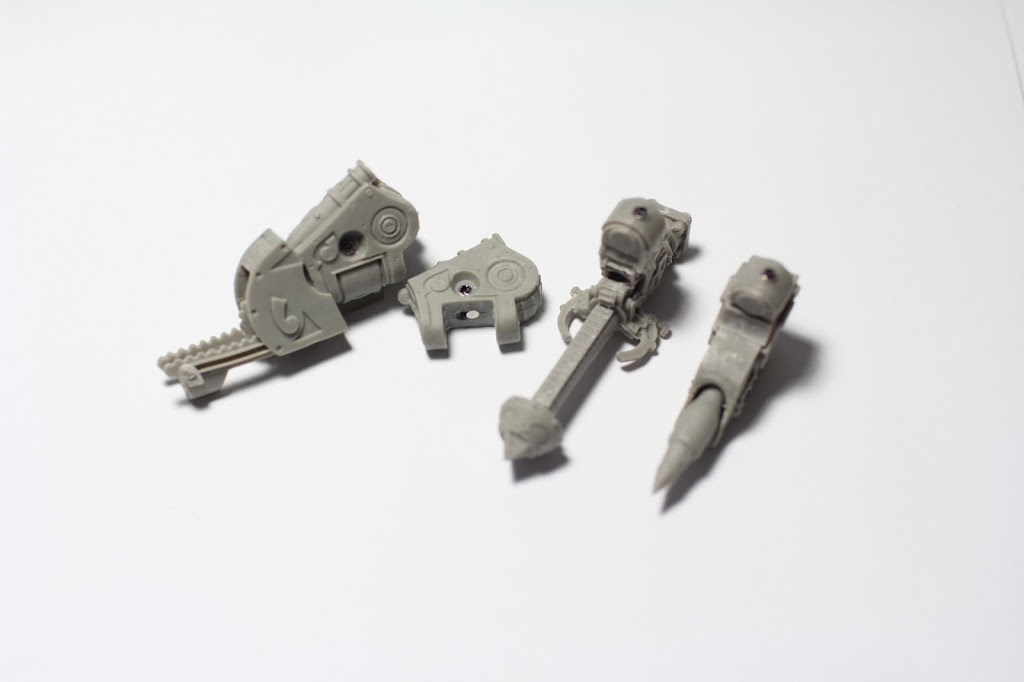
The first step was to lay out all of the pieces and group them together, as illustrated by this bad photo below:

There’s a lot of parts, so I take some time to familiarize myself with them. The infamous legs are especially finicky.
Once I know my way around the kit, I start cleaning the pieces. There are some pretty gnarly mold lines on just about everything, so I take my time and do what I can–despite my efforts, I can’t get all of them, but maybe some of you out there will have better luck than me.
As it turns out, the process of magnetizing models is a little difficult to photograph, so I’m going to show you the tools I used, explain my technique, and then show you the pieces.
For the tools, I’m working with some pretty standard stuff:
- a Pencil
- a Sharpie
- a pin vice (I think I have P3’s model)
- Primal Horizon’s 3/32″ Magnet Combo Pack (I used less than 25 of the magnets):
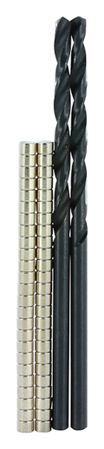
The last thing on that list is really the important one, and it solves the biggest problem with the magnetizing process: you get the magnets and the drill bit (or two, for some reason?). In the past, the hardest part of the whole thing for me was finding the correct sized bit (as I don’t otherwise own a ton of tools and such), but for under $20, you save the whole headache. If you’re looking to magnetize anything and don’t already have a ton of drill bits to choose from, I’d definitely recommend picking these up!
So, the process I go through to actually install magnets is pretty simple:
- After dividing the kit into segments (as in the photo above) I look and see what can be changed out, everything that can be changed is going to get a magnet, things that stay the same will get glued together. (If you want. I didn’t, which will make painting easier)
- Once I know where I want to put a magnet, I’ll take my pinning drill bit and drill a pilot hole, which will guide the larger drill bit in a second.
- Next, I swap it out for the 3/32″ drill bit and start drilling into the pilot hole, which will give me a spot to drop the magnet– I put a drop of glue in the hole and put a magnet in.
- Once you have one in place, make sure that all of the magnets that will connect to it are facing the right way–To do this, I double and triple check, marking one side with a sharpie. Give the glue some time to dry before testing the magnet, or you could suck the magnet out of the hole you tried to glue it in! Conversely, if you put the wrong side of the magnet facing inward, use your other magnets to suck it out before the glue dries!
- Dropping the magnet into the hole, I use a pencil to push it around or flip it over, as the magnet will stick to my Xacto knife or pin vice.
So, I take my time and put all the magnets where I want them and make sure they all match up correctly. In all, it takes me less than an hour to go through the whole kit, and it goes pretty quickly once I get used to drilling and gluing the magnets in.
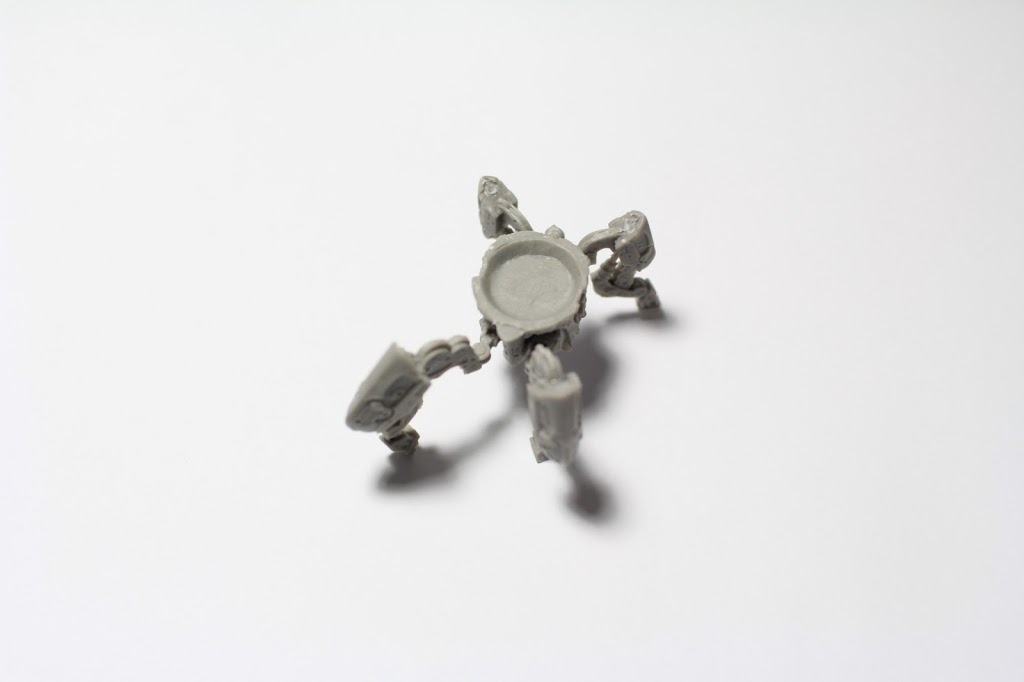
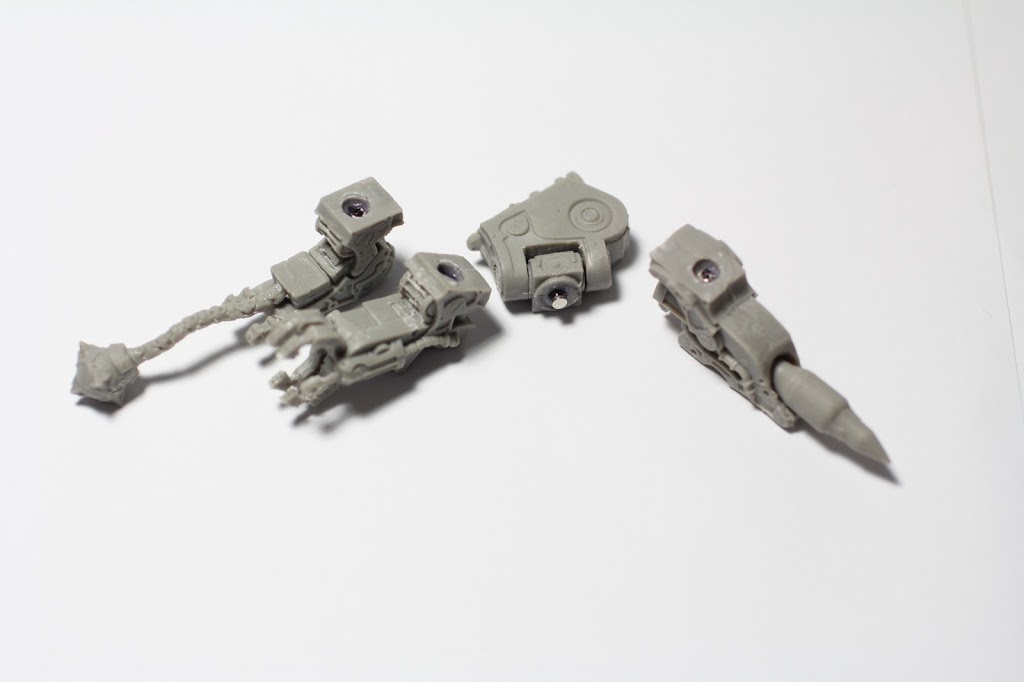
For this kit in particular, the left arms all use the same shoulder and elbow piece so those can be glued together like I illustrate below (with blu-tac, I’m keeping mine disassembled for the added ease of painting) I also go ahead and assemble the legs, as they’re sort of too small to easily paint separately. Be careful though, they feel pretty fragile.
For pre-paint assembly, here’s what all the segments look like:
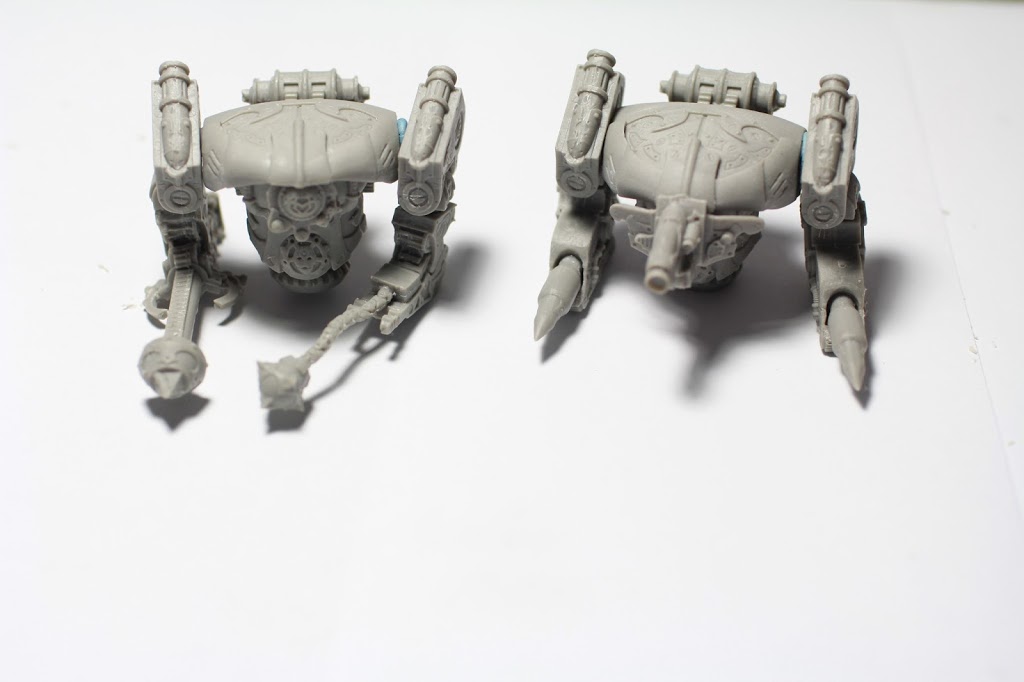
The Torso:
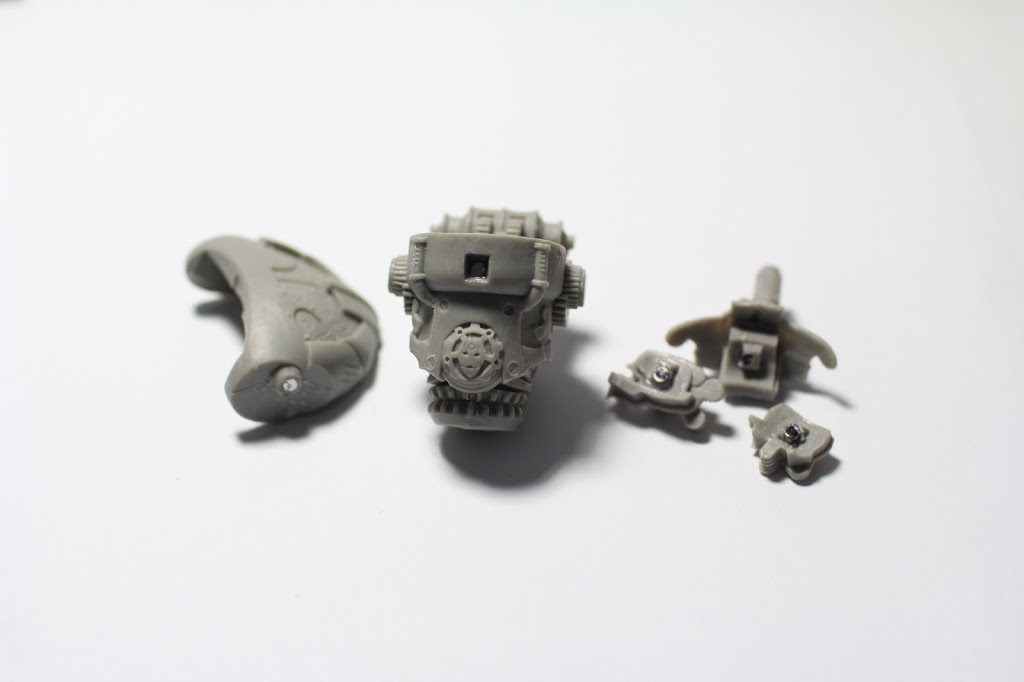
I’m not going to glue the hood carapace thing onto the torso as it covers up some of the gears inside. The Hood is going to get a magnet in its right shoulder peg so that the Ellipsaw and regular shoulder can both attach. The heads all connect to a magnet in the square hole above the maiden of gears symbol. You can sort of see that I drilled into the square pegs on the backs of the heads. It’s really important to have the pilot hole well placed so that you can get the main hole in the right spot.
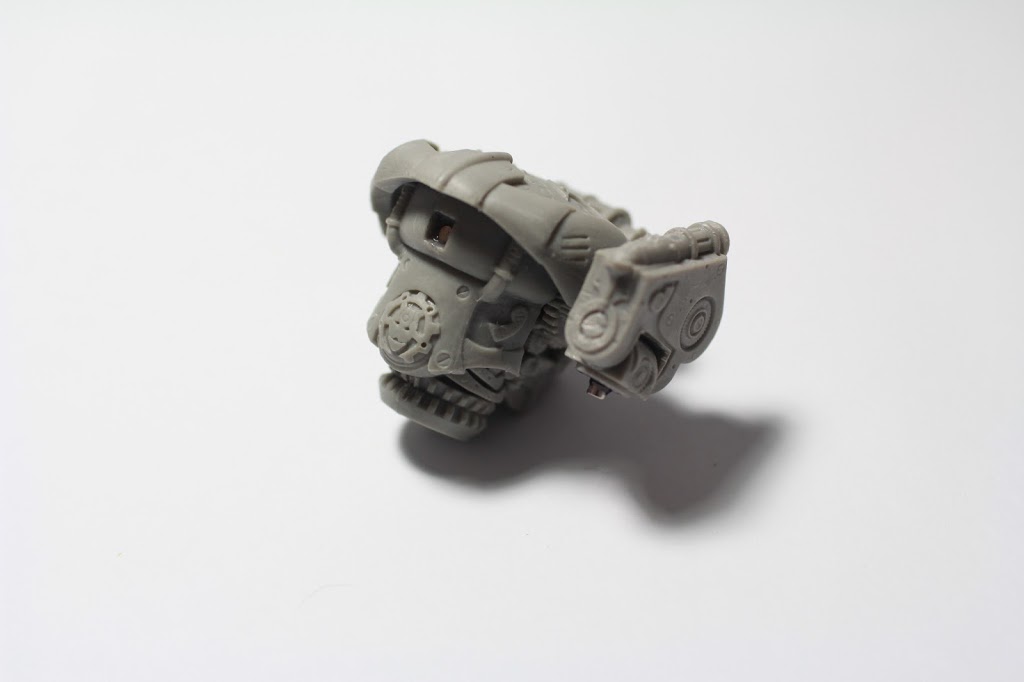
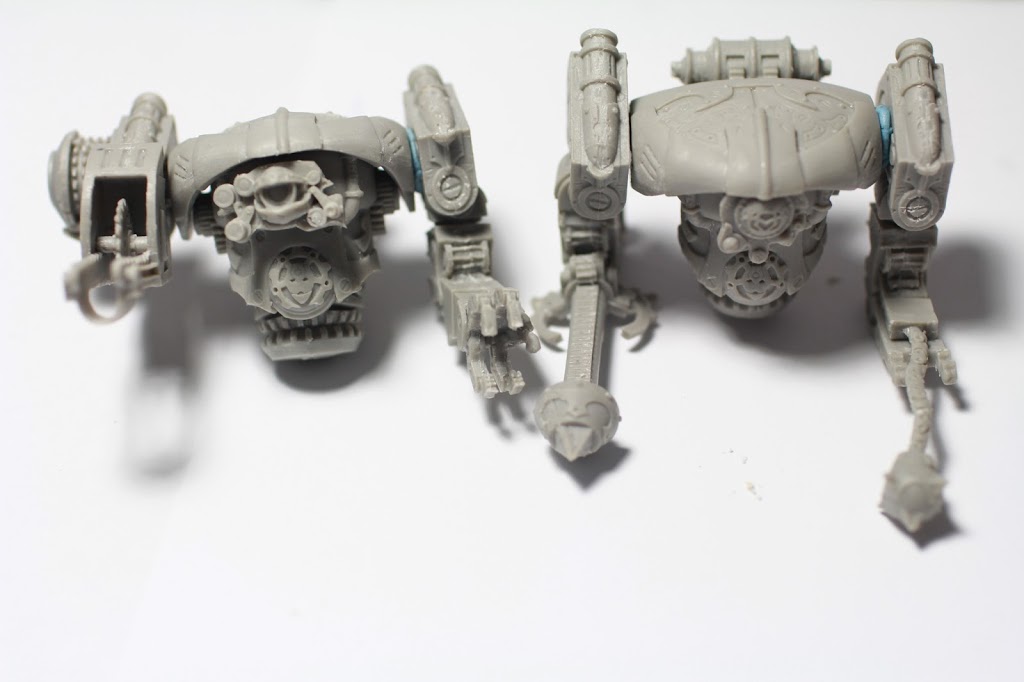
The Right Arm
Like I mentioned before, the Right Arm/Shoulder is going to have to be able to switch out– The Ellipsaw Flinger and regular Shoulder both get magnets inside their holes to fit onto the above Hood’s right shoulder peg. From there, the Macropummeler already has an elbow piece, so I glued the loose elbow piece onto the Piston Spike, and both elbow pieces got a magnet in them to connect to a magnet in the bottom of the shoulder.
The Left Arm
The Left arm has only one shoulder option (meaning you can glue this onto the hood if you’d like). Additionally, none of the left arm pieces have elbows, so I glue my elbow piece into the shoulder. If you look closely, you’ll see that I cut the male peg off of the elbow piece and just glued a magnet on in its place. I just found this to be far easier than drilling into it. From there, I sunk magnets into the holes on all of the arms, making sure they can all fit onto the elbow magnet.
After going through my heavy kit, I took the heavy vector from the Battlebox and threw magnets on so he could accept the heavy kit’s pieces for some extra versatility. The one thing I would have done differently would have been maybe using 1/8″ magnets for the arms– they’re just somewhat bigger and stronger, but these 3/32″ ones feel solid enough.
Here’s what we’ve got:
That’s all for now, folks! Hope I’ve inspired you to open up your Vector options. I’ll be back soon to show you how I go about painting and basing my Convergence Models, but until then, how do you think the Vectors match up to Privateer Press’ other heavy kits?
Author: PeanutButterConspiracy
Advertisement
