Hobby: Basing the Galleons

Time to base these Galleons and get them finished up and ready for play.
For my first Galleon base I wanted to go with a nice maritime theme – one that really spoke to the aesthetics of this unique looking colossal. The first step was to start on the quay.

I cut a strip of foam wide enough to fit across the interior of the base.
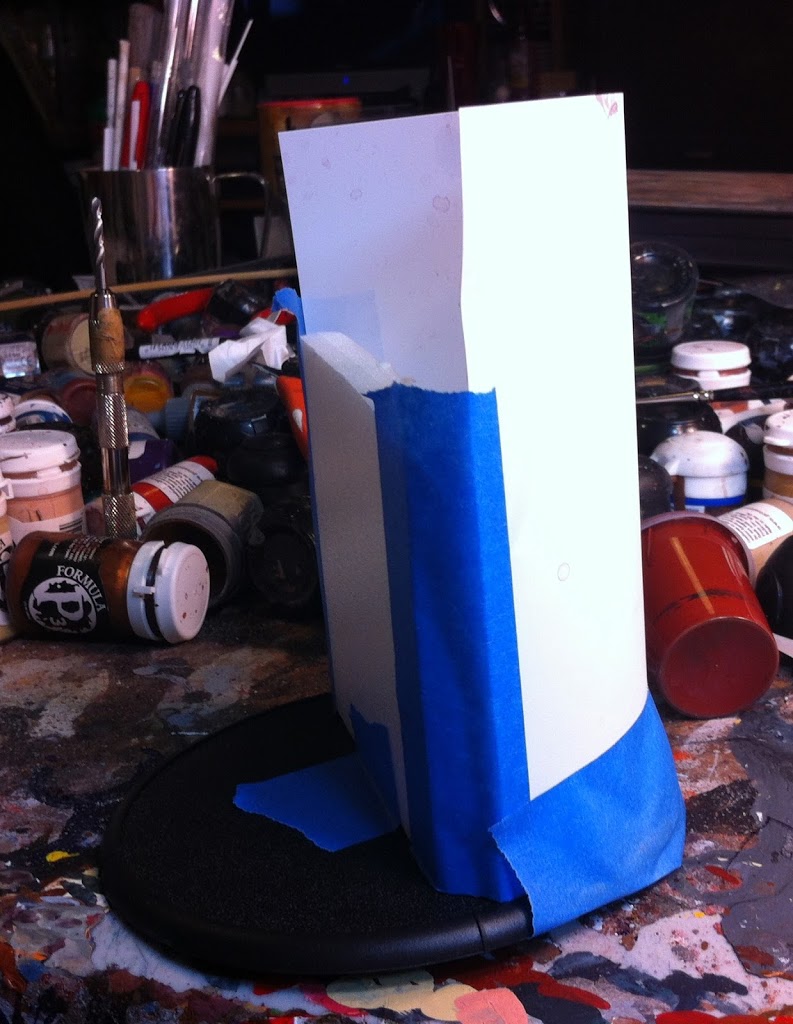
Then I tape a strip of plasticard in place to create a vessel for the plaster. Note that it doesn’t really need to be water tight to work.
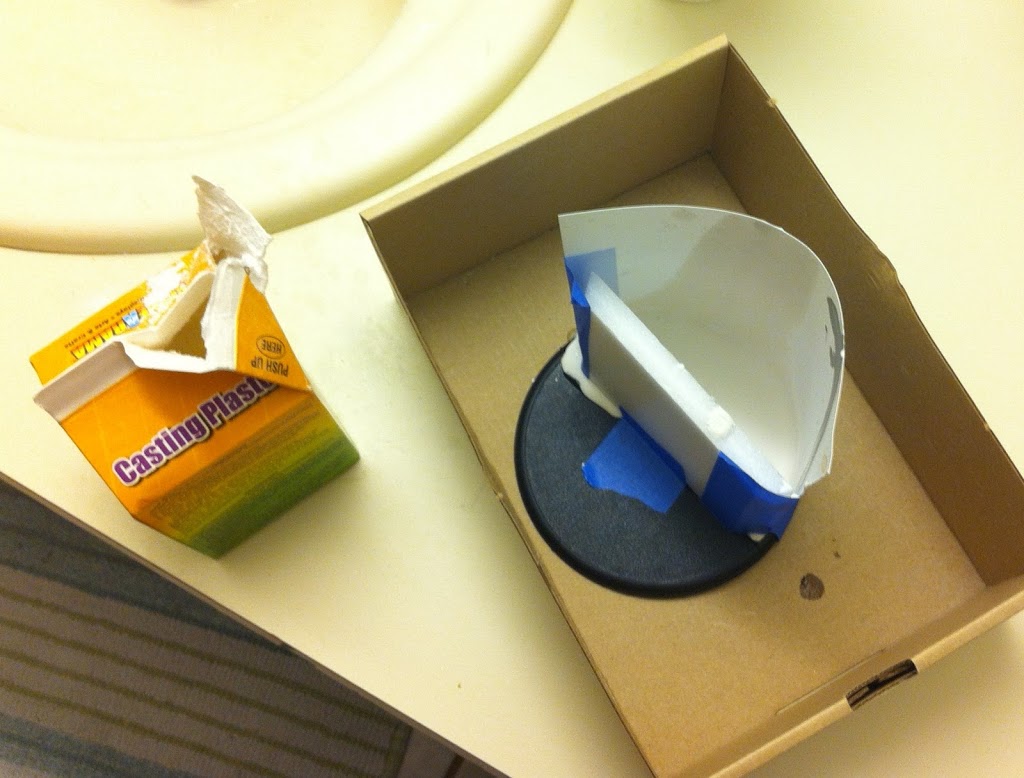
Here I’ve poured the plaster. You can see it’s leaking out the sides a bit but that’s about as bad as it gets. Make sure you don’t pour too much or you’ll end up with a really tall base.
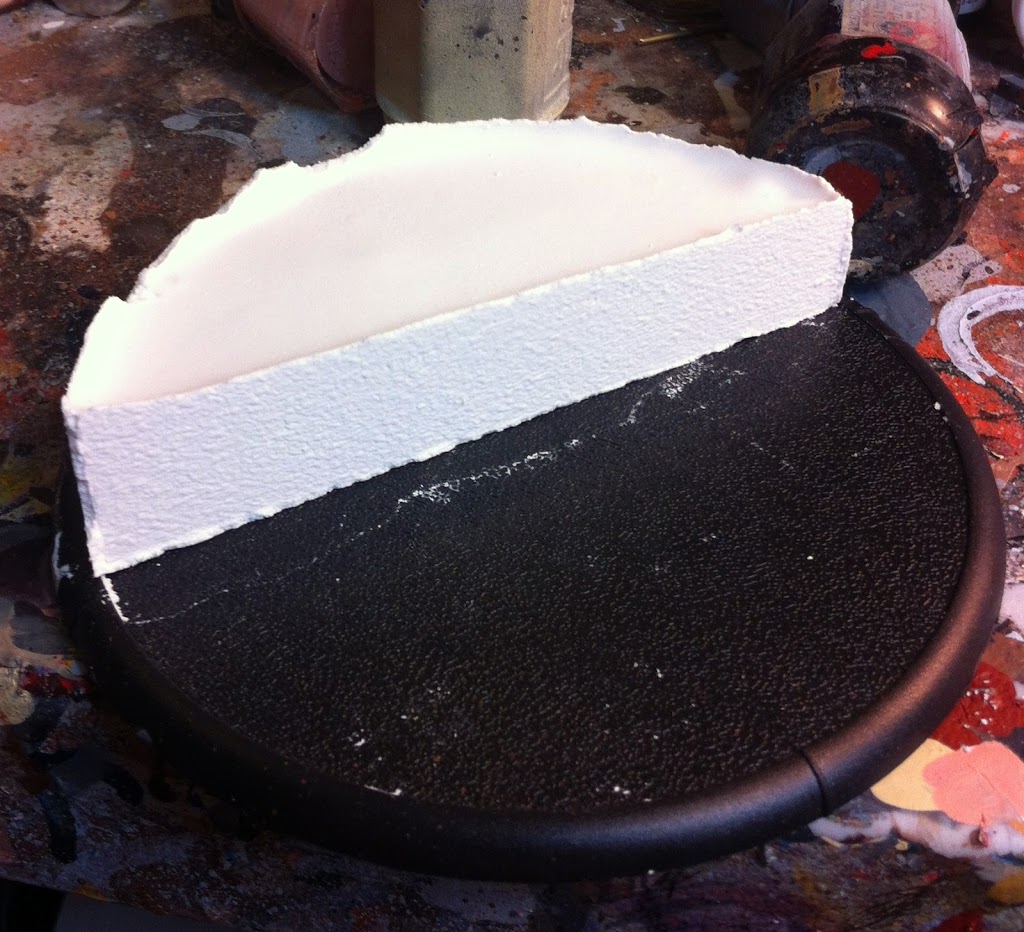
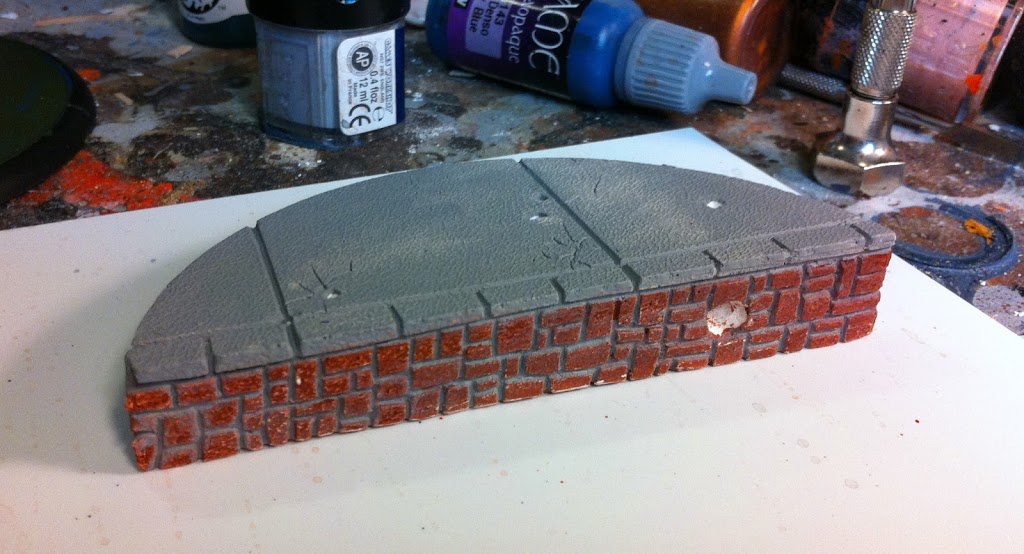
After 45 minutes to an hour it’s time to take the plaster out. It’s best to work with it while it’s still wet, but make sure it’s hard to the touch. Right now you’re looking at the piece bottom side up. You’ll want to file away all that excess so it sits flat on the base. You see how the facing side has picked up some texture from the foam? That’s exactly what you want. It’ll give the bricks a natural look.
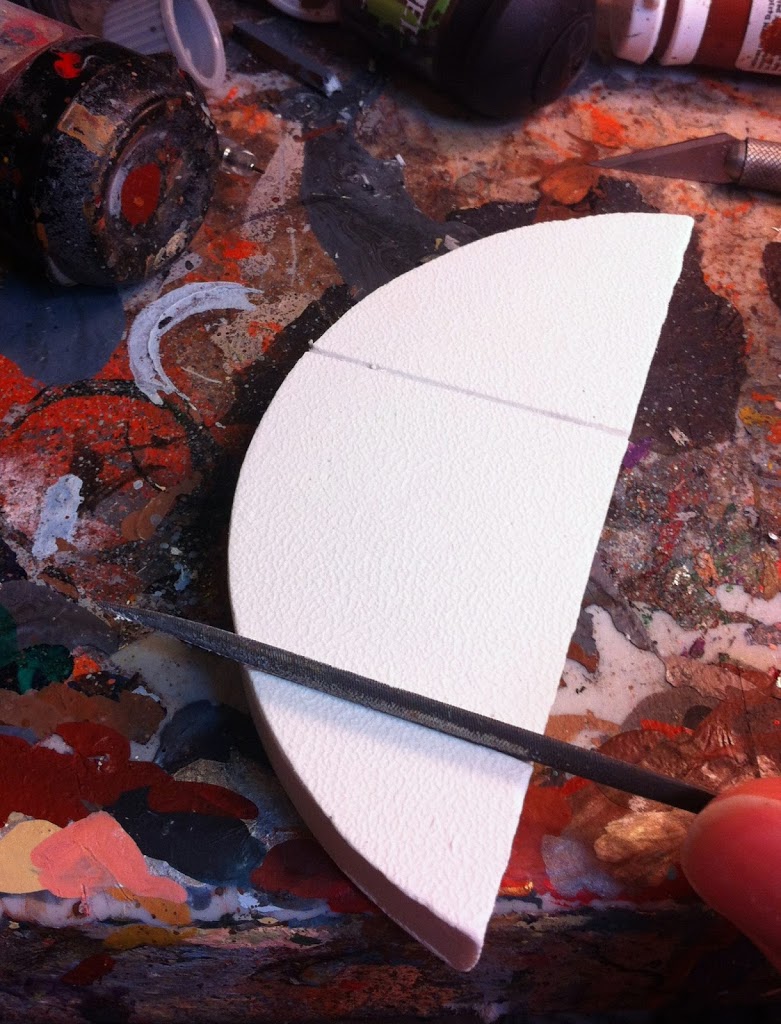
Once the bottom has been filed flat, flip the piece over to begin adding some of the stone effects. The top has also picked up some interesting texture from the base it was cast on. I was going for a concrete slab look so I used the side of a file to make some nice straight lines. It’s probably worth pointing out that this is not the same tool I used to file the bottom of the base flat. That was a big steel number that I usually keep in the garage.
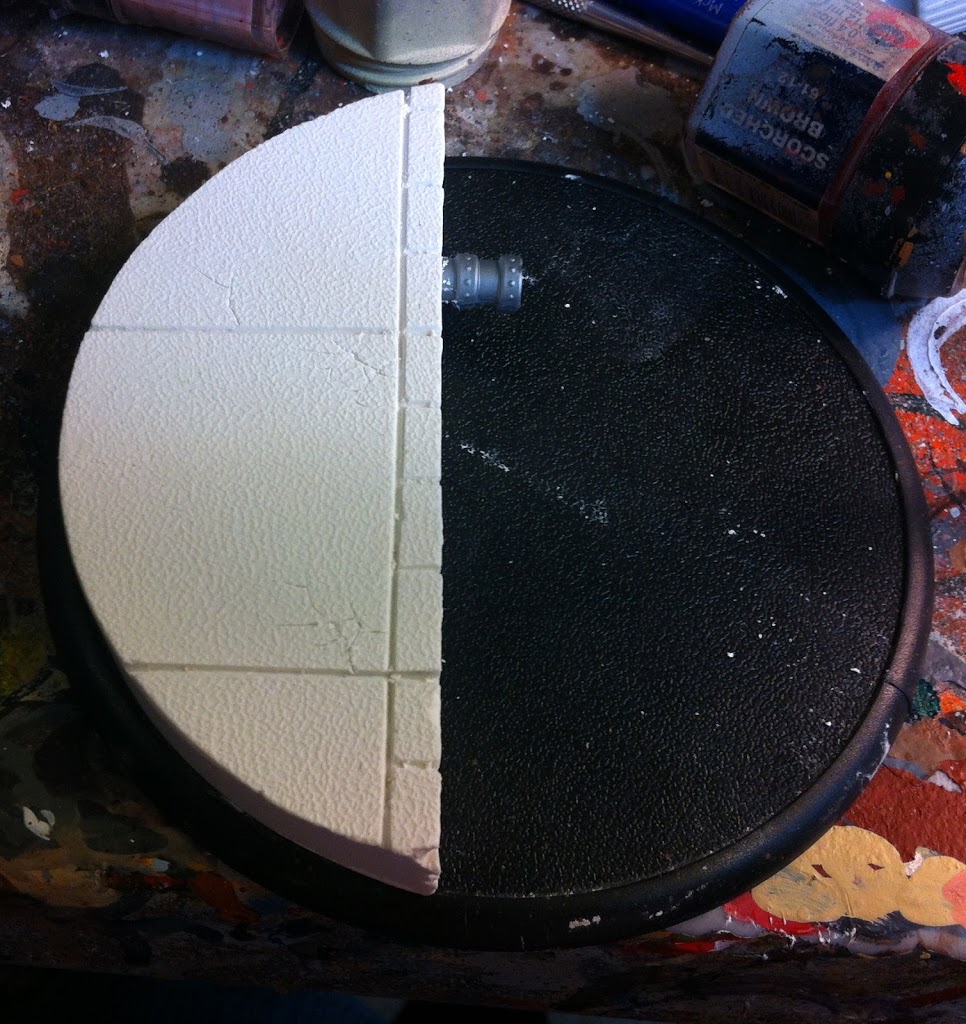
I made some stone slabs across the front, and also added some tiny little cracks with a sharp X-acto.

The bricks were just carved in with the pointy end of my small file.
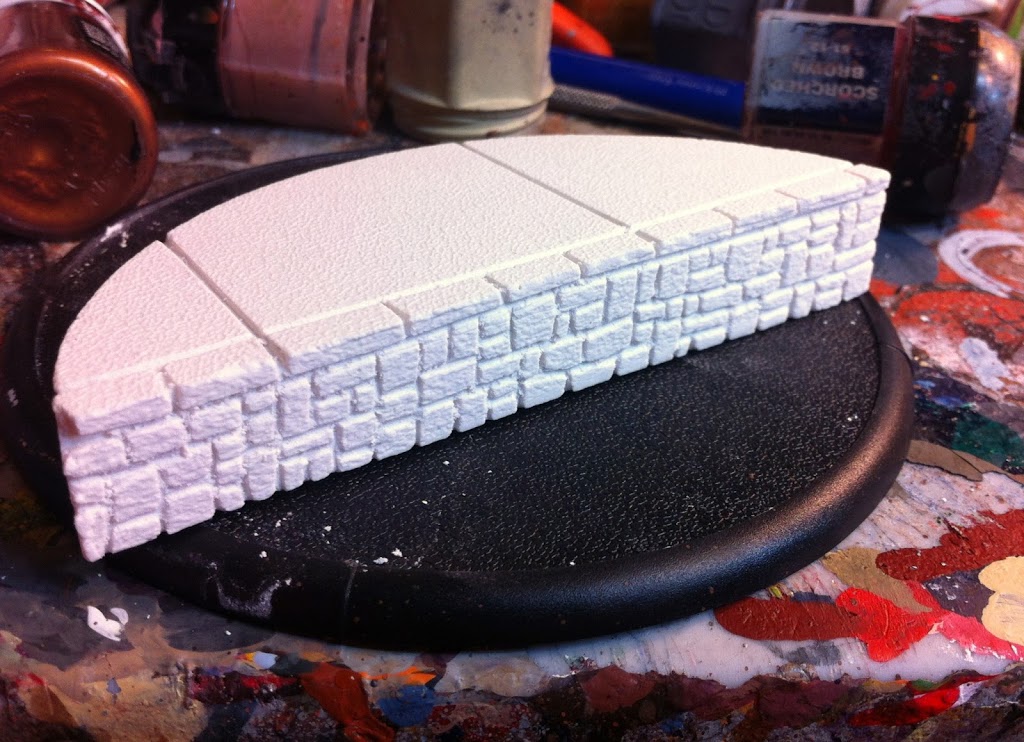
Eventually I had enough to cover the whole surface.

For the Dock I’m just using Balsa Wood. To intensify the wood grain texture you can rub a wire brush along the wood’s surface.
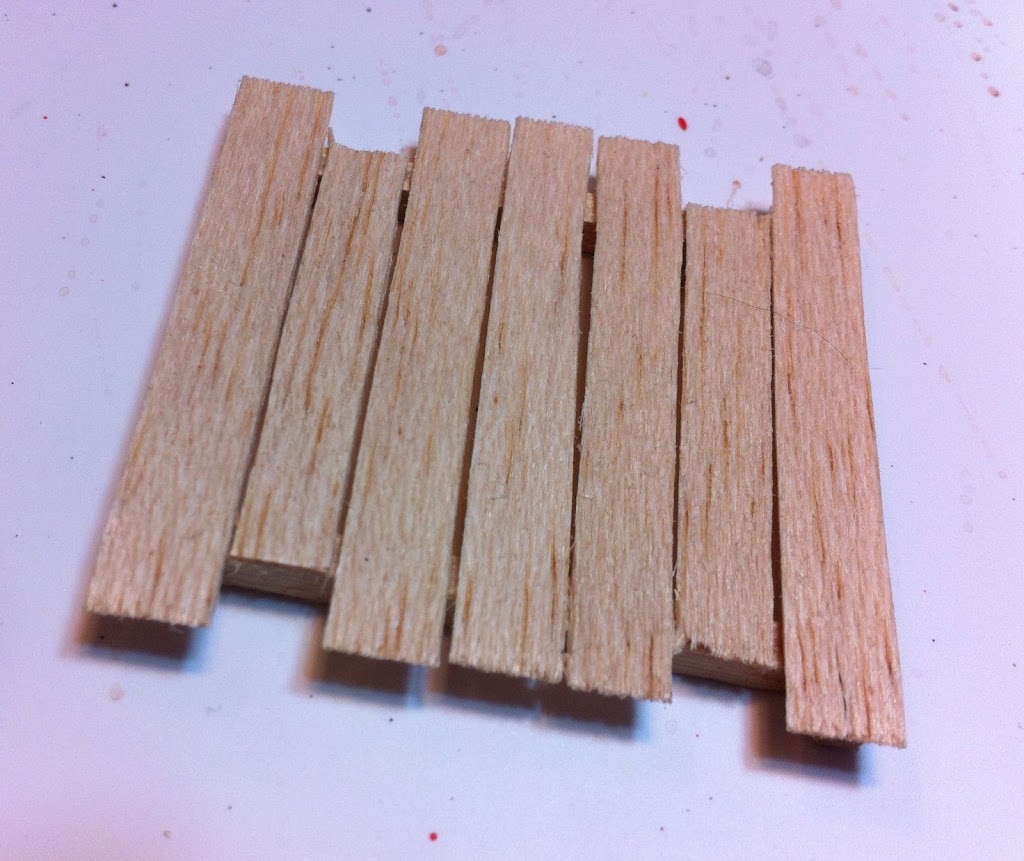
Just cut the wood into strips and glue them to a framework of some sort. I’ve just glued mine to a sub-structure made of thicker wood. Super glue is terrible for this sort of thing, so use white glue or wood glue.
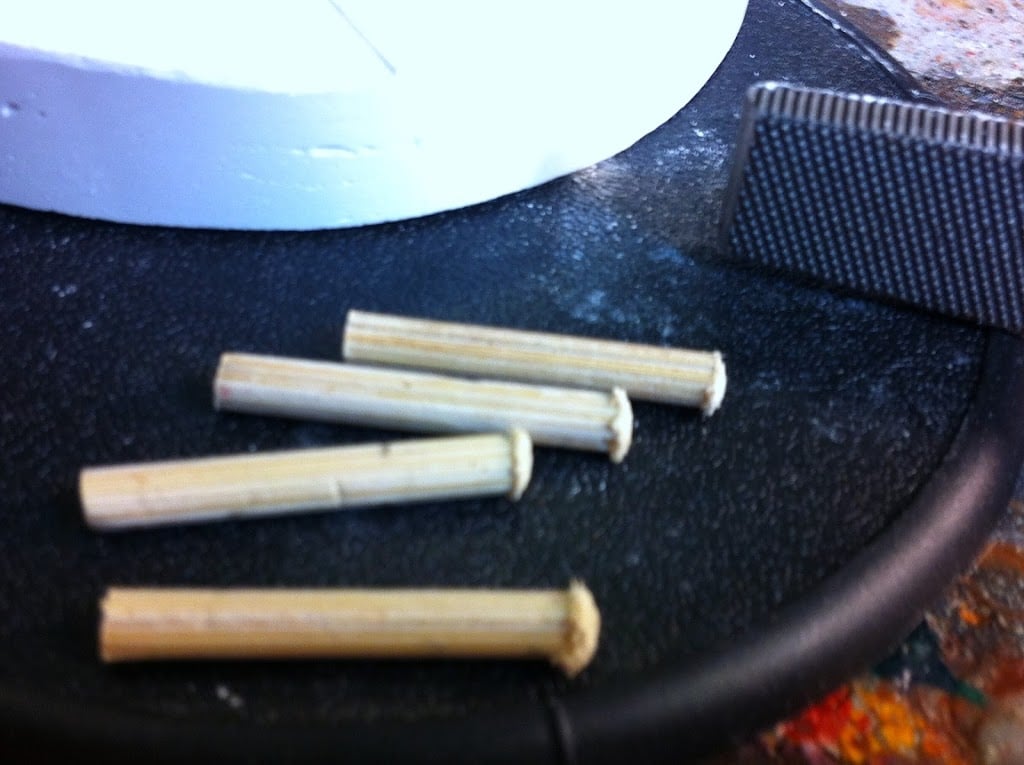
For the posts I’ve cut up some bamboo skewers. To get that beaten appearance, give them some good solid whacks with a hammer or something else that’s solid and moderately heavy. I used my file and it worked great.
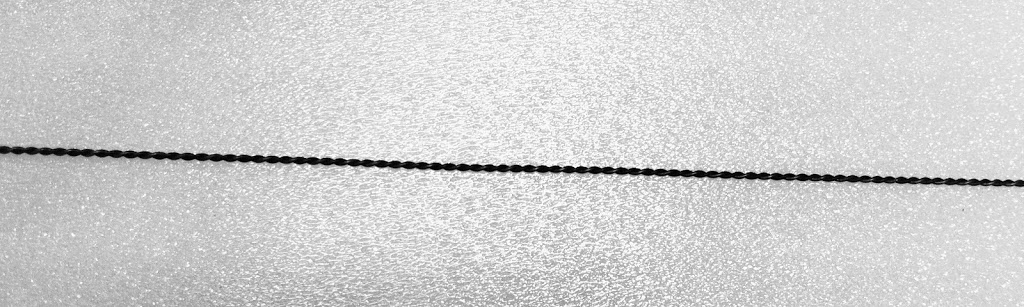
The rope was made using a length of very thin wire and a pin vice drill. Double the length of wire back over on itself. Try to make sure the lengths are about the same size. Wrap the bend around a stick or something. Clamp the two loose ends into the pin vice drill and start twisting. Eventually it will twist together tight enough to give you something that looks like rope.
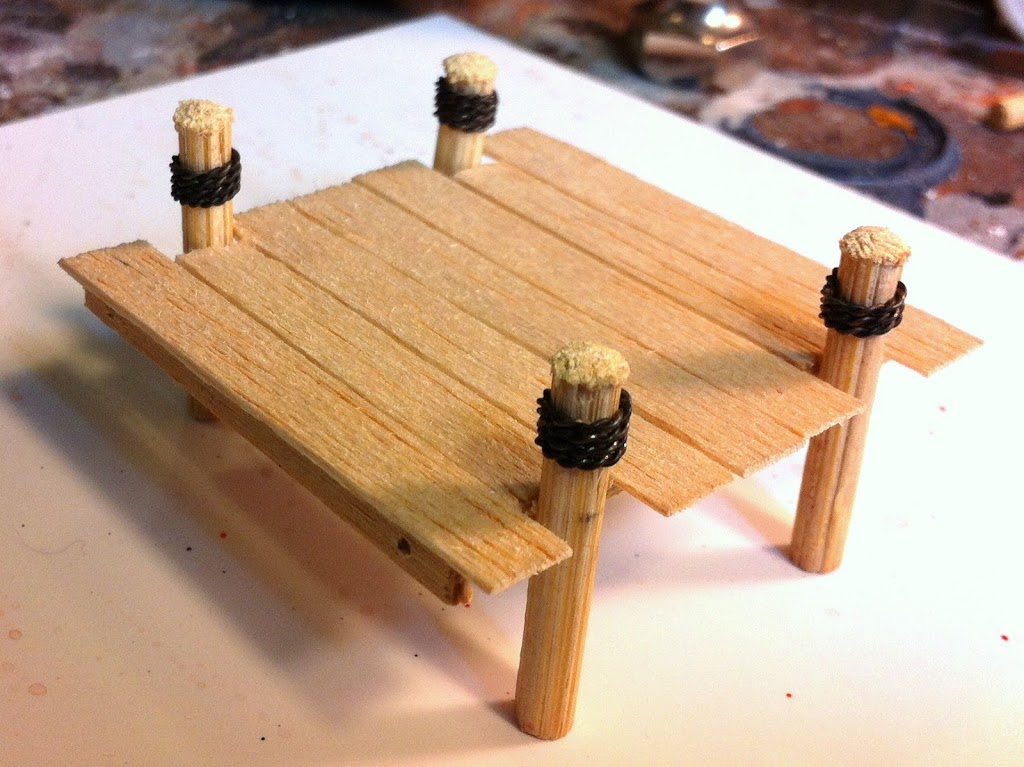
Then put it all together.
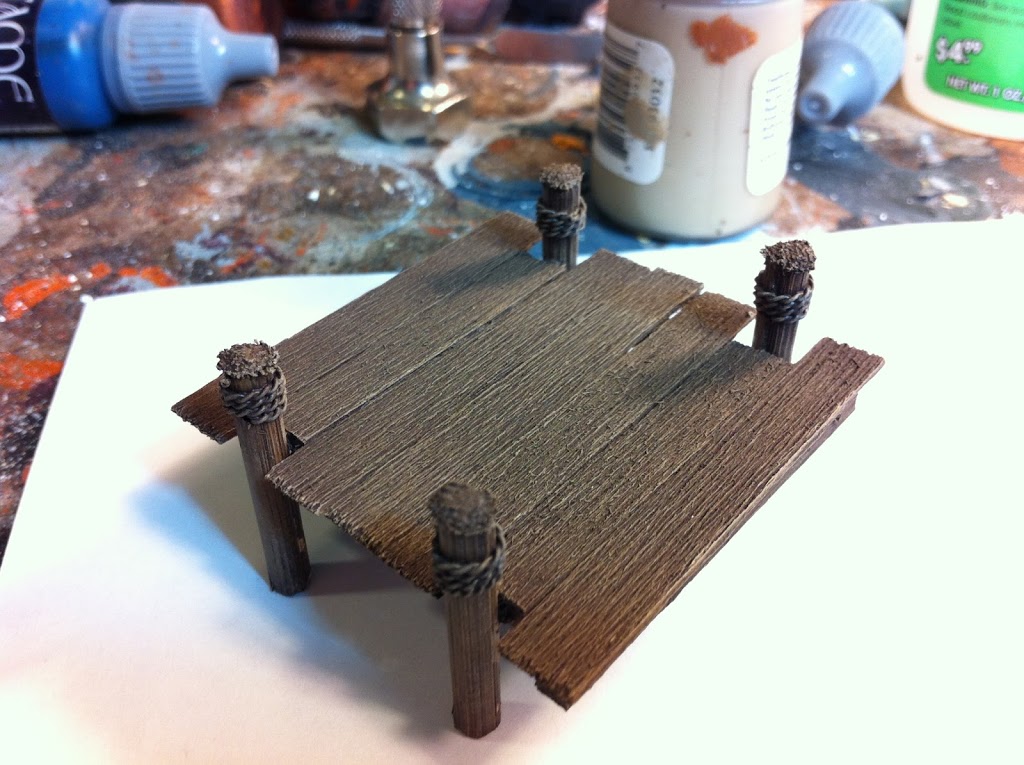
The dock is painted with Umbral Umber (P3). Then it get’s drybrushed with Gun Corps Brown (P3) and a little bit of Hammerfall Khaki(P3). Then it gets a wash of Agrax Earth (GW). You can add some drops of green ink here and there while the Agrax is still wet to give it some color.
To get a nice brick color I mix a little Umbral Umber in with some Skorne Red (P3).
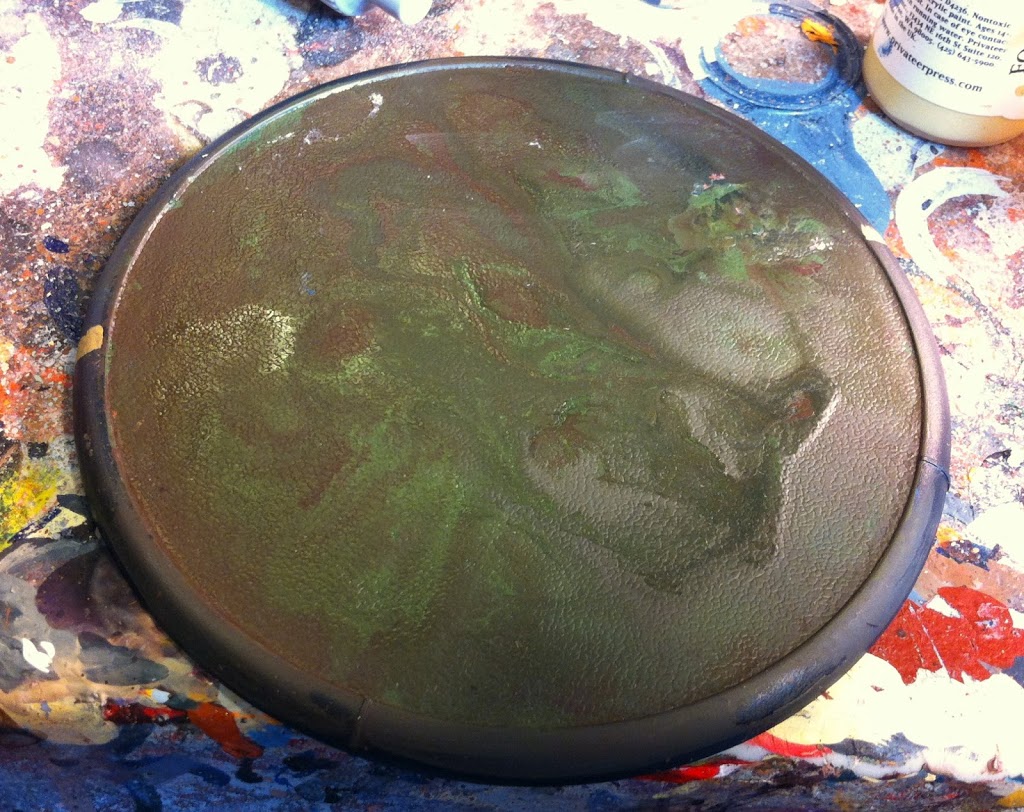
To get a nice gross color for the water I our some Umbral Umber into the base, then spread it around with a brush to get it nice and even. I squirt some Vallejo Cayman Green on there while it’s still wet, and spread it around with one of those cocktail sticks. This makes for a nice gross toxic waste kind of appearance.
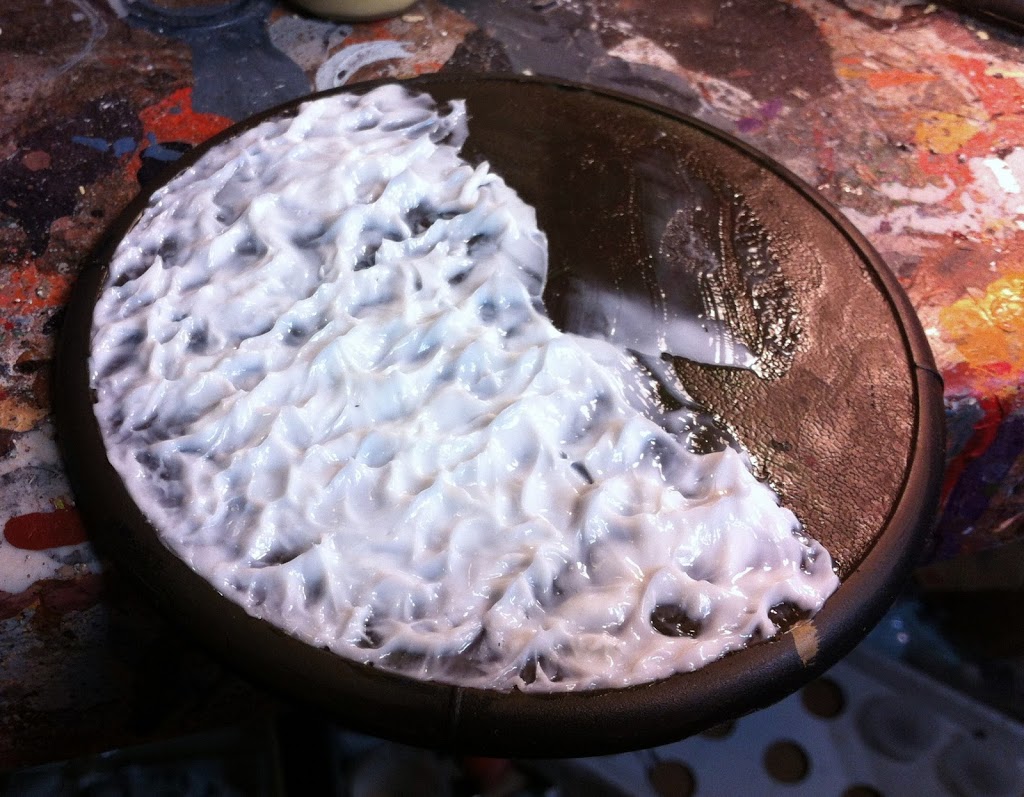
Once that’s dry it’s time to add the water. This isn’t any special product for terrain. It’s just some Liquitex Gloss Heavy Gel. I used a piece of thin plastic I cut off of a blister pack to spread the gel around and get it nice and even. Then I went in with a smooth sculpting tool (basically shaped like a very small spoon) and patted the gel repeatedly to get it to make ripples. When I was finished, some of the peaks of the waves were a bit too tall and sharp. I tapped the base against the table a few times to kind of even it out.
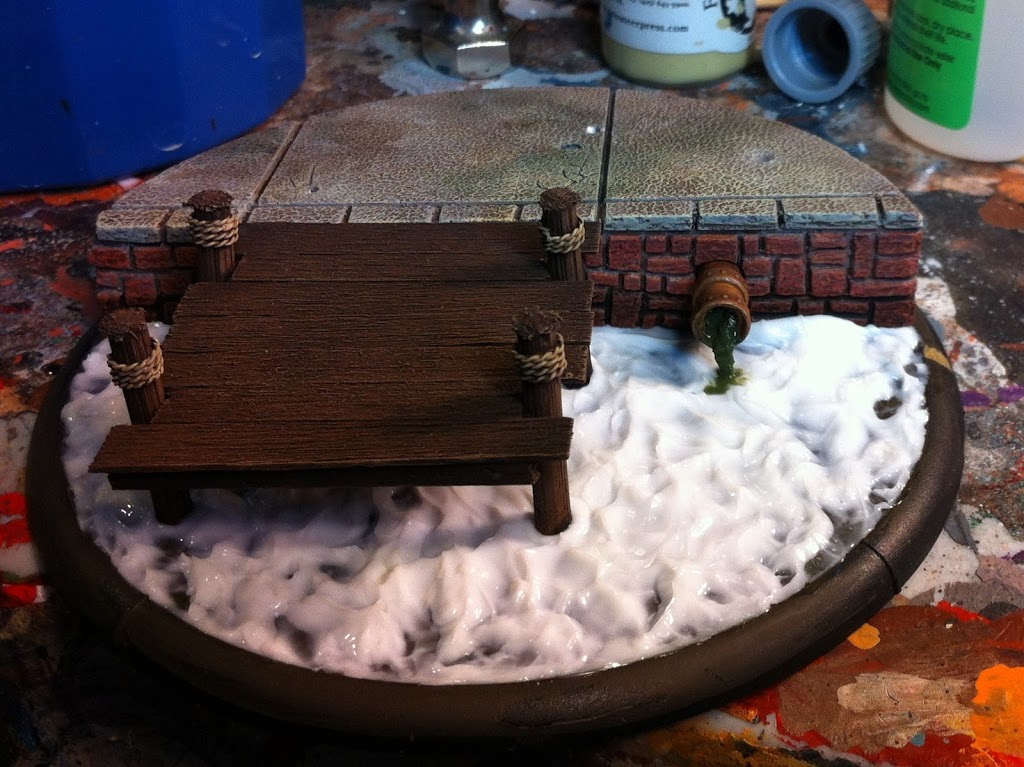
Then I put everything on the base. A little super glue was used to make sure the plaster held tight.
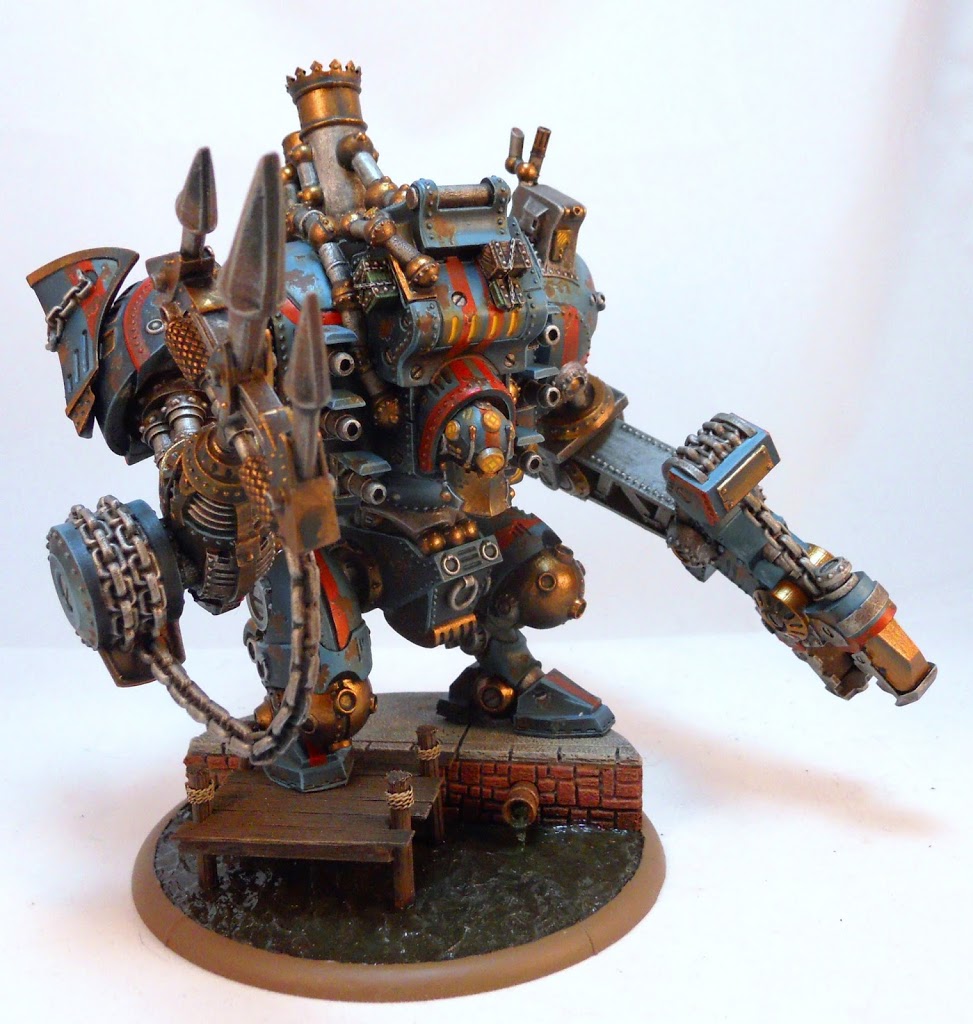
And here he is. In order to get him to perch up there properly I pinned him through the plaster and down into the base. There are 5 pins in all, and they all use thick brass rod to help support his weight.
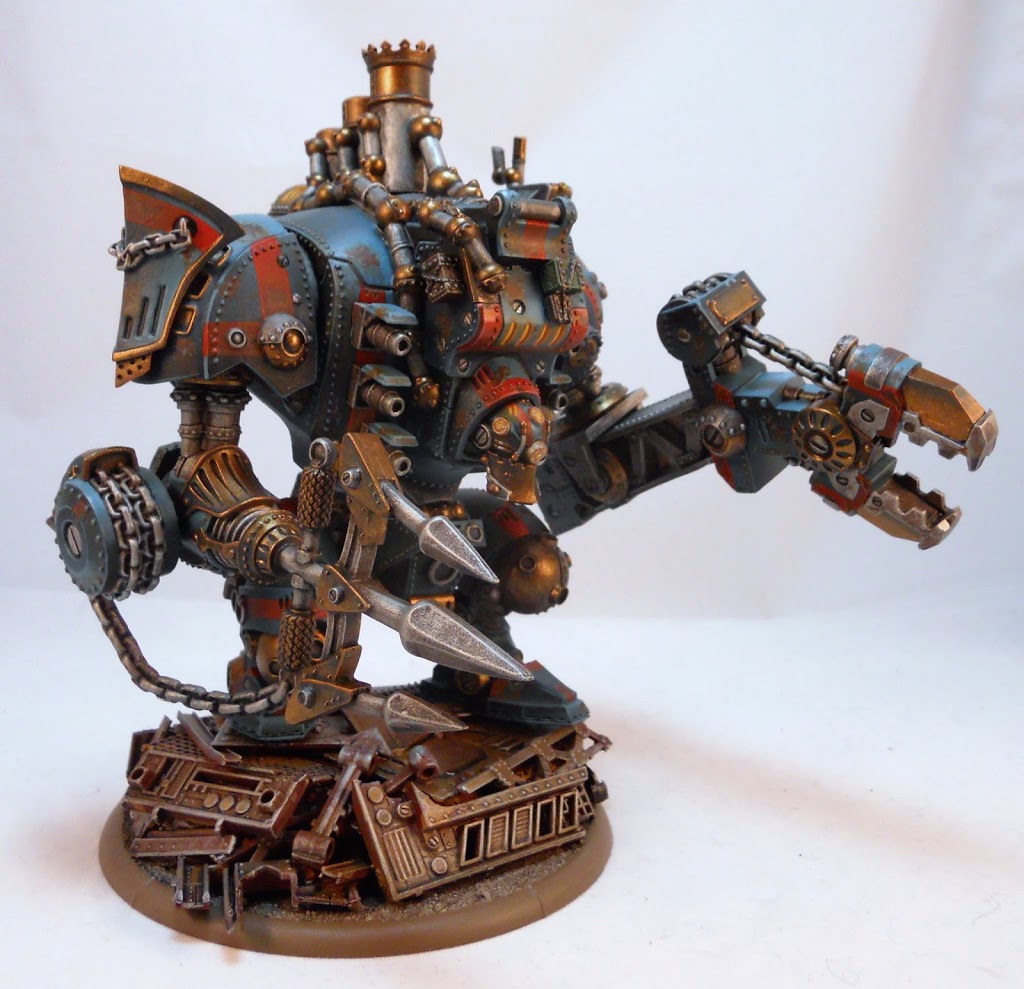
As you can see the next base is quite different. The rest of my Merc army are based on various hunks of scrap. I guess someone’s paying them a lot of money to guard a really important junk yard. I decided to make an extra big junk pile for this Galleon.
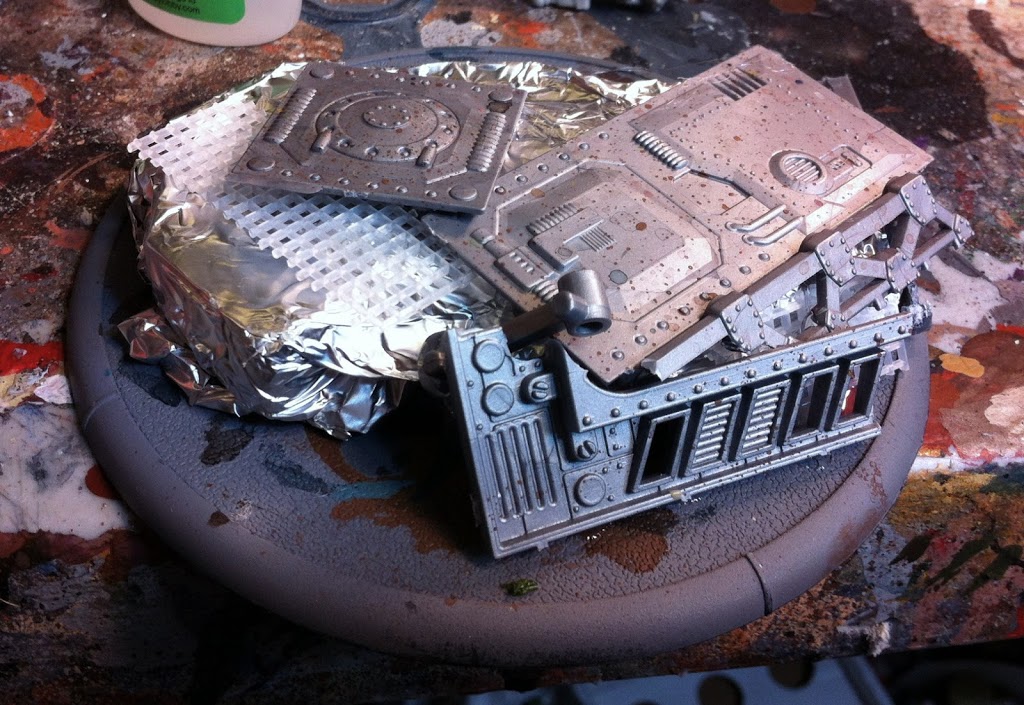
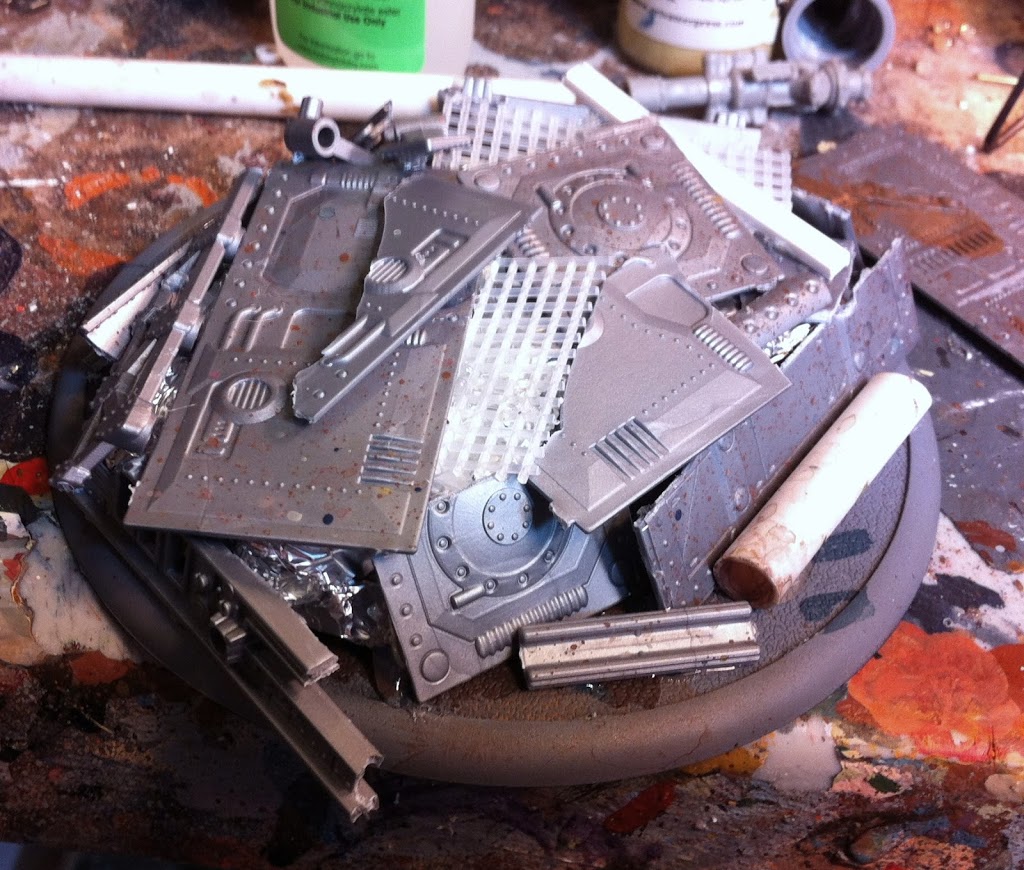
I can’t claim credit for this technique. This idea came from a No Quarter a few years back. The focus of that article was about creating terrain, but Colossal bases are big enough to use the method. Anyway, on to making the base. You begin by cutting a piece of pink or blue foam down to the appropriate shape. Then crinkle some aluminum foil around it. Use hot glue to apply the chunks of scrap over the foil. I’m using parts from the Pegasus Hobbies Power Plant and Chemical Plant sets. With enough time and patience you can create your own industrial looking parts with rivets and strips of plasticard. But man – this is way faster.
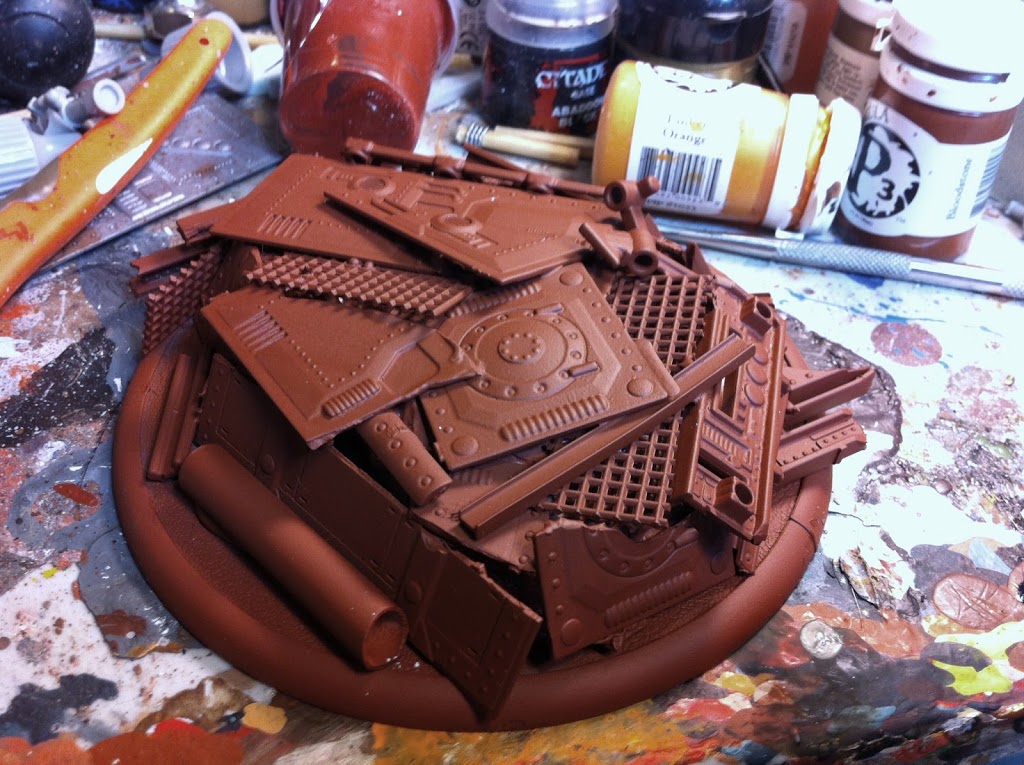
Next I spray it with Rustoleum. Make sure to get the spray into every nook and cranny. Of course if you get it too thick you can obscure the detail.
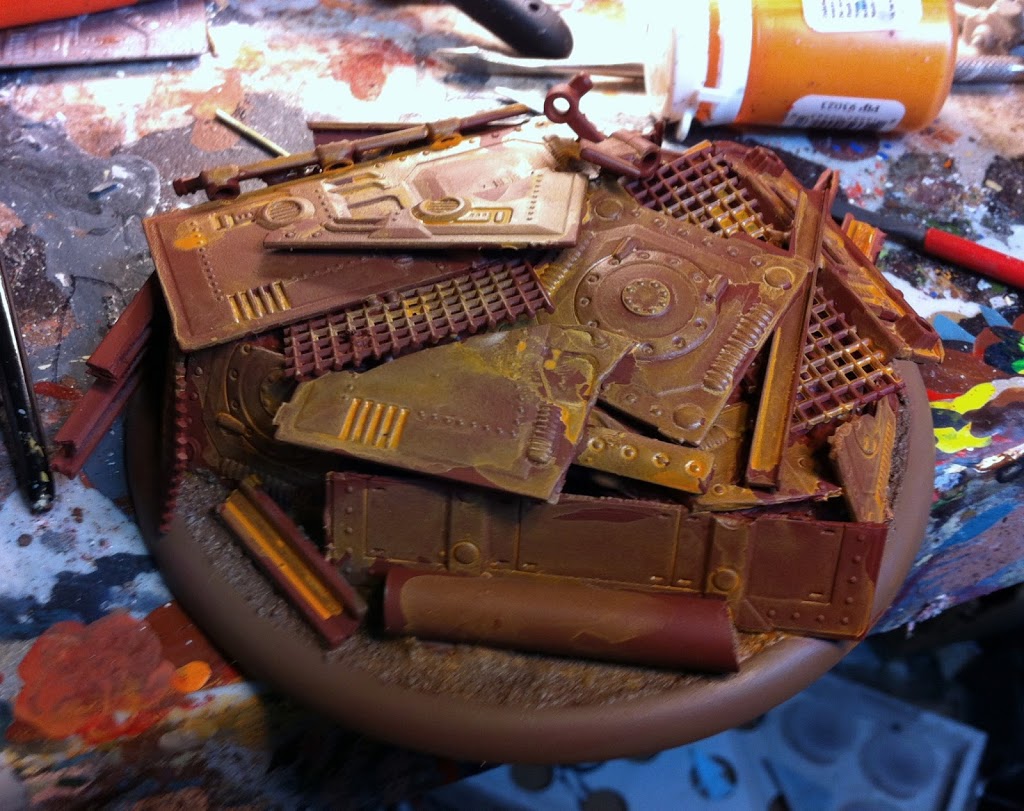
Once the spray is dry I give it a wash of thinned down Heartfire (P3).
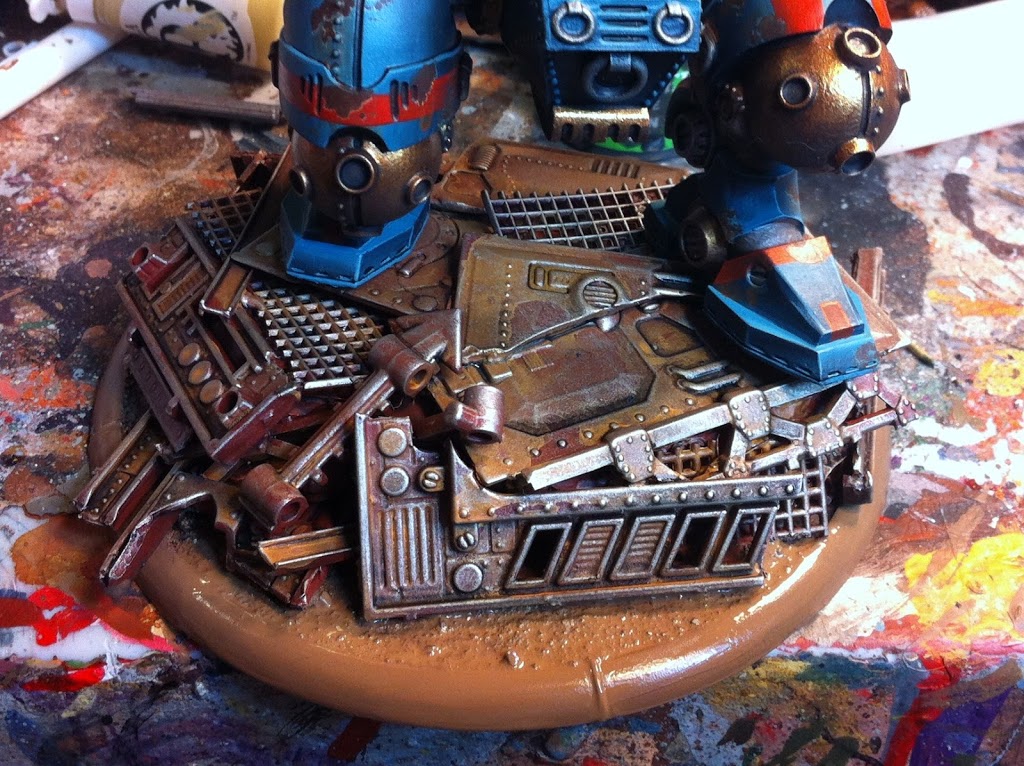
Finally I drybrush it with Chanimail (P3), then give it a nice thick coat of my special armor wash. This is mixed from 1 part water, 2 parts Agrax Earth, 1 part Nuln Oil, and 1 part Asurmen Blue. It also gets a drop or two of matte medium to make sure it binds properly. Then you have to pin the big guy through the foam. As before, I used thick pins so that they bear the load of the Galleon rather than the scrap pile.
~So there you go. Hopefully these tips will come in handy whether you use them for basing or terrain.
