SHOWCASE: Arena Rex – Painting Aquila

Hello BoLS fans! Gentleben here with something special for you today!
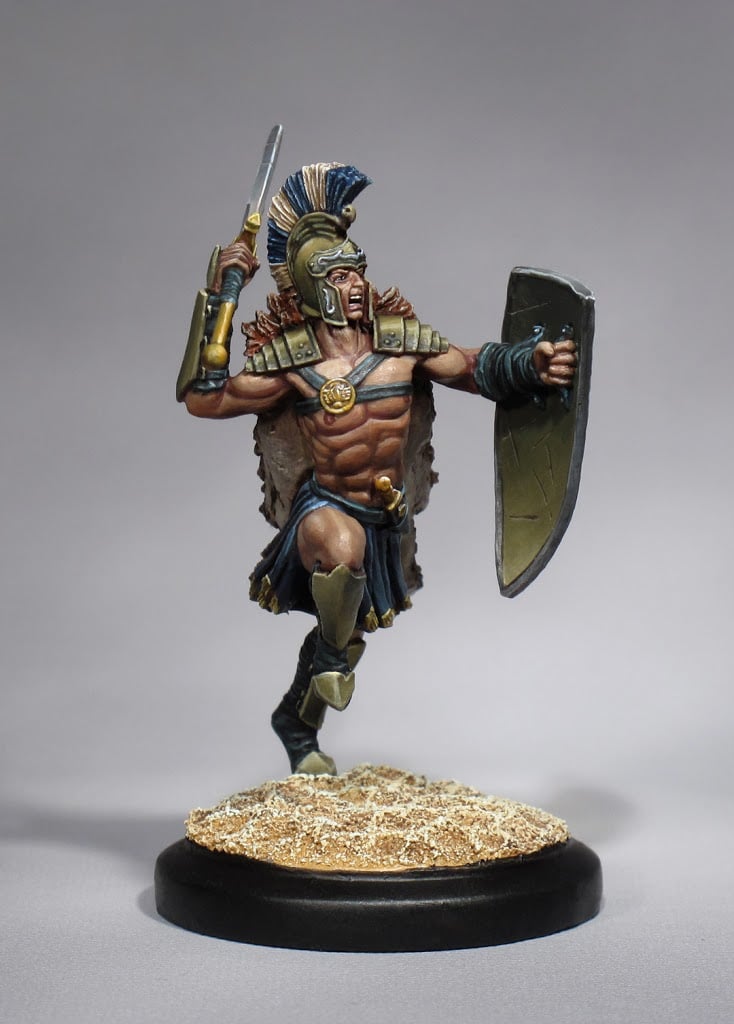
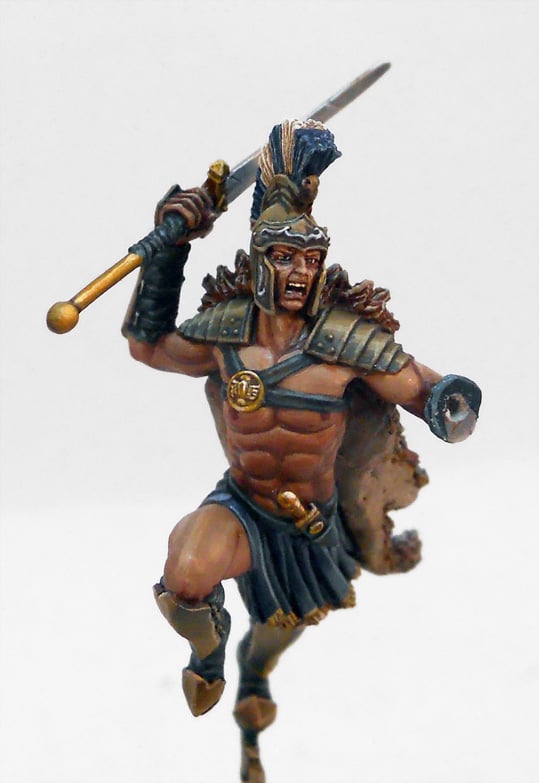
Why special? Well, because this is your first chance to see the painted version of Aquila from Arena Rex’s upcoming line of 35mm premium gladiator miniatures. It’s also really special for me because this epic warrior is my first studio paint job for this brand new company.
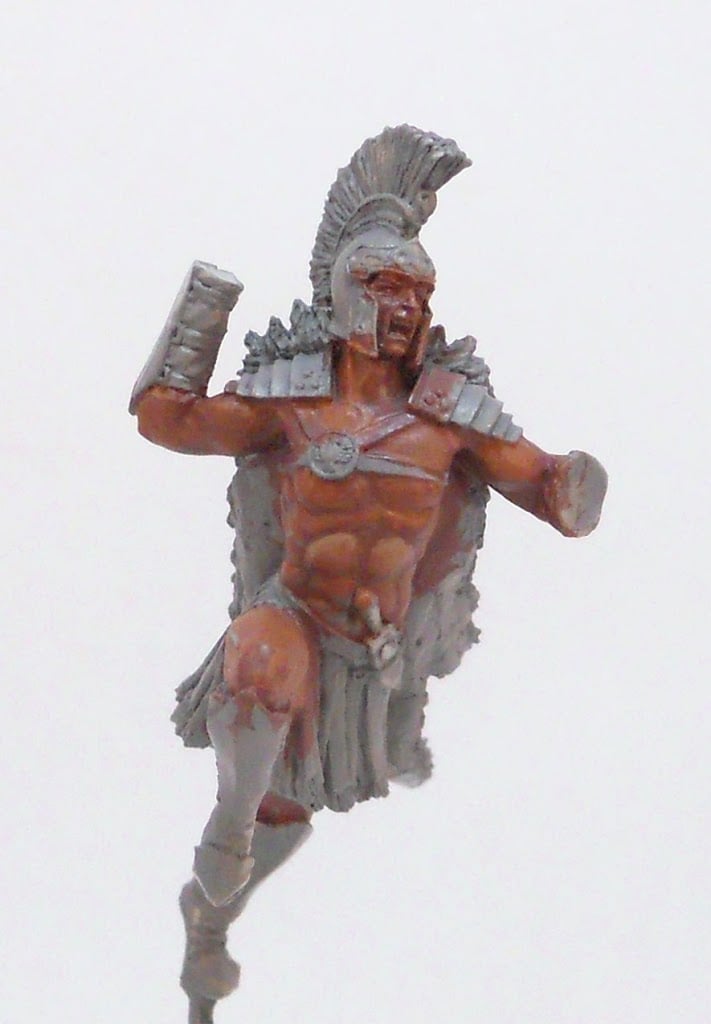
So why am I starting this tutorial off here, with a lot of skin already painted, and two abs noticeably highlighted when nothing else is? Well, this was originally supposed to be a video tutorial. It was Nick of Arena Rex’s idea but I was definitely game. I’ve felt like these photo tutorials are getting less and less adequate with the wet blending work I’ve been doing these days. It just doesn’t take well to photography. Running over to my light box with a wet mini, photographing it, and getting it back to my desk while it’s still workable is just as much of a problem as the glare that reflects off wet paint. Unfortunately the video ended up being a fail since I hunch over so much while I paint. No matter where I put the light source I ended up eclipsing it too much to get a decent video. This is how far I got with it before I gave it up. But enough of that, let’s get to the painting.
Since this is a resin mini, I began by washing it in Simple Green and warm water. Then I painted on a thin basecoat of P3’s Ironhull gray lightened by mixing in a little Morrow White. In fact with the exception of some washes, the whole model was done with P3 paints.
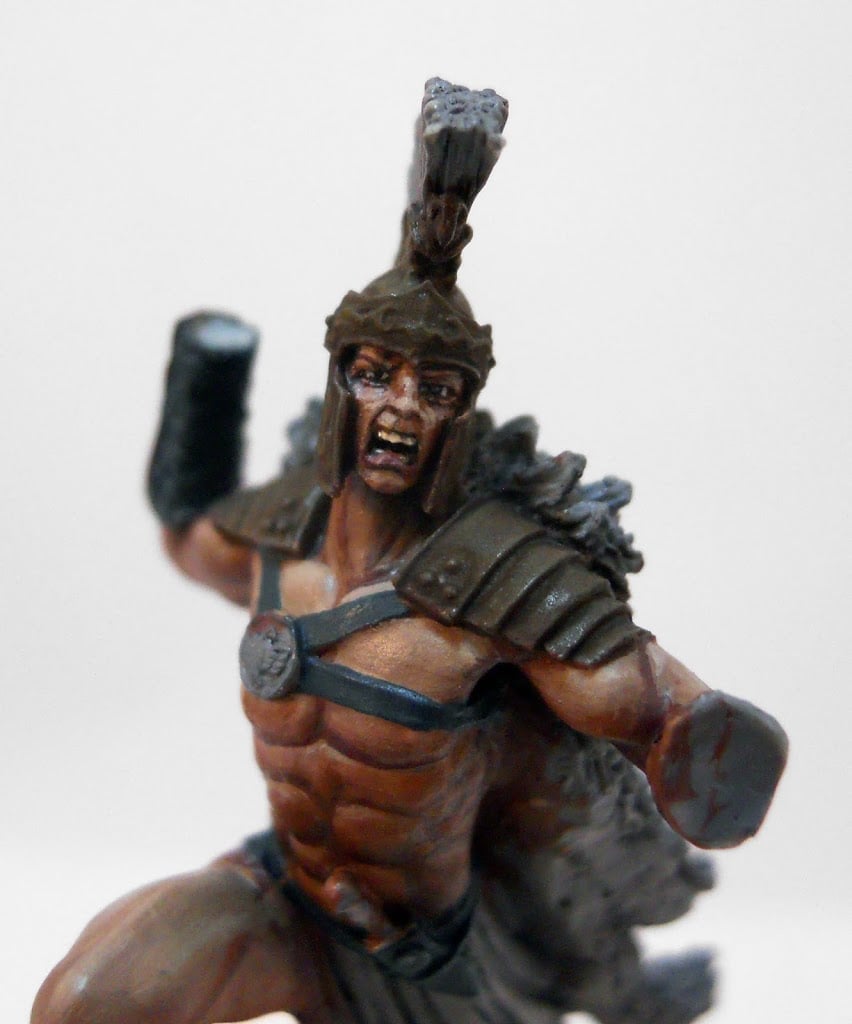
For the skin I wanted Aquila to have a really bronzed appearance. He’s spent a lot of time fighting under the Roman sun. With this in mind I began by giving the skin a basecoat of P3’s Idrian Flesh. I mixed the Idrian Flesh with some Umbral Umber to create a shade tone for the recesses of Aquila’s form. I also started to add some highlights with Beast Hide. And that’s where we are now… with those two abs highlighted with Beast Hide.
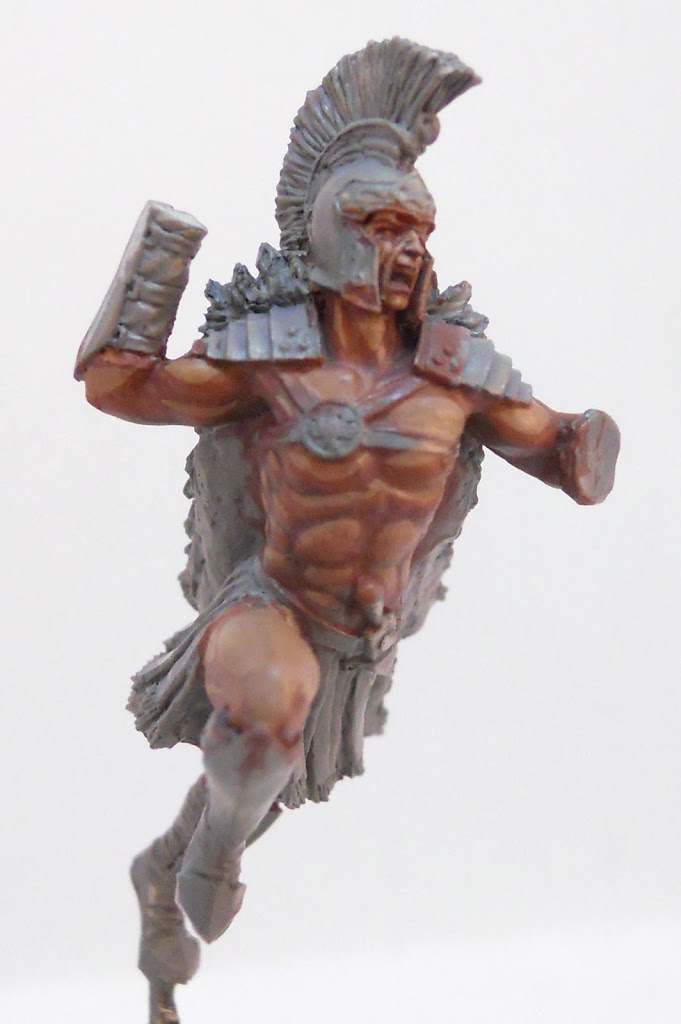
After that I added another layer of highlights with Rucksack Tan. I also added some darker shading with a mix of Umbral Umber and Beaten Purple.
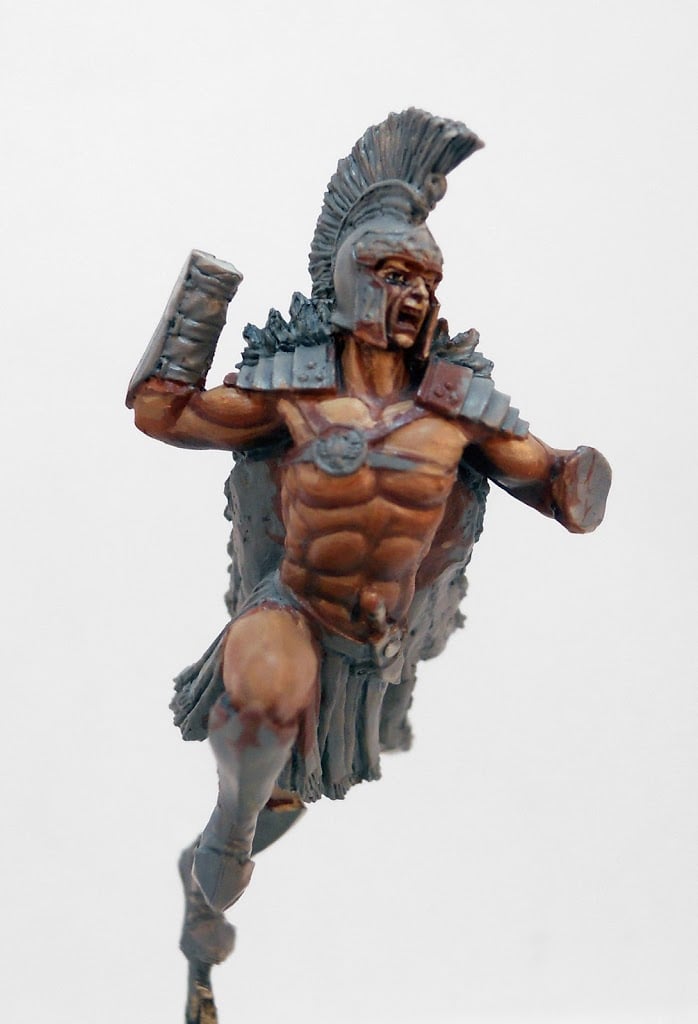
Then these new tones were blended into the previous layers.
As you might have noticed, I’ve also begun working on the eyes. Even after all these years painting, the eyes still give me trouble. And it’s never helps when the face is recessed inside a helmet like this. In order to paint good eyes I often find myself sacrificing the area around them. As you can see here I’ve pretty well wrecked the eyelids in order to get the pupils right. They’ll have to be fixed of course. But I always find it’s easier to touch up a raised surface like those eyelids than a recessed surface like the eyes themselves.
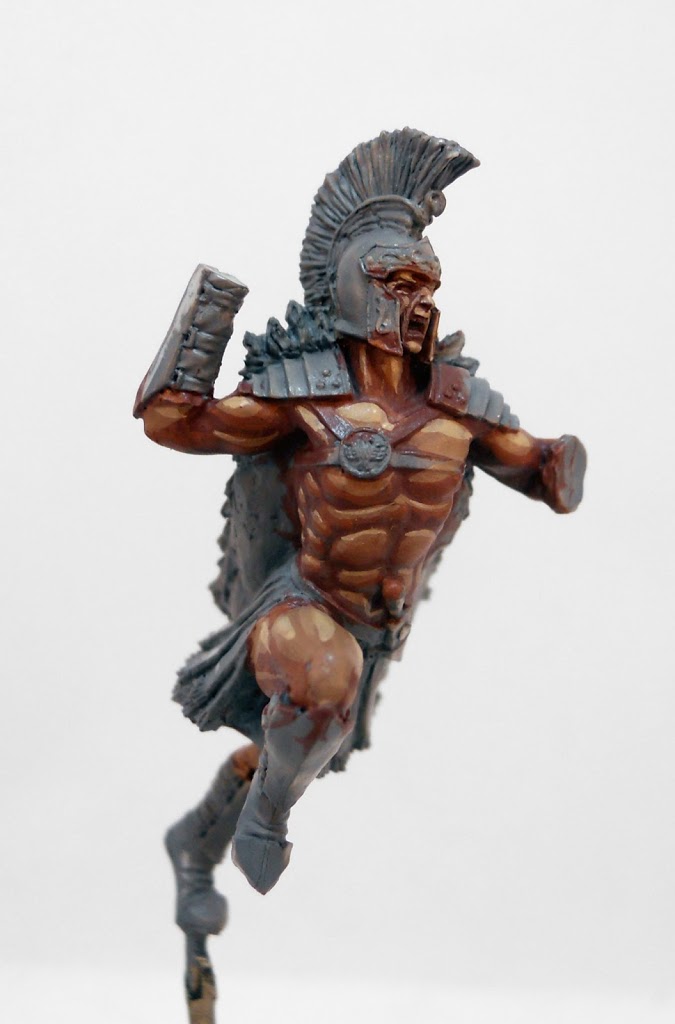
Here I’ve cleaned the face up a bit more. But I want to get started on the helmet before I finish it up. I won’t really know what the area’s going to look like until the helmet has been completed. So it’s on to the armor then.
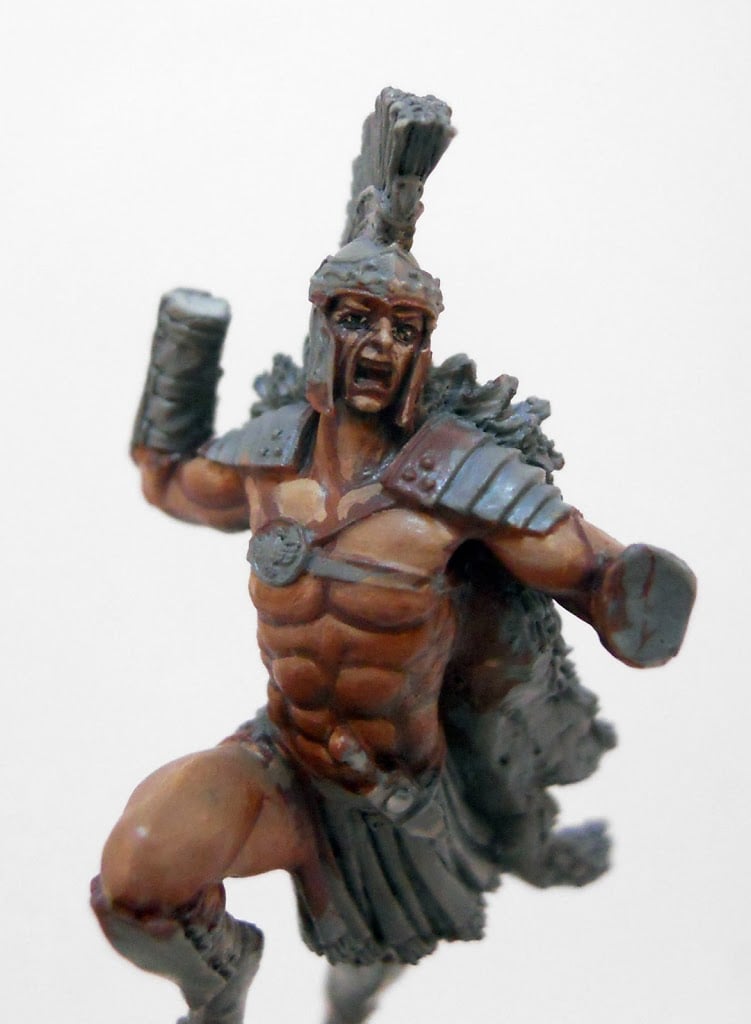
This game is going to have a lot of gladiators in it. That means lots of bronze, lots of skin, and lots of leather. I wanted to make sure the different ludi (gladiator schools basically) had a varied appearance that set them apart from one another. For Aquila and the other members of the Ludus Brittanicus I thought a cooler color palette would work well. To help convey this, I decided to go for a very greenish appearance with the bronze. That meant Battledress Green was a perfect basecoat for the armor. Next I give it a wash with Agrax Earth for some quick and easy shading. I also begin the leather areas by giving them a coat of Coal Black and a wash of Agrax Earth.
With the armor underway I go back in and finish off the face. I did make a few final touch ups later on but it was mostly done at this point.

Now it’s back to the armor. I begin adding highlights by mixing some Rucksack Tan in with the Battledress Green.
I add some more Rucksack tan for the next highlight.
To finish off the bronze, I also add some Menoth White Base to the mix. Pure Menoth White base is used directly in a few places to create a very strong highlight. With the bronze finished I start working on the filigree on the helmet. To make it stand out I want to give it a silver appearance. I begin by defining it with a dark mix of Umbral Umber and Exile Blue. Then I begin to highlight them by adding some Frostbite to the mix.
I continue adding highlights with Frostbite, then eventually pure Morrow White. I also go back to the leather areas and start highlighting them with some Trollblood Base.
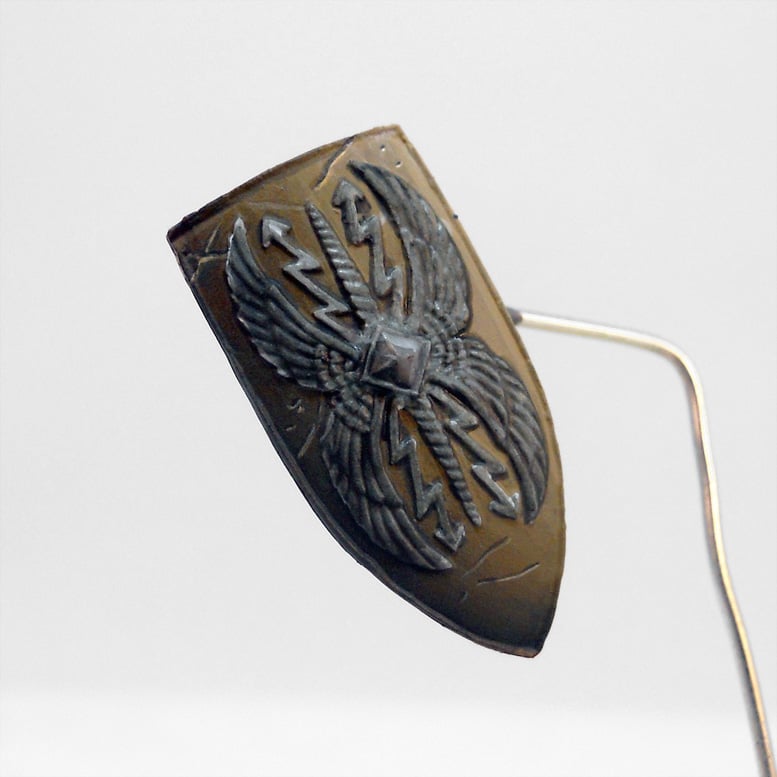
I also want a silver appearance for the embossing on the shield. I begin by painting it Frostbite, then washing it with a mix of 2 parts water, 2 parts Agrax Earth, 1 part Asurmen Blue, and 1 part Nuln Oil (all inks by GW).
Like before I’m using a mix of Exile Blue, Umbral Umber, and Frostbite for my silver tones. To create the appearance of metal you want to paint smooth transitions across your flat surfaces then define them with stark highlights from above. As you can see I’m about halfway through the shield here.
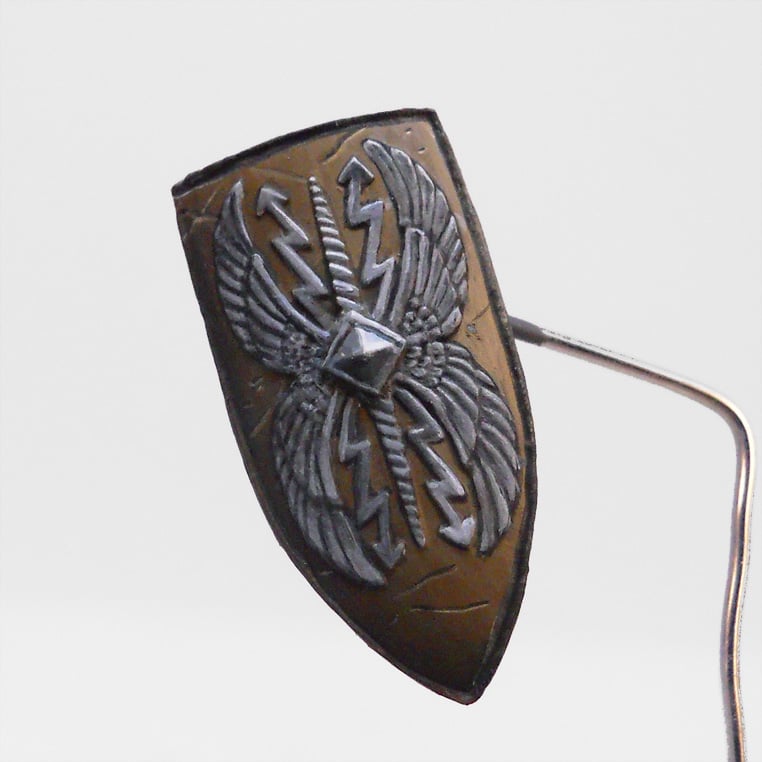
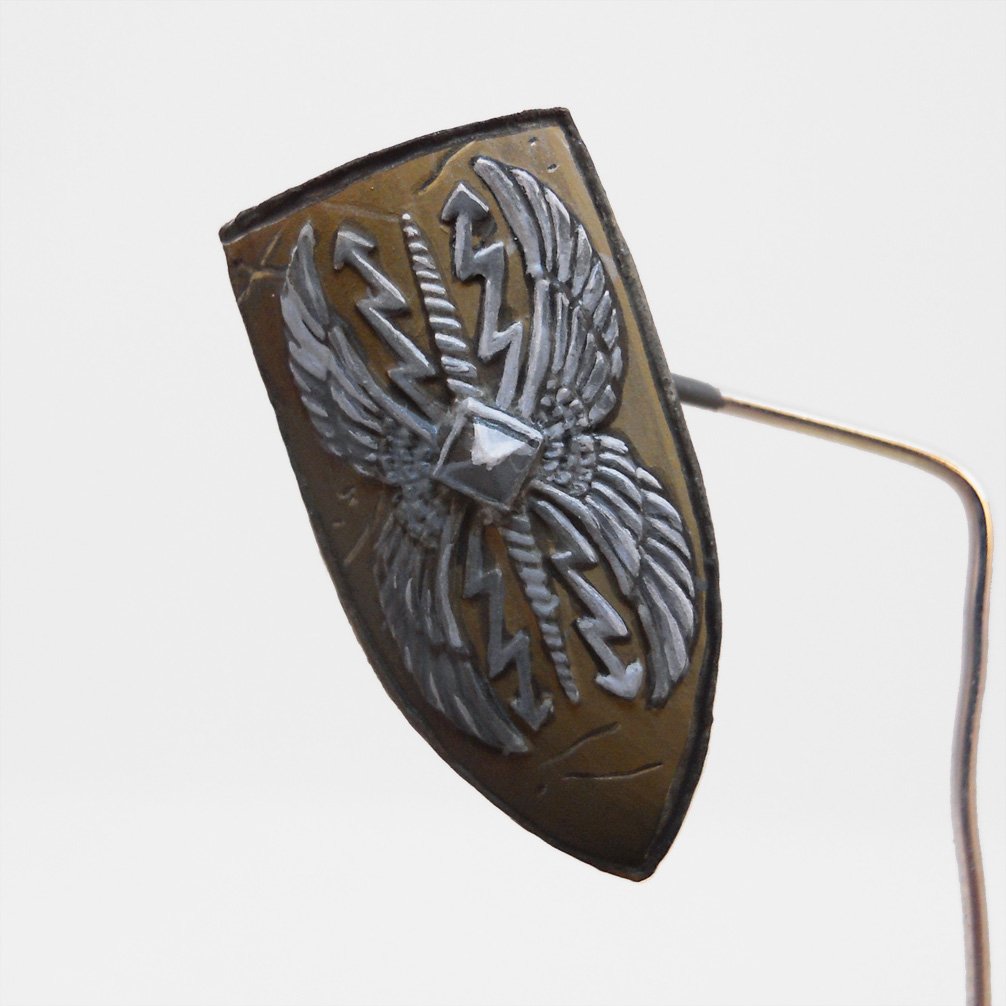
I’ve continued the blends over onto the left half of the shield relief.
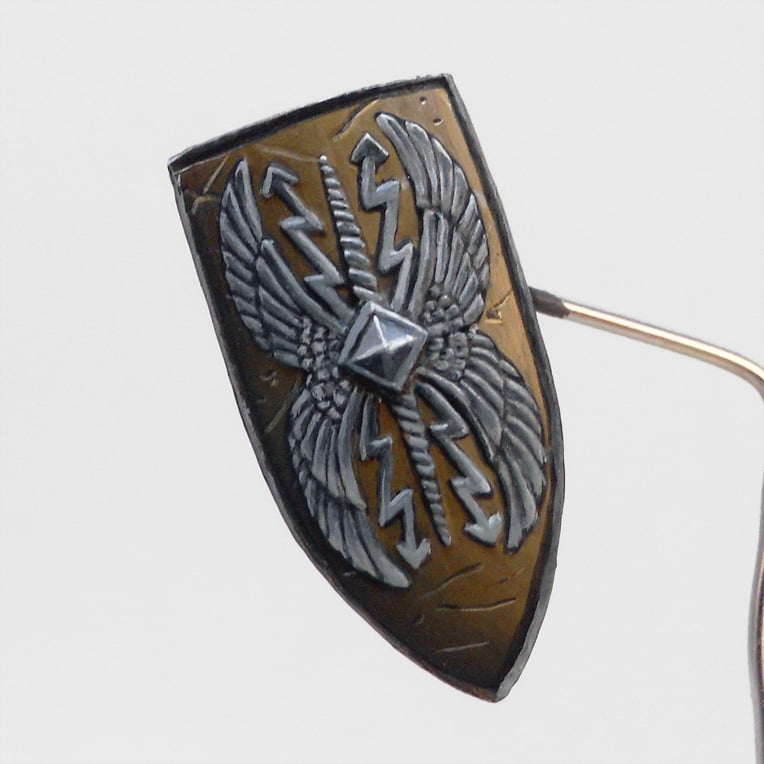
And now it’s finished. I’ve kept the highlights a little stronger on the right since that is supposed to be where the light source is coming from. While I can’t say it’s really a perfect silver analog, I’m still pretty pleased with the appearance. At the very least I managed to add some good definition to some incredibly tiny details.
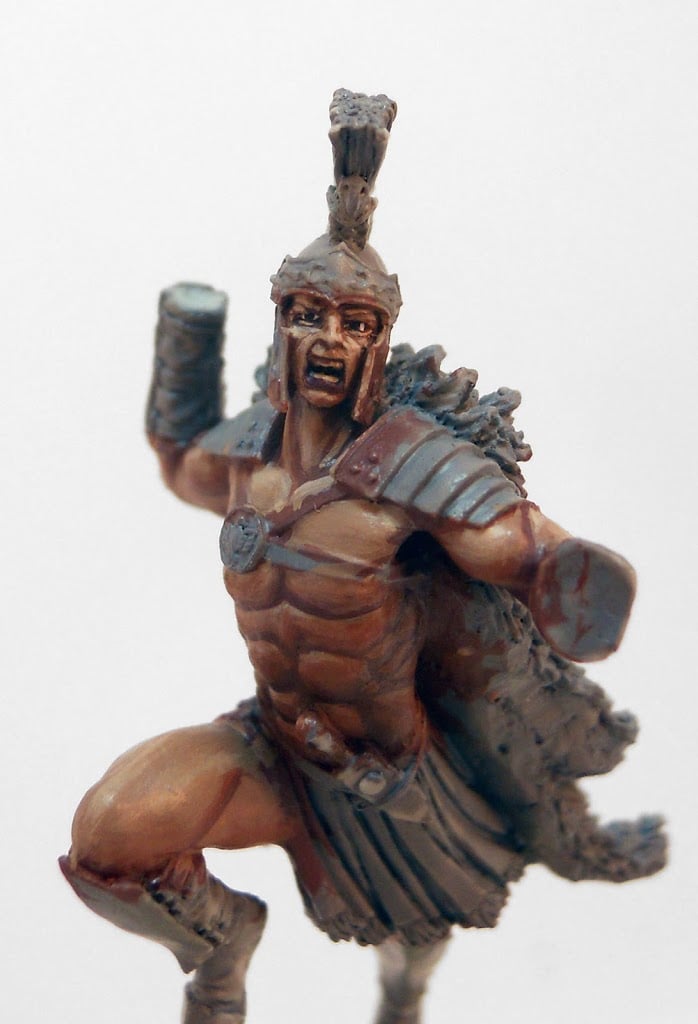
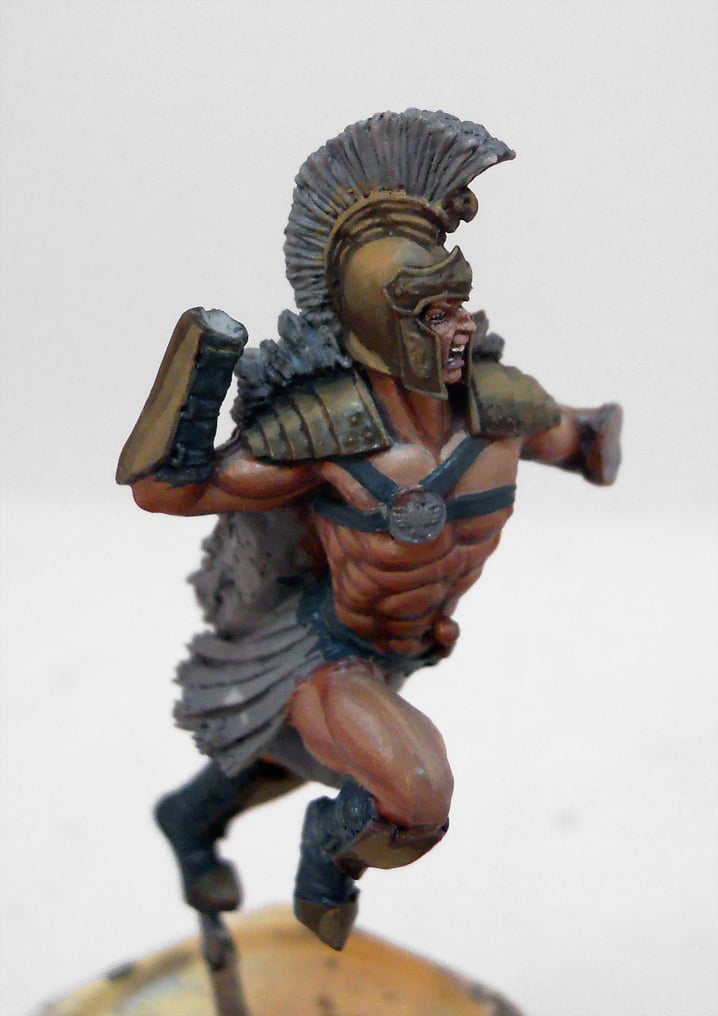
Now let’s go back to Aquila. I’ve completed the leather by adding some final highlights with a Frostbite/Trollblood base mix. I’ve also begun his helmet plume. I started it off with a base coat of Menoth White Base. This was given a wash of GW’s Agrax Earth. Once the wash had dried the plume was drybrushed first with Menoth White Base, then with a little Menoth White Highlight. I also start off his skirt with a basecoat of Exile Blue.
The skirt is highlighted by blending in increasing amounts of Frostbite to the Exile Blue base. I also make a wash for the helmet plume by mixing some Exile Blue in with some Agrax Earth. I carefully apply this wash in bands to finish off the plume.
Finally I wash the skirt with some Agrax Earth to even it out a bit.
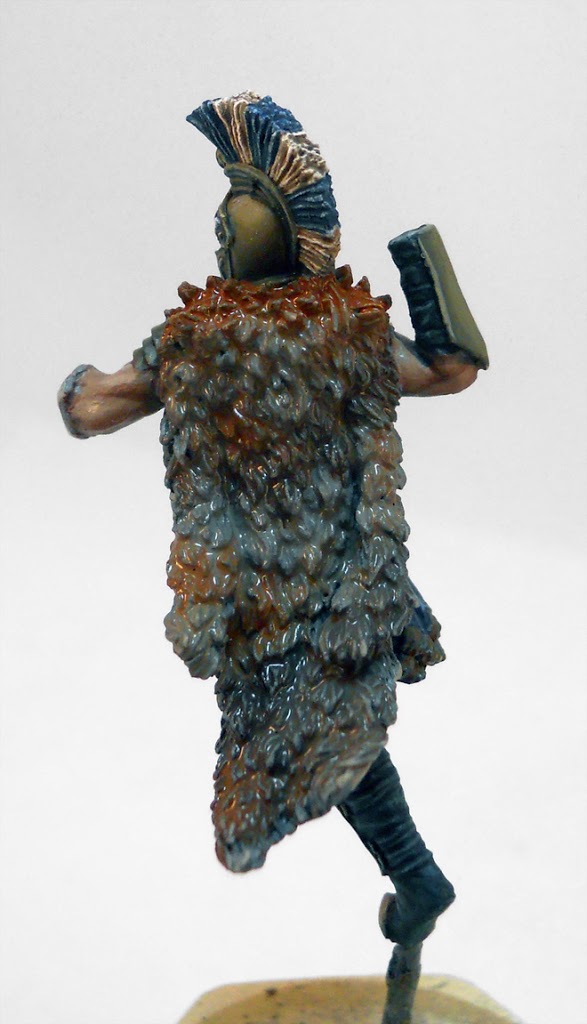
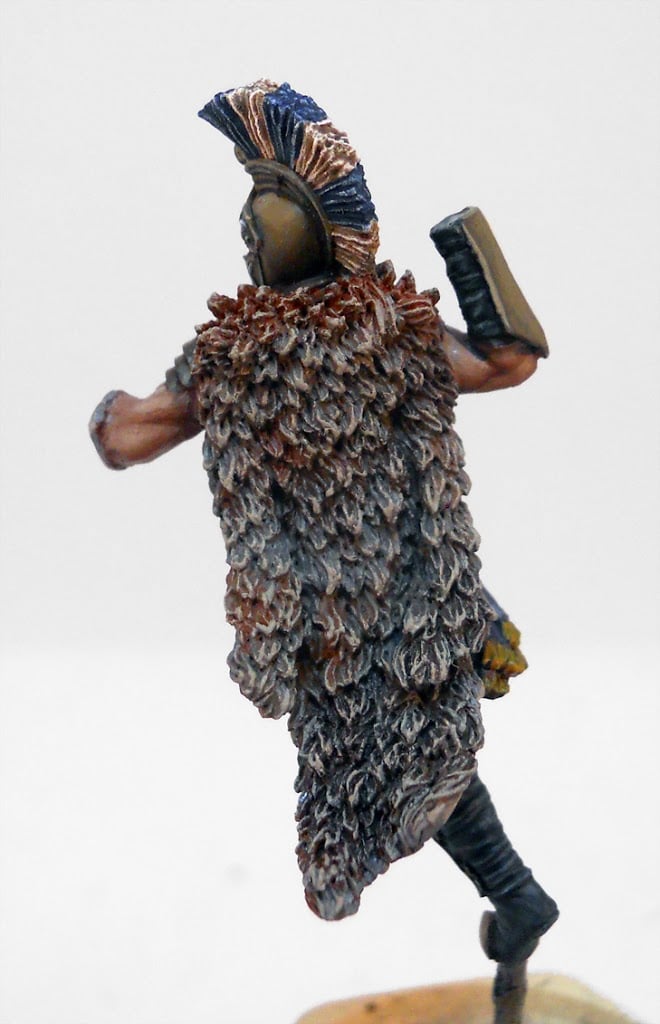
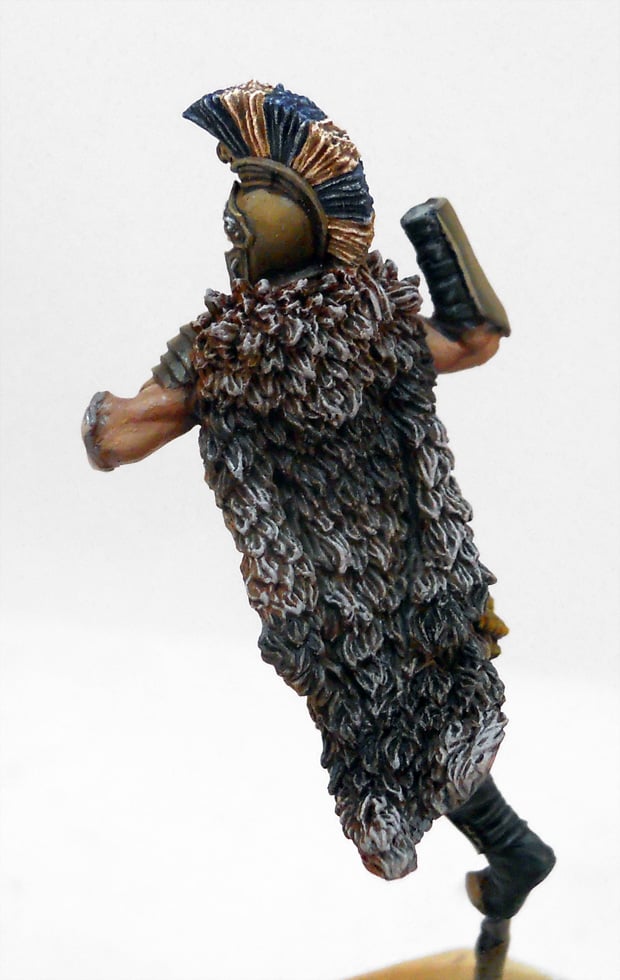
Then I wash it all with Agrax Earth. Once that’s dry it all gets one final drybrushing of Menoth White Base. To finish it off I apply some bands of Nuln Oil to the cloak to help recreate some of the black areas I had covered up with the drybrushing.
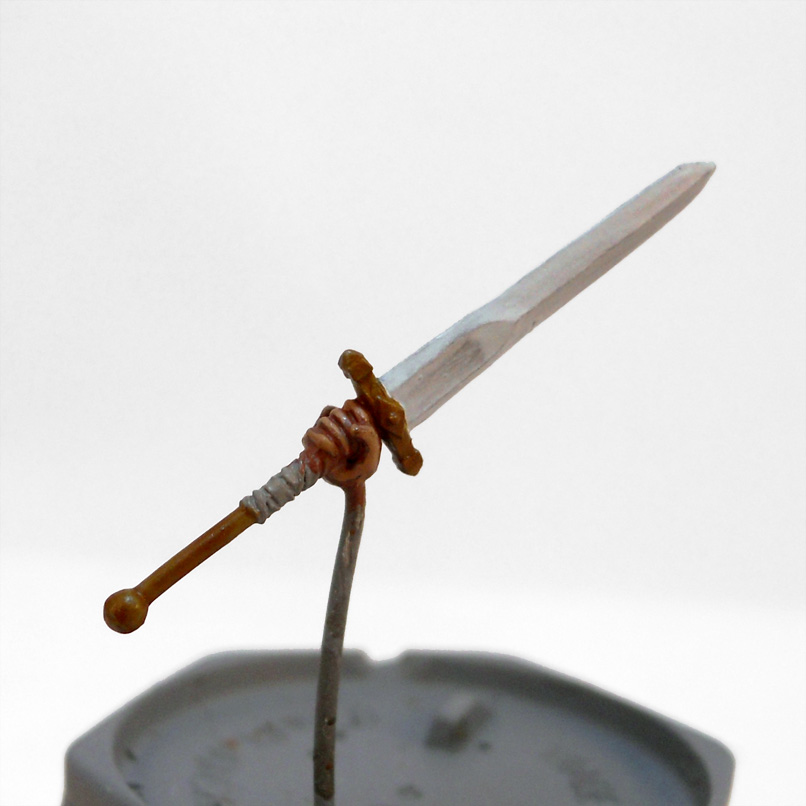
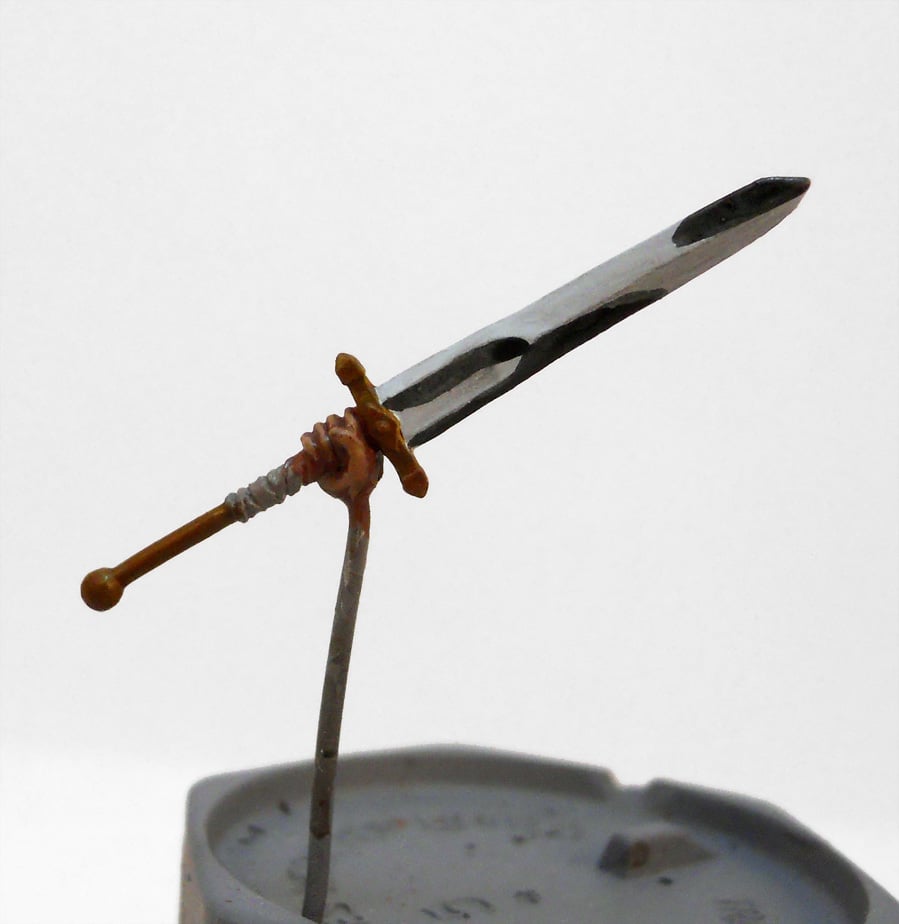
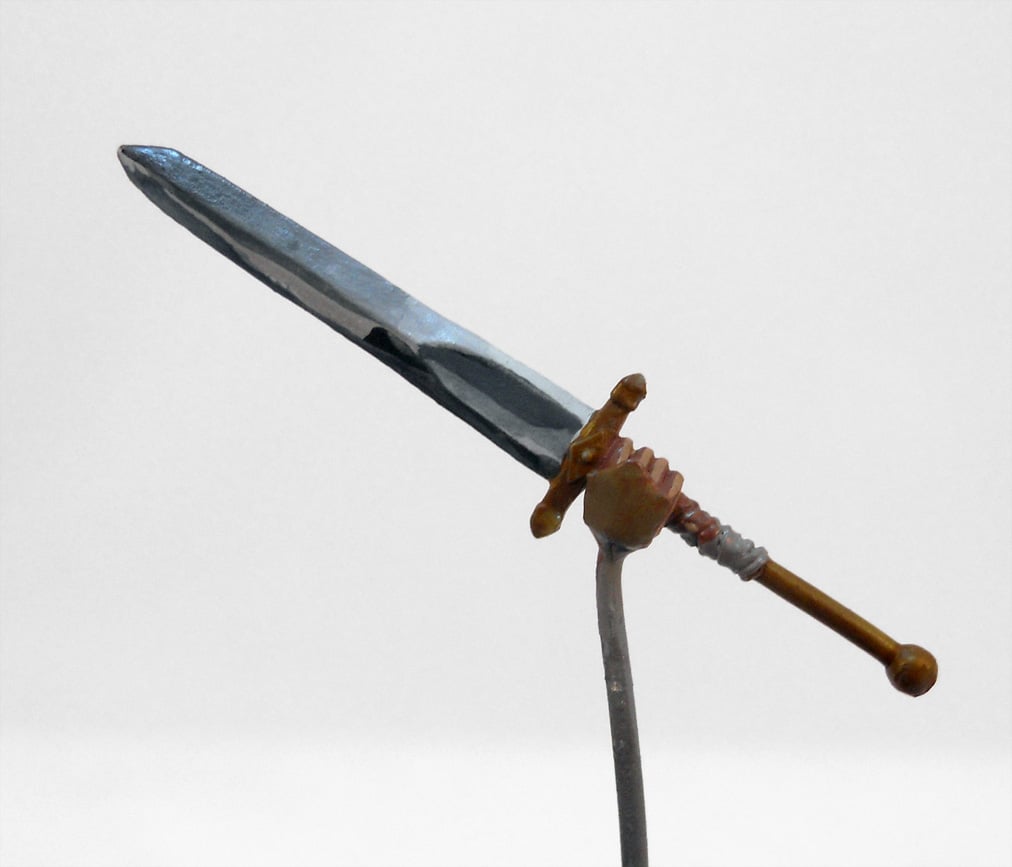
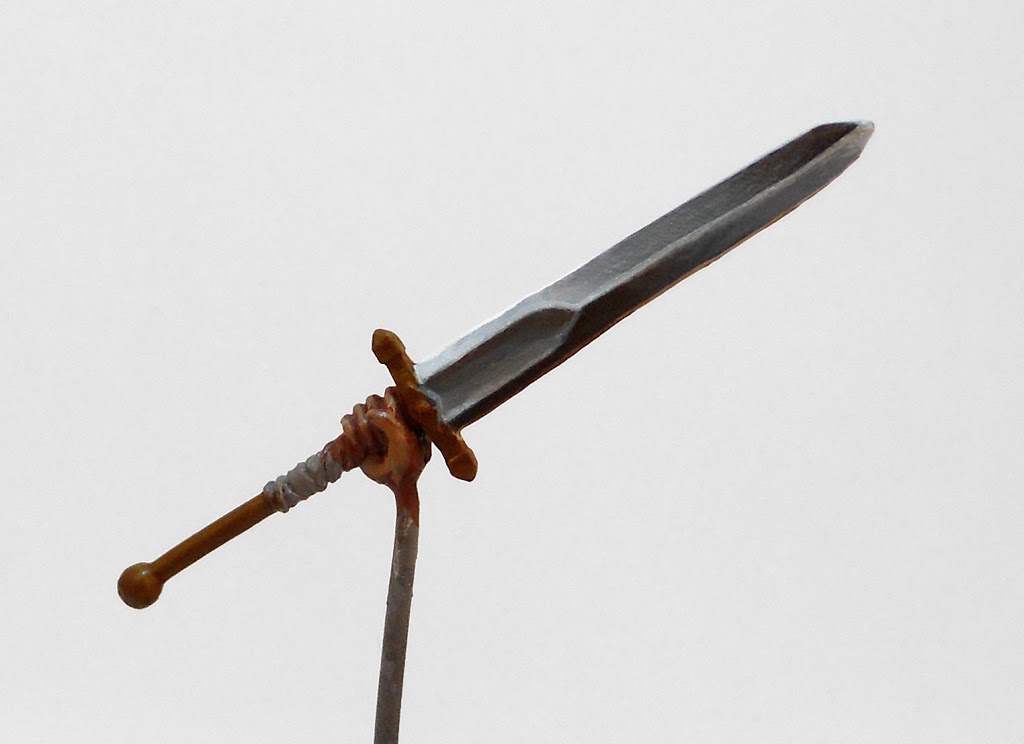
When the blending is complete I end up with this. I’ve also added very thin lines of Frostbite along any hard edges to define the different areas of the blade. Along the bottom of the blade I’ve added a line of Hammerfall Khaki to represent a reflection off the sand.
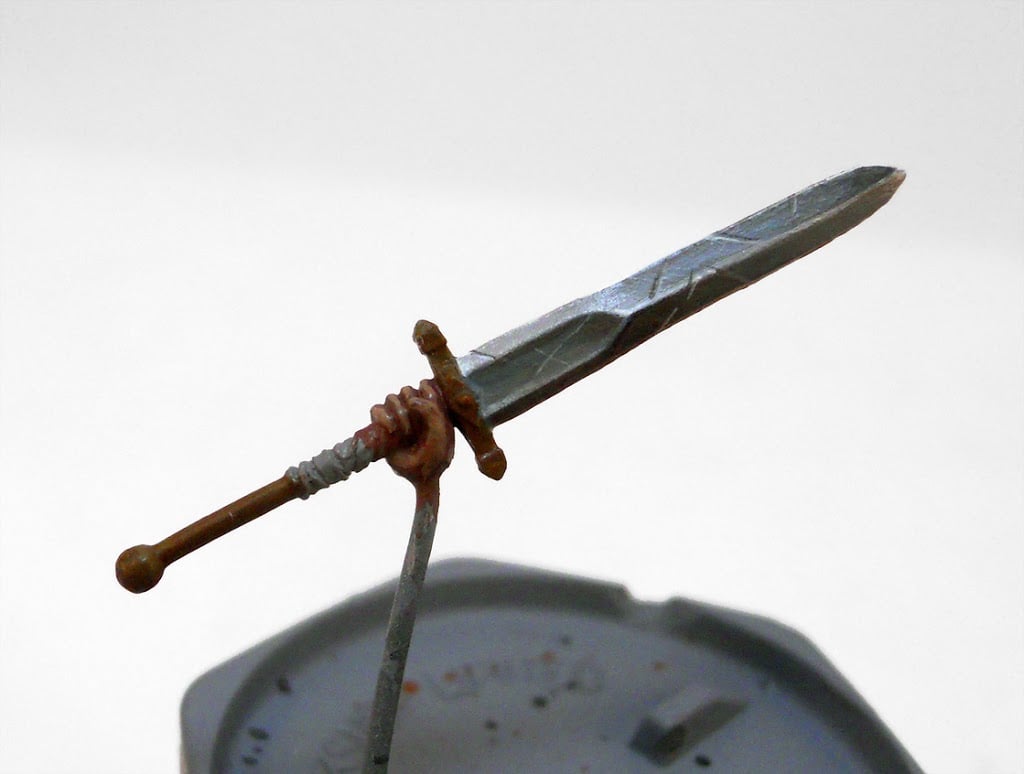
The last step for the sword is to add some battle damage. I start with small streaks of Frostbite, then add a thin line of darker color directly above them.
The last things to paint are just the gold bits. I highlight the gold by adding some Cygnus Yellow to the basecoat mix of Bloodstone/ Battledress Green. Menoth White Highlighted is blended in for a final highlight. When I need to shade the gold I mix a bit more Battledress Green in with the Bloodstone.
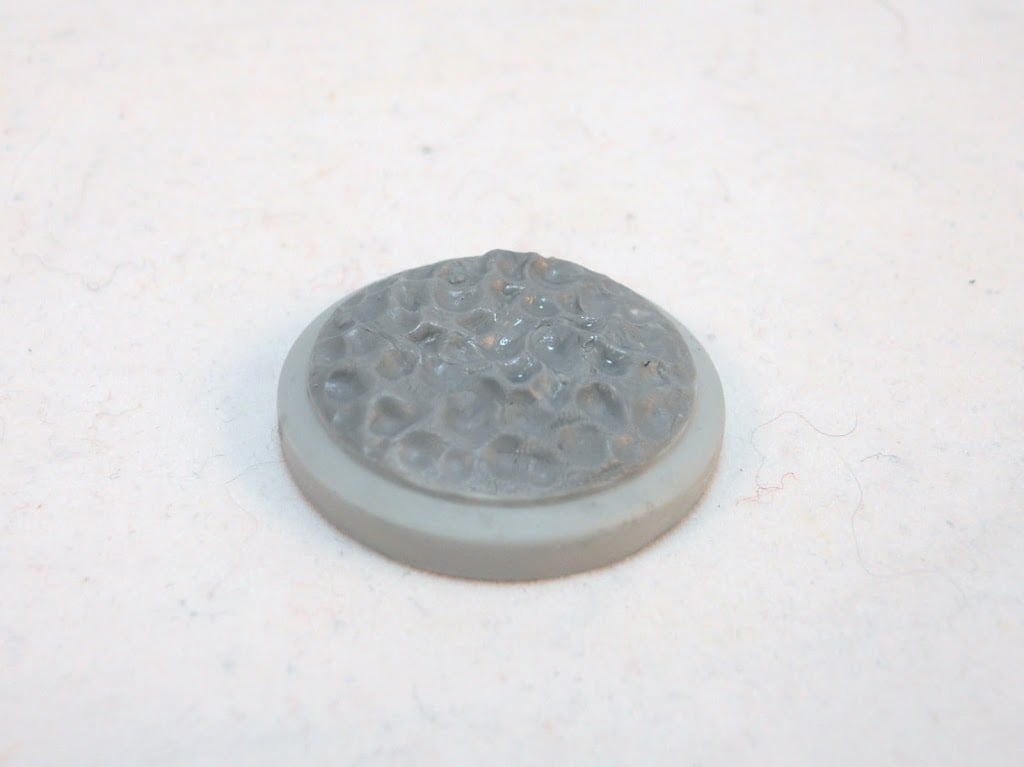
Finally I need to make a base for the guy. Arena Rex has these special display bases for it’s miniatures. To decorate it, I’ve decided to go with some nice simple arena sand. The point is to show off the model, not overwhelm it with some crazy base. I cover the base with a uniform application of grey stuff. Then I begin pressing the back of a paintbrush into the soft putty. These impressions will represent footsteps.
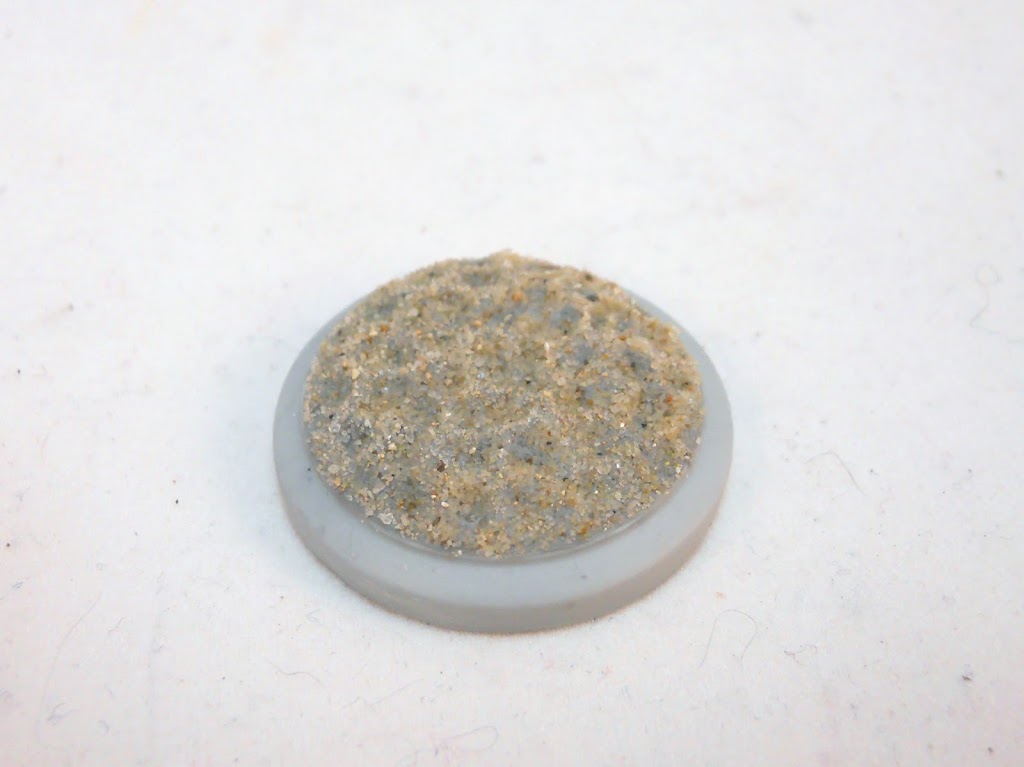
I strain some sand to make sure the grains are nice and fine. While the Gray Stuff is still soft, I paint it with some white glue and sprinkle on the sand. Then I use the bottom of my brush again to push the sand into the soft putty. This should help give the base the appearance of being made of sand, rather than looking like putty with sand sprinkled over it. I was also sure to make a little impression of Aquila’s foot so it would feel like he’s really interacting with the base.
Painting the base was the easiest part. I started it with a base of Rucksack Tan, which was washed with thinned down Agrax Earth after it had dried. This was drybrushed lightly with Menoth White base, then with Menoth White highlight. Then the lip of the base was painted with Thamar Black.
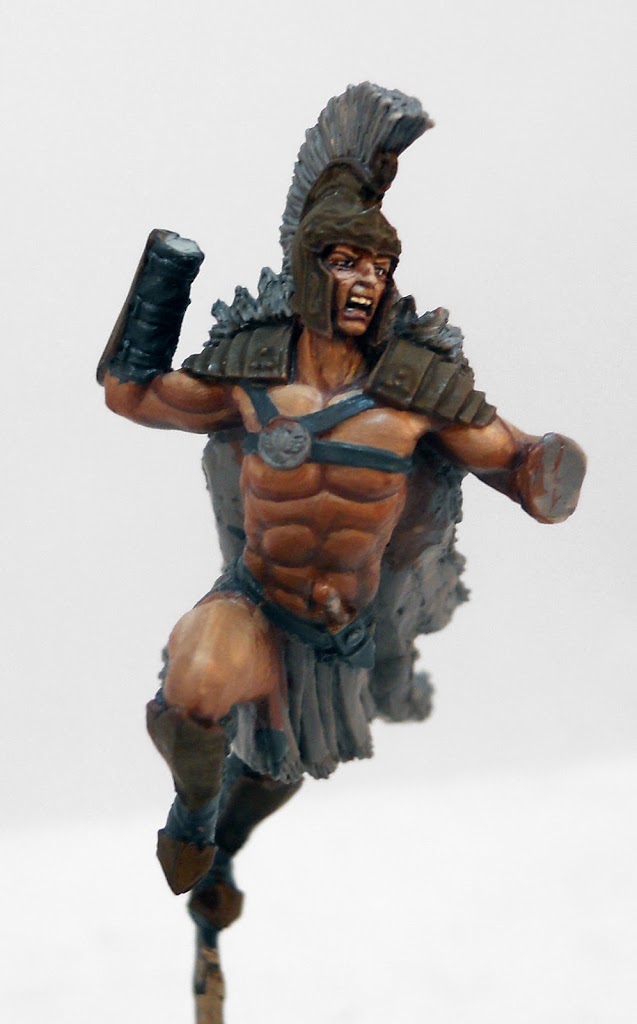
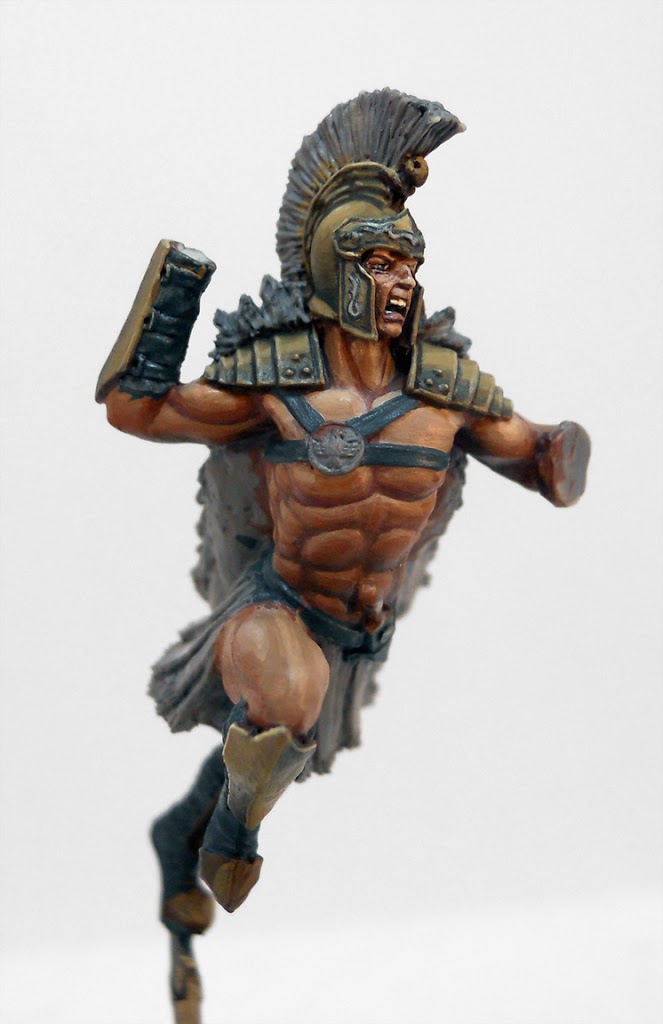
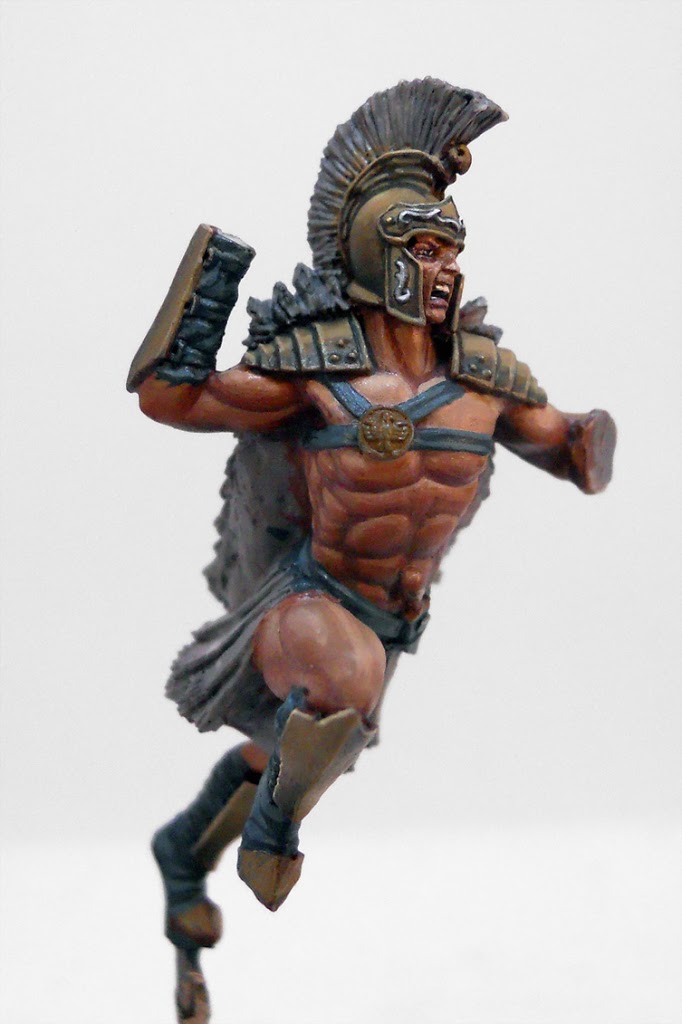
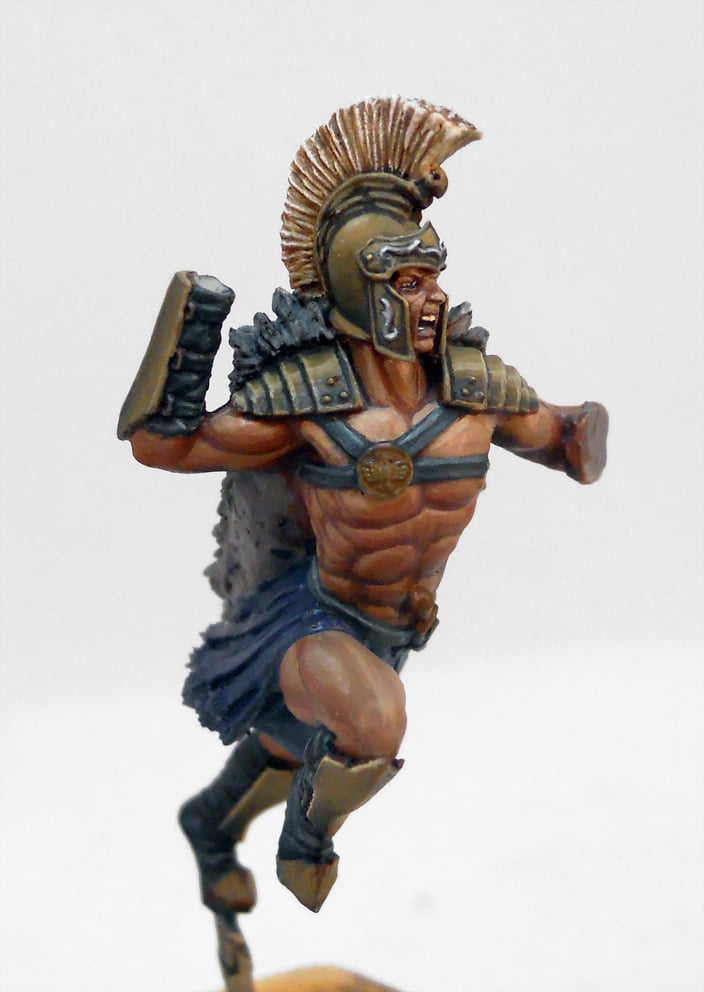
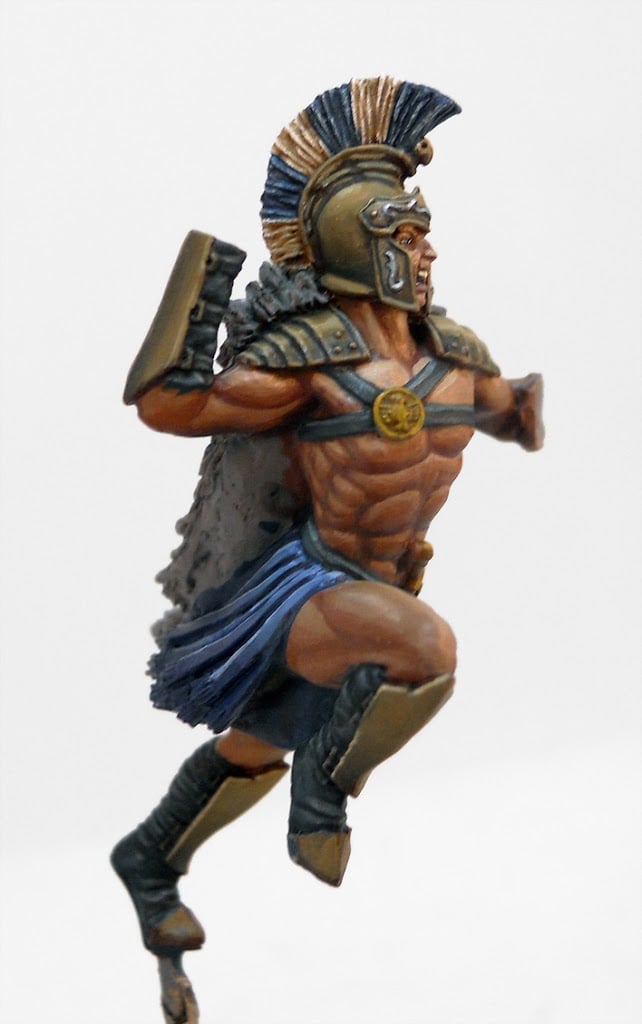
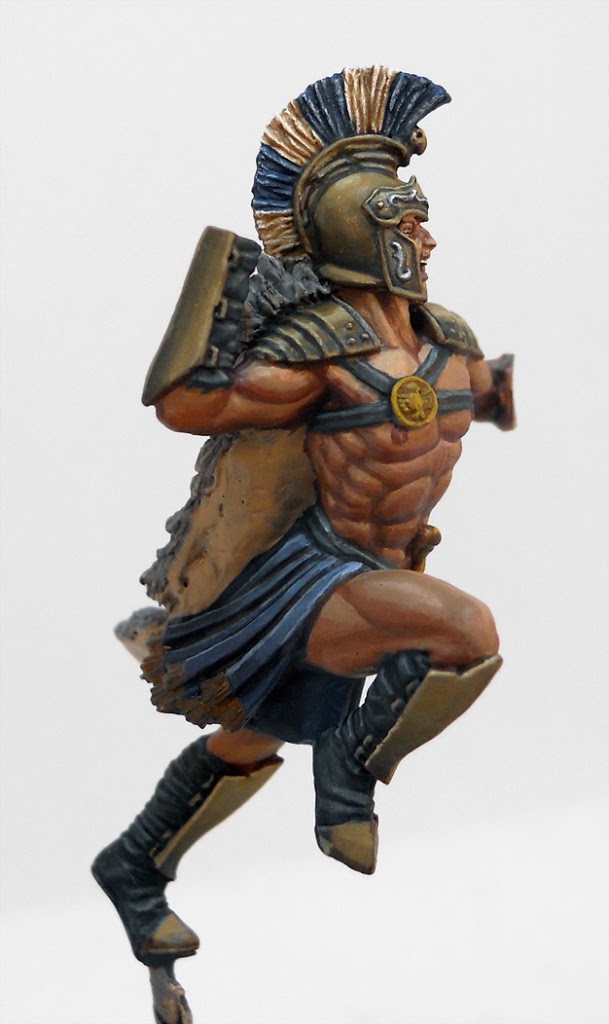
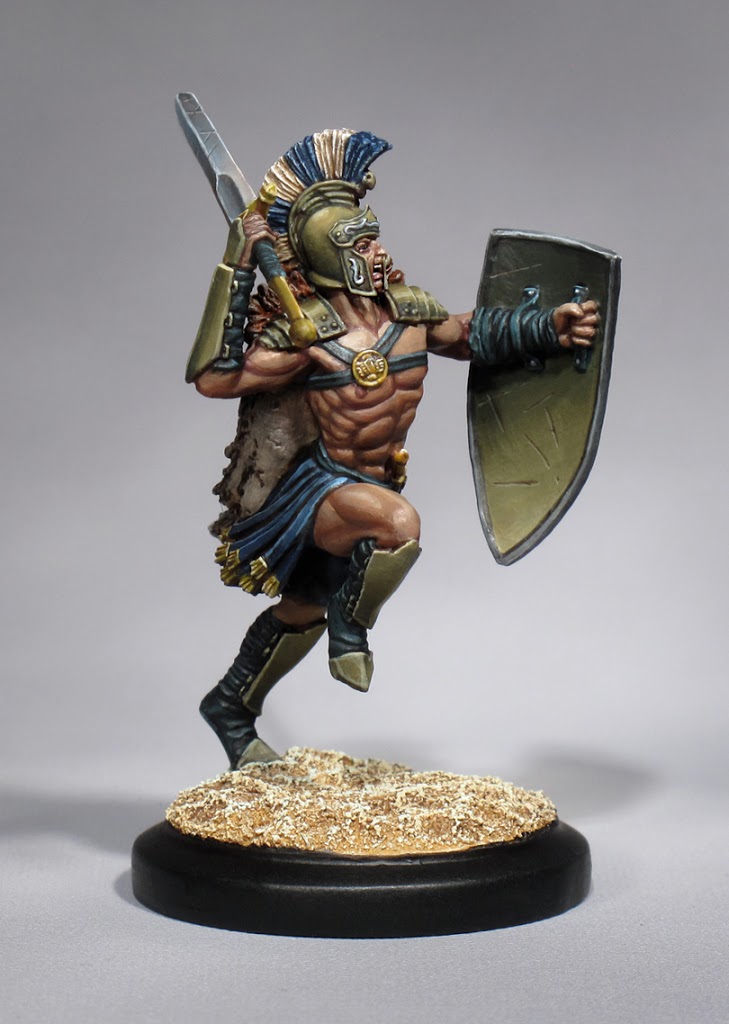
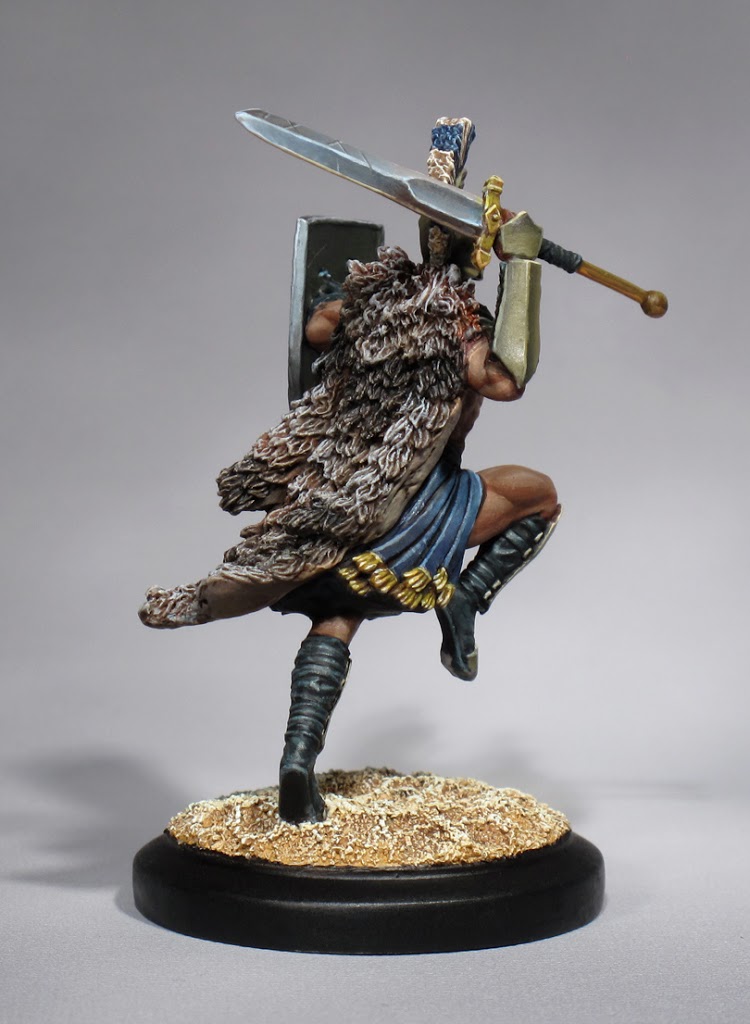
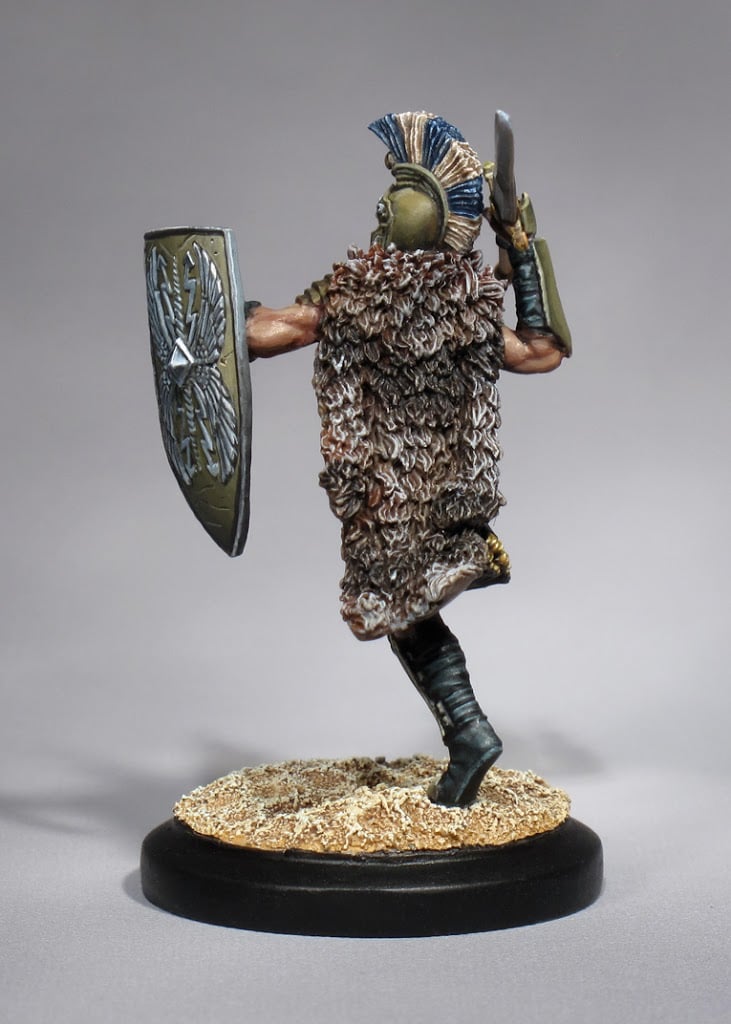
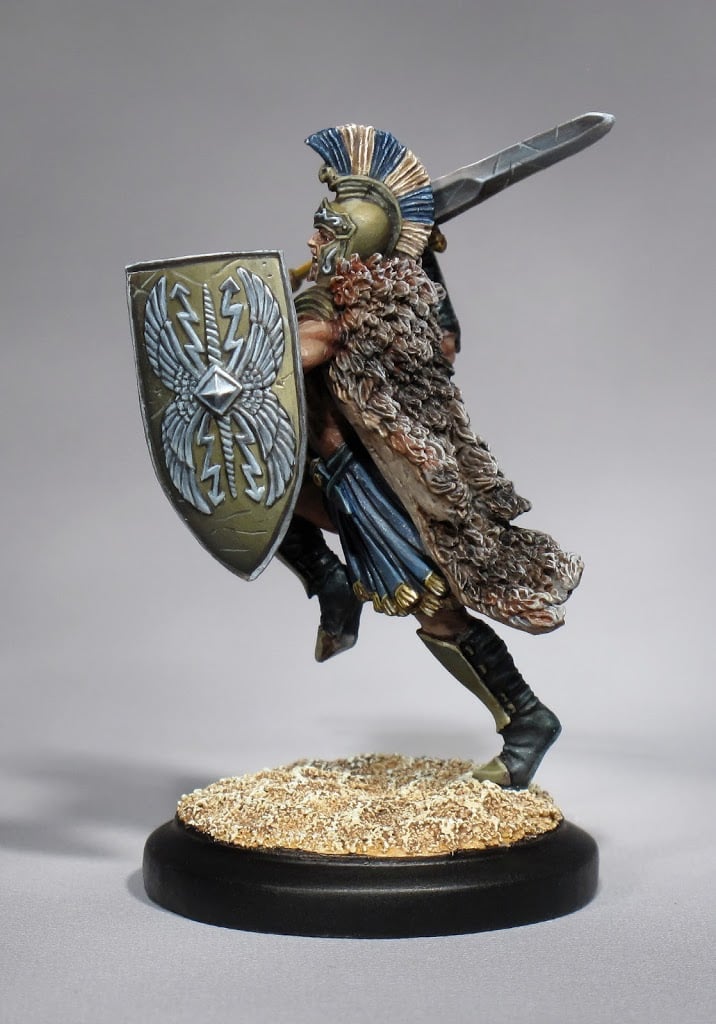
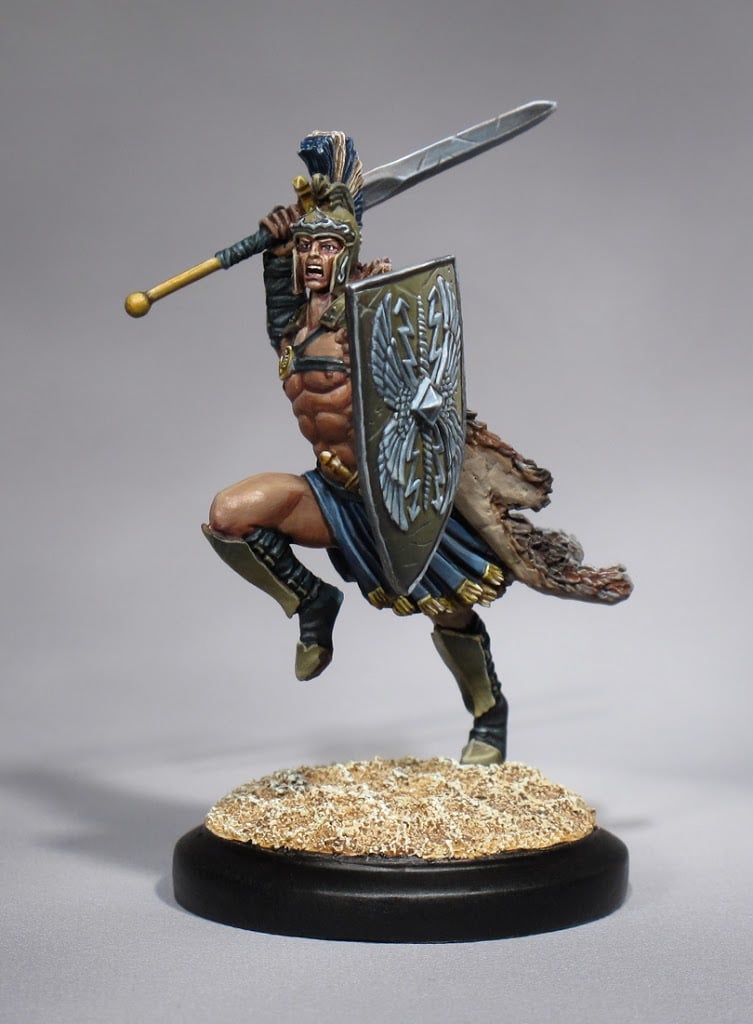
And with that done, here are some more final pictures for you. Taken by Nick for Arena Rex they were done with a much nicer camera than the one I used for the rest of the tutorial.

Arena Rex is running a giveaway for some of these minis. Here’s the details:
