HOBBY: Blessings of the Plaguefather
5 Minute Read
Nov 26 2012

Advertisement
Here is a guide showing how I went about painting the new Plaguebearers and Nurglings using a simple scheme and easy techniques.
Simply put I don’t like painting. Really don’t like it. I find it frustrating, tedious and a whole lot of other things using words that can’t be used on BoLS.
I also though don’t like being the only one that turns up for a game without any paint on my models. So when three of us decided to meet up at Warhammer World for a weekend of gaming using 500 point armies on a Zone Mortalis board I was determined to have a fully painted force.
I needed something I could a. do quickly and b. look decent even with my minimum level of enthusiasm for painting.
I have always liked Nurgle (though Khorne was my first love) and with the recent plastic Plaguebearers and Nurglings I decided to plumb for a Papa Nurgle Daemon force. I reckoned I could do them justice without wanting to kill myself in the process.
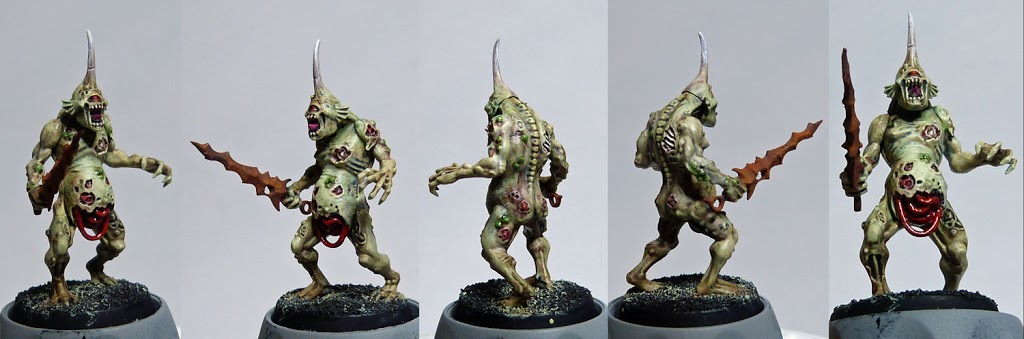
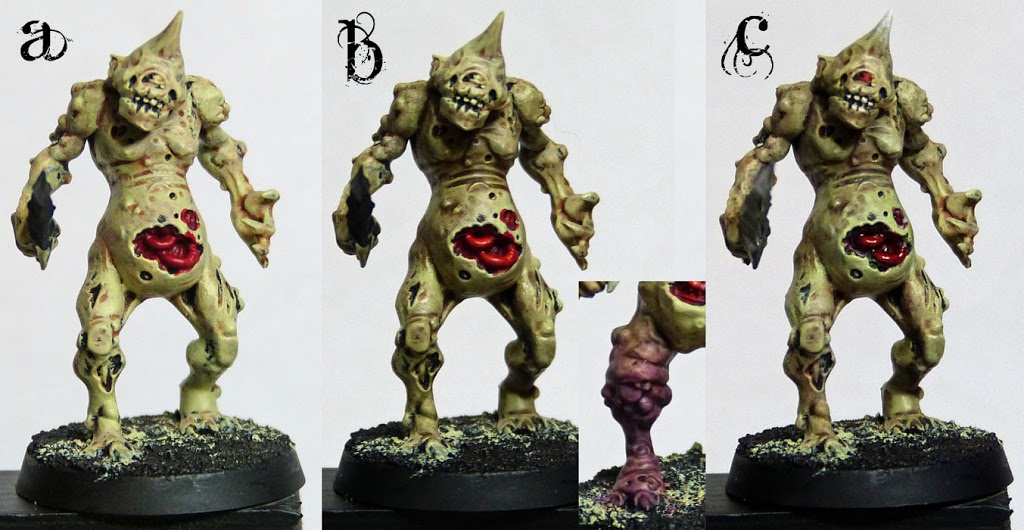
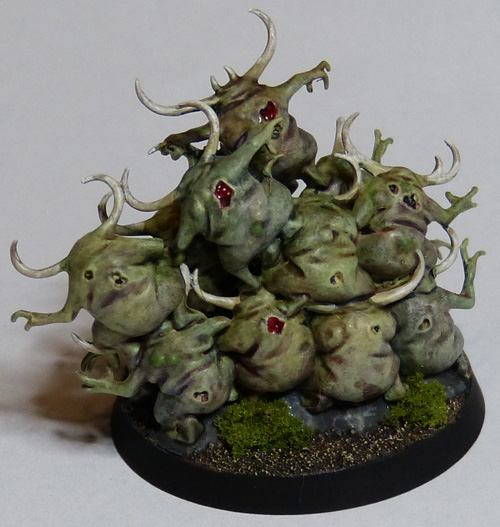
The basic idea was that over a simple basecoat different washes would be used to give much of the contrast and shading. The model above was the test bed to see how things would shape up. I was very happy how he turned out and even happier how quick he took. The following is the process I followed in painting the rest of his friends.
Note: The paints & washes used are from various GW ranges – I have quite a few knocking around that are no longer produced under the same name. Some can be found elsewhere (such as from Coat D’Arms who used to produce the GW paints some time ago). However it shouldn’t be a problem using equivalent paints from the current GW range. Indeed it would be better to experiment and change different paints and washes to see what effect it has, the following is intended as more of a guide than a strict recipe to follow.
STAGE ONE –Basecoats.
Advertisement
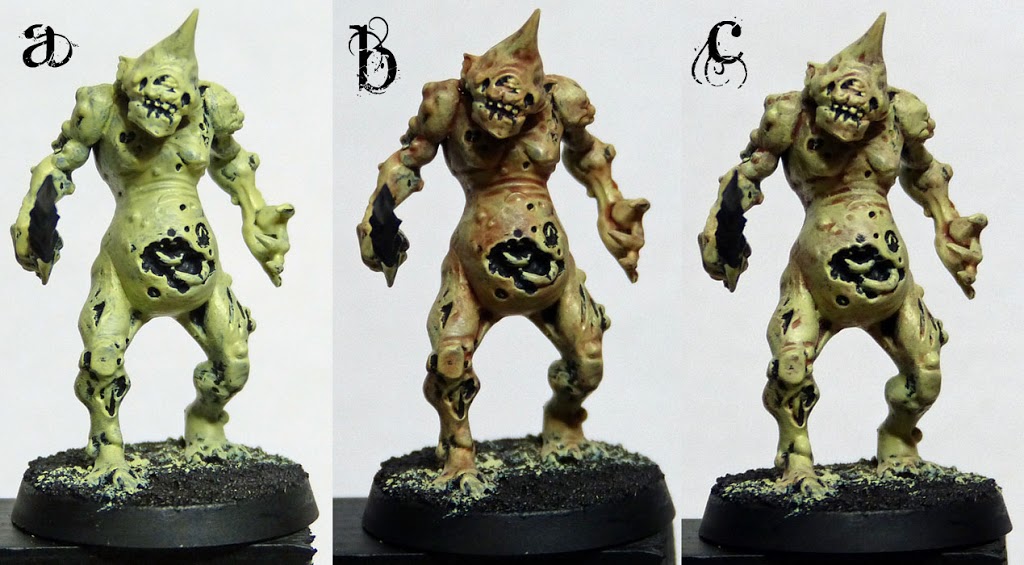
a. Over a black undercoat the Plaguebearer was given a rough coat of Rotting Flesh (Putrid Flesh in Coat D’Arms range). While I ensured raised areas were covered I wasn’t fussed about getting into every nook and cranny.
b. Ogre Flesh wash was then liberally applied.
c. This was followed by Rotting Flesh being heavily drybrushed on. I took care to give extra attention to areas I wanted to stand out, such as the face and belly.
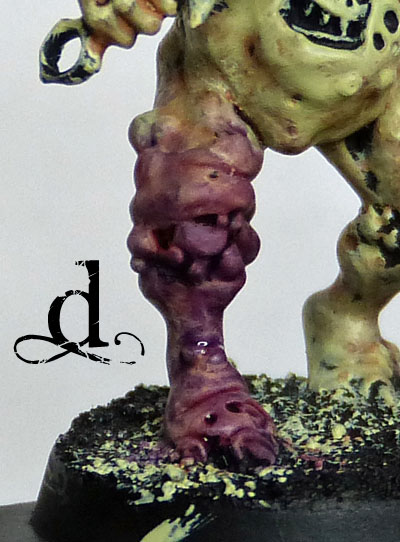
d. Leviathan Purple and Baal Red washes were used on the‘stumpy’/bloated leg that a couple of the Plaguebearers have. The washes were thinned out towards the top so that it blended into the regular flesh colour.
STAGE TWO – Early Details & Further Washes to Add Depth
Advertisement
a. Any recessed areas which I wanted a different colour were blocked in. For example the guts were painted Blood Gore. Other areas where skin was broken open were painted Blood Gore to match or painted in paler tones.
b. This was followed by a Devlan Mud wash over all of the skin.
c. Rotting Flesh was once again drybrushed on and used to highlight areas. Step a above carried out before the wash to allow you to tidy anything up at this stage.
STAGE THREE – More Details.
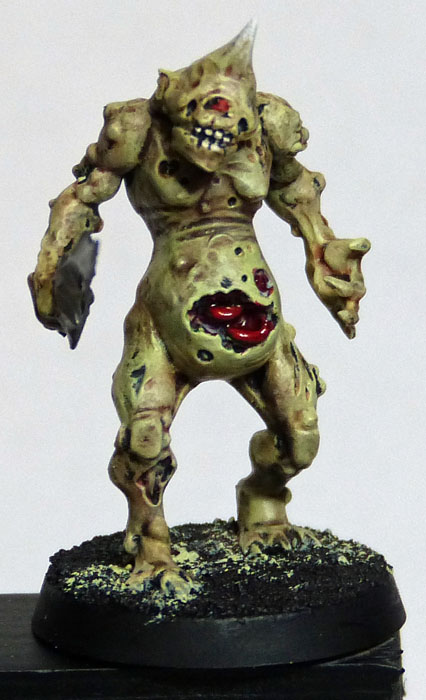
Guts – these were highlighted before getting a Baal Red wash followed by some Leviathan Purple. Once dry they had gloss varnish applied to make them really stand out.
Subscribe to our newsletter!
Get Tabletop, RPG & Pop Culture news delivered directly to your inbox.
By subscribing you agree to our Terms of Use and Privacy Policy.
Eyes – Picked out in a vibrant red, washed with Devlan before being touched up with the same red.
Horns – Drybrushed white with a progression from flesh at the base up to pure white at the tip.
STAGE FOUR – Many More Washes and the Final Details.
Advertisement
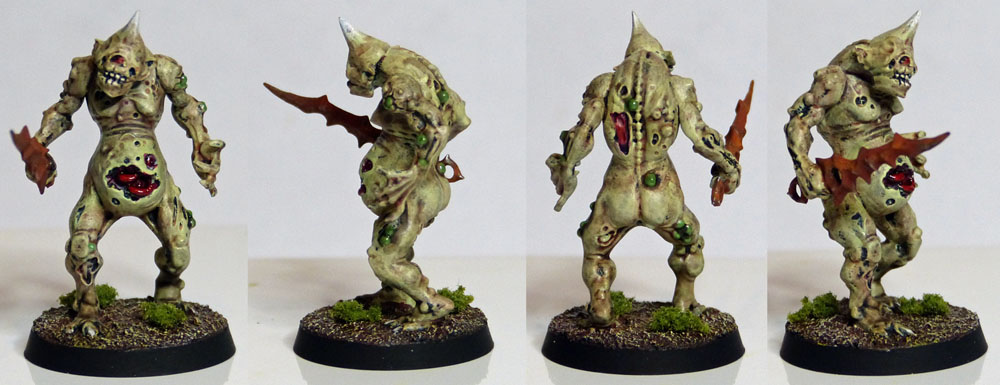
Green, red, purple, brown and blue washes were added to the skin, never covering a large area but just used to tint the flesh here and there. Devlan was used occasionally to give more depth where desired.
Occasionally more Rotting Flesh was drybrushed on to lighten and highlight as required.
Teeth and Claws – picked out in white and given a Devlan wash.
Tongues – painted purple, washed with Leviathan purple and highlighted.
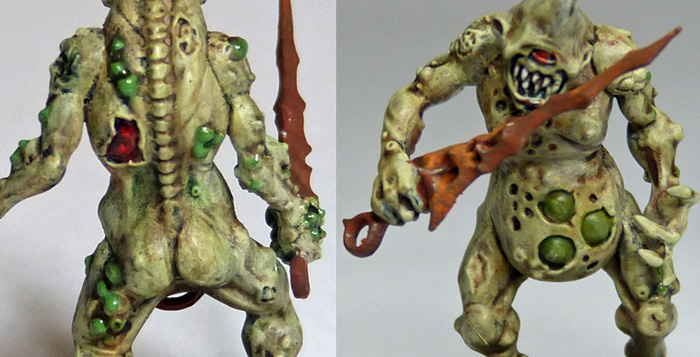
Boils – these were picked out in Goblin Green, followed by a Devlan wash and a Goblin Green highlight. Once dry they received a gloss varnish.
Swords – First they were base coated in Boltgun Metal. I then mixed up white spirit and burnt umber oil paint and applied it all over the sword, different shades of rust weathering powders were then applied over the still wet surface.
At this point the only thing left to do was the base and the Plaguebearer was finished.
Moving on From Plaguebearers.
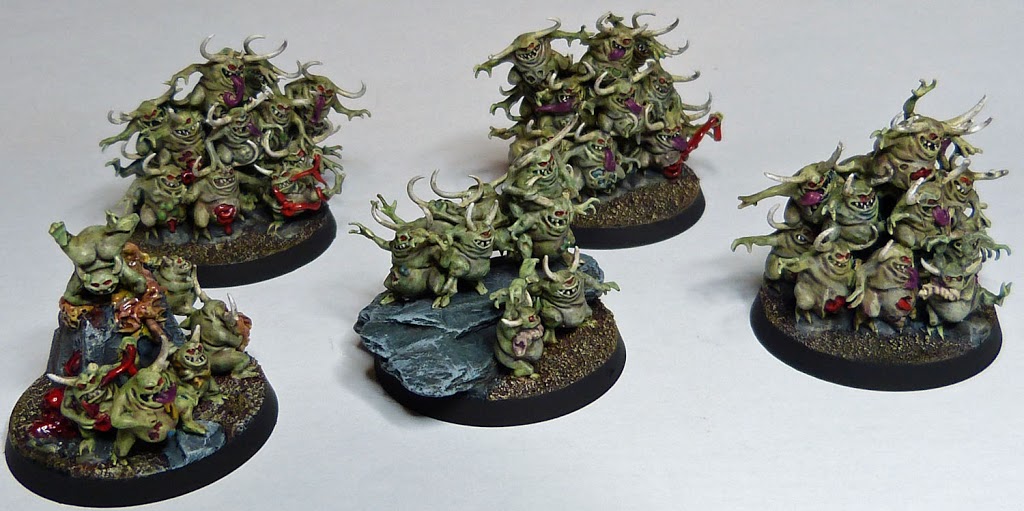
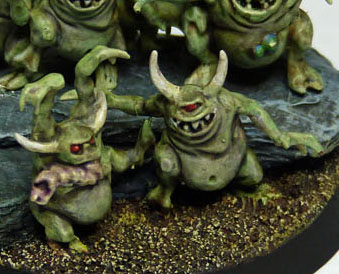
I used exactly the same scheme on the Nurglings above, to add a bit of variety I picked out some Nurglings on each base and used a wash (green or blue) to tint them slightly. I then followed the above guide. This broke up the colour a bit so that you didn’t get such a solid wall of the same colour, the picture below explains the result far better:
Advertisement
The same colours were used to do the details – tongues, boils, horns etc tying them into the rest of the Daemon force nicely.
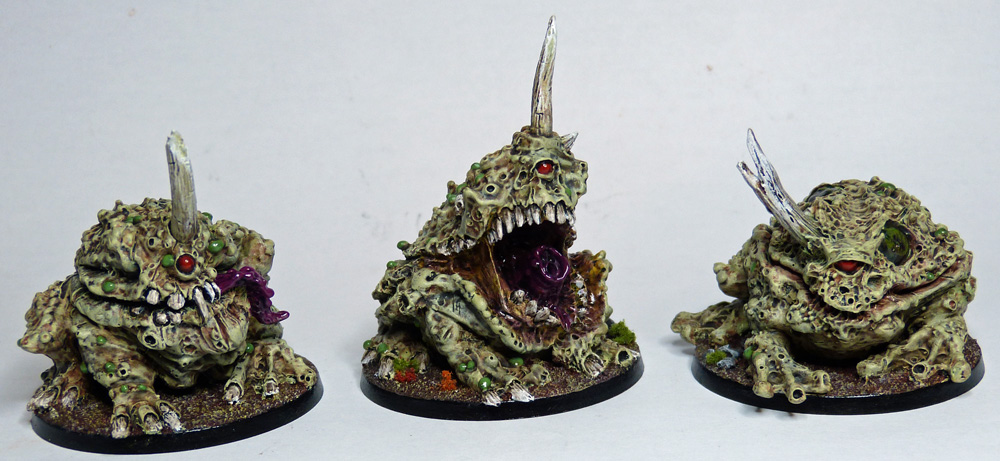
I have since started expanding the army with a Beasts of Nurgle unit. I used the Forge World Plague Toads mounted on 50mm bases rather than the GW models.
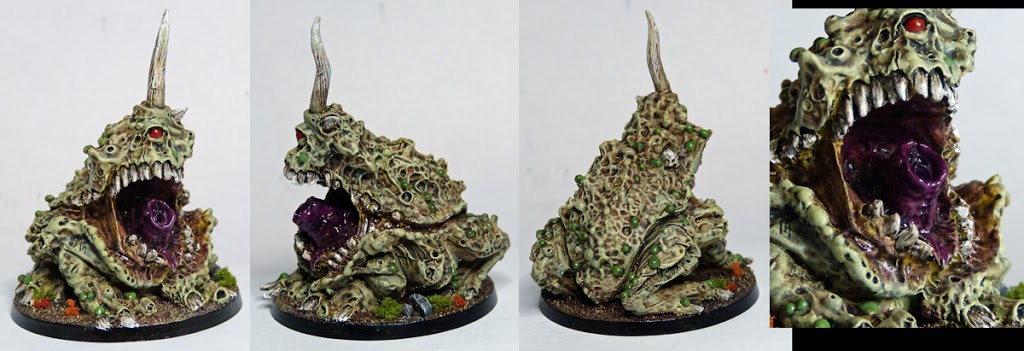
As well as painting their tongues purple I expanded the colour into the open mouth one of the toads has:
And to finish off here is a shot showing how the Plaguebearer, Nurgling and Beast compare to each other.

And that is that, for now. I am currently putting together a Blight Drone which I will be painting the same way. Hopefully I’ll be able to do a follow up article to show how that turns out. In the meantime please drop into Recalcitrant Daze to see how the Drone develops and more pictures of the Nurgle force in full.
Advertisement
Author: Rictus
Advertisement

