Matte medium and what it can do for you.


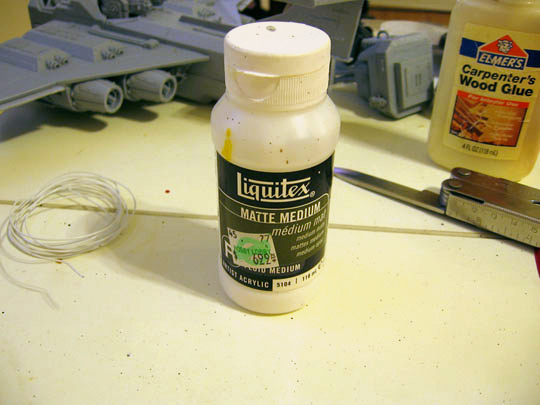
So if you read my last post you know that paint consists of Binder, Vehicle, and, Pigment. Matte medium has binder and vehicle but no pigment. When added to paint it increases viscosity and drying time slightly, but what it’s really useful for is translucency effects. If you want to make something look dirty or rusty this is the stuff. You can add it to highlights for a smoother more blended effect. I think the most important use I have found for it yet is in inks. As you can see I use liquitex matte medium, but I know Vallejo makes their own, which means there is a good chance some of the other miniature paint companies have some of their own as well.
Ink washes are one of the best ways to get good effects when painting minis. I primarily use inks to enhance detail in areas that are too small to bother painting manually, and I also use them on all metals. Inks have the same 3 primary components as paint. The biggest misconception about inks is that they are just pigment in water. The binder in inks is just as, if not more important, than those in paint. I find that the GW inks I buy are too dark straight out of the pot for most uses. Straight black ink will completely coat surfaces, eliminating the appearance of the detail. You want the ink to add contrast. Contrast enhances form, and that’s the whole point of painting minis anyway. So, the simplest solution then is to add more vehicle (more water). This works well up until a point. Eventually though, with too much water, the binder will be too thin to do its job of holding the pigment together cohesively. This will result in an effect called “ringing” where the pigment actually ends up being concentrated on the higher areas of raised detail rather than in the recesses. This is where matte medium comes in. Although you will need to try out your own mixtures, a good starting point for a very useful ink is 1 part ink, 3 parts water, and 3 parts matte medium. This will give you something that is easy to handle and goes on smooth. The highest concentrations of pigment should end up in the recesses with a lot less on the higher areas of detail. If you save empty paint pots, you can clean them and mix the ink straight inside, meaning you can go back and use it at any time. This also means consistency as you paint a whole army.

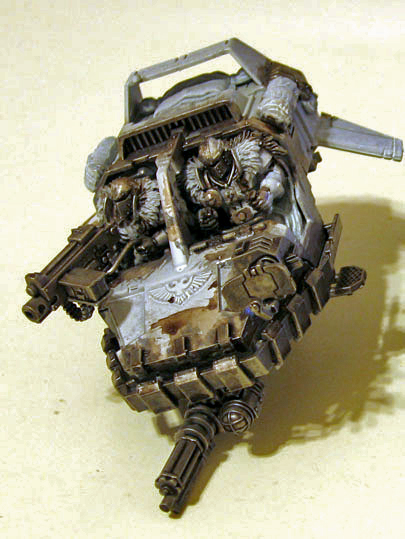
Here is one of my white scars speeders in an early step along the way. I drybrushed chainmail over codex gray and then added an ink wash like the one mentioned above. I think it was 1 part chestnut ink, 2 parts black ink for the 1 part of ink, and then the aforementioned ratios for the other 2 ingredients. The chestnut ink is there to add a little dirt and grit. To make the metal appear a little cleaner, I could do another drybrushing step, but I prefer these guys to look a little dirty. For clean metal, leave the chestnut ink out.
Remember that for non-ink effects that involve translucency, you should use a ratio of at least 5 parts matte medium to 1 part paint. Many times even more matte medium might be needed. Though I can’t speak for other brands, I can say the liquitex m.m. will leave these areas of tranlucency glossier than most of the surrounding paint. Don’t worry, this effect should be eliminated if you spray your finished mini with a matte clearcoat (more on these in an upcoming blog). Always, always, always experiment when trying out any new technique to see how it works for you. Test out your new mixes on paper to get a feel for their translucency. If you are a real mini fanatic, you might have some old pieces lying around that are obsolete or that you have upgraded from. These can make great testers.
Now in the spirit of the new year, here are 2008 uses for matte medium. Not really, but here are a few ideas to get your imagination running:
-Inks like these are also a really fast way to paint an army. Now that you know the secrets on making good inks, go back and read mkerr’s tutorial on dipping orks. Instead of using the minwax polyshade, try mixing up your own inks using whichever colors you like.
-Take this a step further by using a green ink for the skin, brown for the clothes, black for the metal, etc.
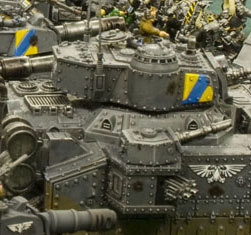
-Use the ink over a basecoated tank, then drybush (like Bigred’s Deathguard Fellblade)
-Use it to turn any acrylic paint into an ink. Usually adding water to acrylic paint to try to make ink produces a ringing effect in the extreme, but the extra binder from the matte medium makes it feasible.
-Mix a tiny bit of dark flesh, scorched brown, vermin brown, or blazing orange with a lot of matte medium to add translucent rust effects to your metals. Use a beat up old brush and apply with a stippling motion to produce a good rusty texture. Apply one or more of these on top of each other for maximum rustiness.
-Add black and a little dark flesh to matte medium to get a motor oil look. Stain the hands and clothes of your new big mek, the pistons of your penitent engine, or the heavy bolter of your I.G. weapons crew.
-Mix matte medium and blood red and apply to weapons. The gleam of metal underneath will be more visible, and more realistic looking.
-Use a pin vice drill and a decent sized bit to create a recess in the hull of a tank. Don’t drill all the way through. Apply scorched brown and matte medium in the shape of a blast over this recess. Then add black with matte medium in a smaller area in the center to simulate weapons damage. Use the same mix on gun barrels for a greasy smoke residue feel.
-Mix with graveyard earth, scorched brown, snakebite leather, etc. in large quantities. Use a big thick brush to slather on this translucent “mud” to wheels treads or nearby areas of hull.
-For the virtuoso, matte medium can be your best friend when trying to create directional lighting effects, particularly those from colored lights. Mix it with reds and yellows to create the reflected flare of heavy bolter fire. Mix it with pale greens for the glow off a necron gauss rifle.


