PAINTING: Layering vs Drybrushing

A guest post from Skarboy
Hi again everybody! For this article I’ll focus on the “why” more than the “how” of things. There are plenty of publications out there that have good “how-to” articles in them; I’m more interested in helping people understand the concepts behind certain techniques then to tell them for the tenth time what color to paint things (although I can do that, if you want to know, just ask, and if those are the posts you want, let me know).
For the time being, I’ll be writing to the beginning and intermediate painting crowd, mostly because I’m an intermediate-type guy myself. My aims are to promote the Warhammer hobby, help people improve their painting skills and generate discussion about the things I write about, keeping in mind quality and doing my best to be easily understood. Let me apologize for rambling, and get on to the actual content.
The Basics
Layering and drybrushing are both methods of highlighting your miniature – of emphasizing the raised areas on the model and representing the way light falls on them. Many painters will also wash the model to exaggerate the lower areas of the model to represent shadow (although that isn’t the focus of this article… maybe later). I know, figure painting 101. Bear with me, brothers and sisters.
…what about blending? Yes, blending is a third option for highlighting. For the sake of brevity, and the fact I haven’t done a great deal of it, I won’t speak of it here other than to say I’ve tried it a few times, found it very difficult to get the effects I wanted, and went back to layering. I’d welcome any comments on blending in the comments.
First, you need to consider what your miniature is going to be used for… How “good” do you want it to look and how much time do you want to spend prepping and painting it? Do you want it to be “table-top ready” in time for this weekend’s Warhammer tourney, or will this be your latest Golden Demon competition piece? Do you want a “showroom fresh” look, or do you want your hero to look like he’s been knocking heads together for a while? Yes, you can have different answers for different parts of your mini.
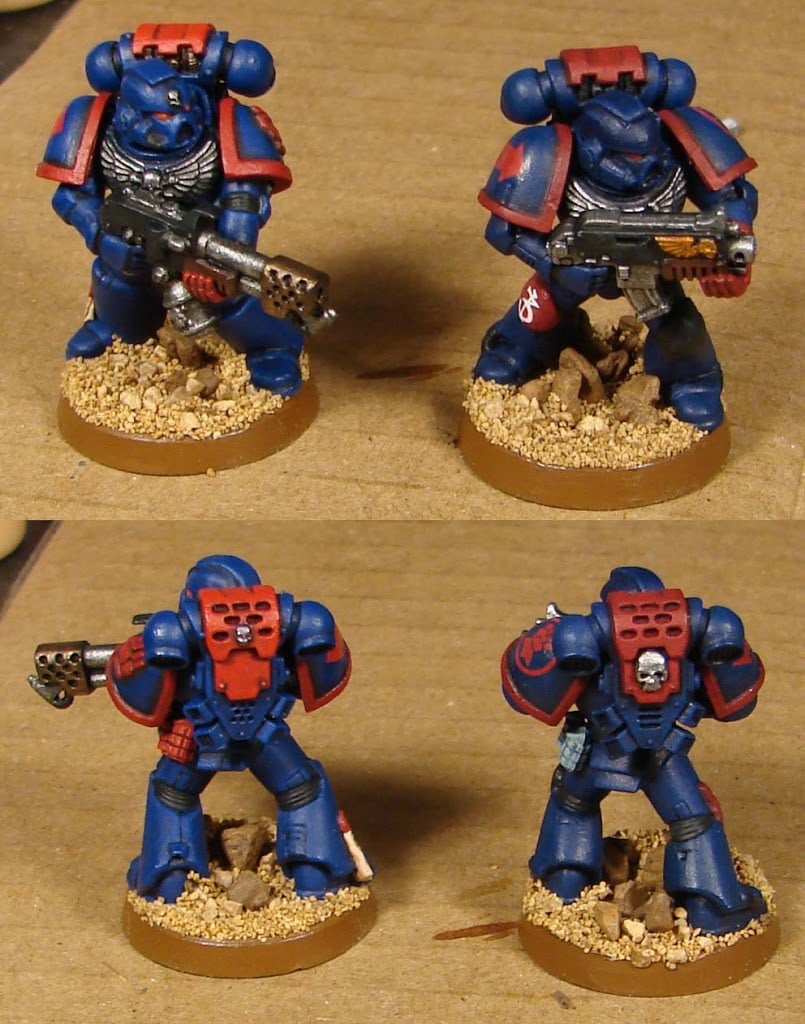
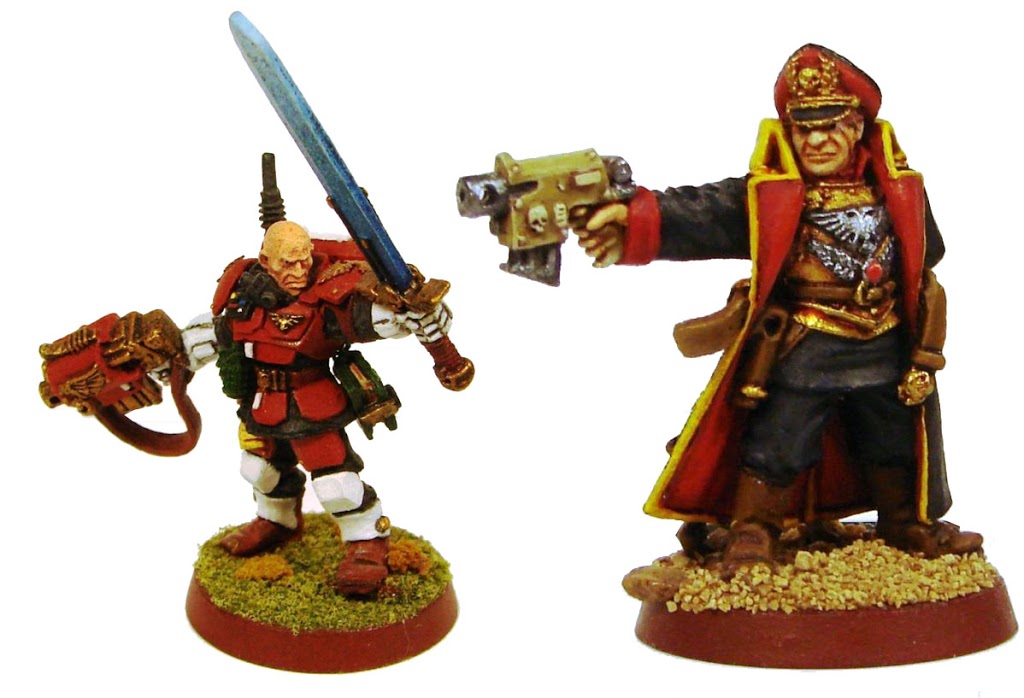
Let’s look at some Space Marines. The Marine on the left was primarily layered, and the one on the right was drybrushed entirely. Aside for some minor differences (flamer vs. bolter, blue grenades instead of red), the two are essentially the same. I even used the same colors on both miniatures (including the mid-tones). The “drybrushed Marine” took me about six hours, the layered one about twenty. Yes, I work comparatively slowly. The point here is if you just need to get your army ready to game with, dry brushing the whole thing is an option; it will save you a lot of time, and gives quite a “rough and ready” look. Layering, while much more time consuming, produces “cleaner,” more exact results, but takes more time.
Reasons to Drybrush:
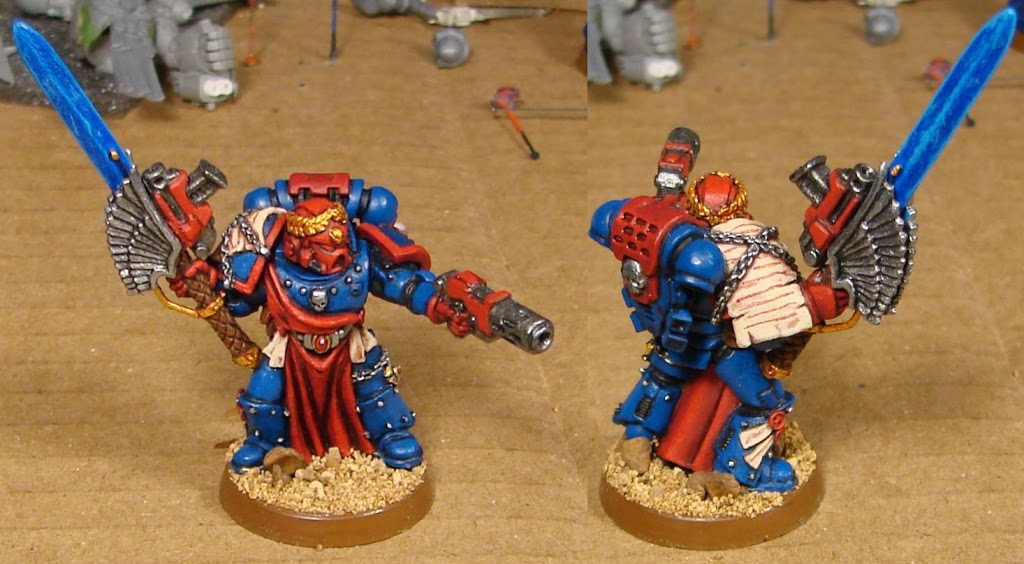
Drybrushing produces good, rapid highlighting effects and works best when you have plenty of texture. By texture I mean actual relief on the model – areas with lots of “high” and “low” points very close together, like furry animal hides, hair, the Imperial Eagles on Mark VII armor, or the ropes on the Space Marine commanders below (go on – it’s okay to skip ahead). On the two marines above, the black rubbery-looking pieces between armor segments were dry brushed on both figures – lots of texture there.
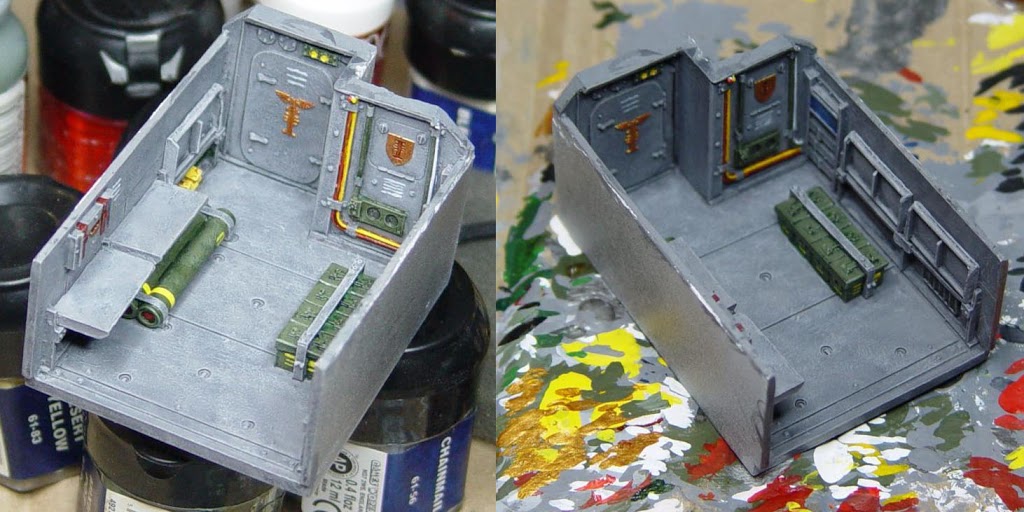
Alternately, drybrushing can be used to “create” texture where there is none. Here’s a shot of an Imperial Guard Chimera interior where dry brushing has generated texture on some otherwise flat and uninteresting surfaces. As another example, base coating firearms in black and dry brushing on metal tones is a time-honored practice used to create texture and a good “steel” look.
Have a look at the tabard on this Space Marine honor guard – it’s layered.
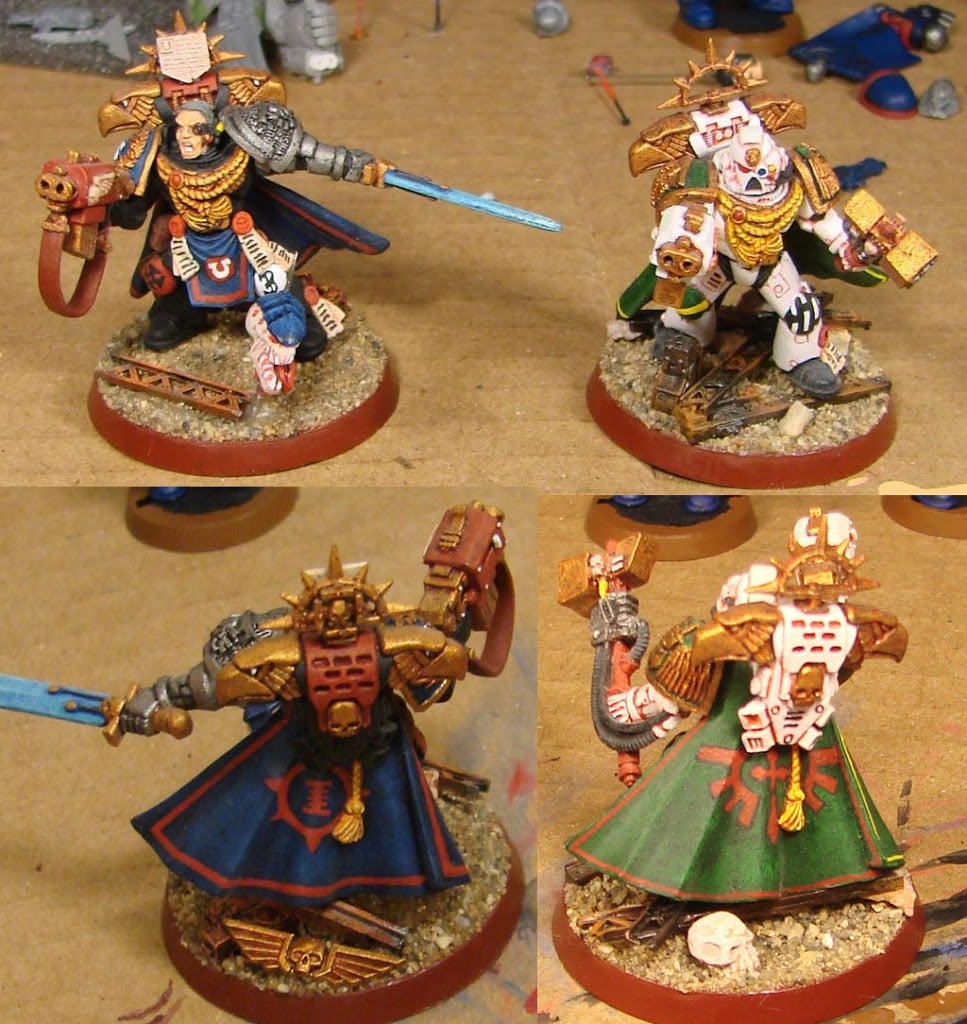
Here are a Deathwatch Brother-Captain and a Dark Angels Master. Both have cloaks that have been dry brushed. Notice how the dry brushing creates a little “pattern” on the otherwise very flat “fabric.” It’s a marked difference from the Honor Guard above, who has very pronounced highlights on the fabric but no texture. It’s all about the effect you’re trying to create. The point on this comparison is not to say one is better than the other; I’m just trying to demonstrate the different effects you can produce. It’s up to all of you to choose which one you want.
Drybrushing can also be used to create a lot of “weathering” effects – like drybrushing small patches of silver on a 40k vehicle to represent chipped or worn paint, or dry brushing browns and oranges over metal pieces to get a “rusty” or “muddy” effect. Have a look at the girder pieces in the two lads above for the rusty effects. Incidentally, if the Dark Angels Master looks a little pink, it’s because he is a little pink. I was still trying to perfect a “bone white” look, and I didn’t quite get it. Layering on the white would have been a better option, as it tends to give you a more opaque coat. These days, I think I would have gone with a very thin wash of red-brown or off-white with a little red, just in the recesses, and then layered on the white, instead of washing the whole model. Live and learn.
Tips on Drybrushing
Mix your colors slowly. Add small amounts of the lighter color to the darker color. Too much of the lighter color is an easy mistake to make, and difficult to go back from, if you put too much in there. You’re really going to have to re-mix if you get too much of the lighter color in there.
Like everything else, it takes practice. “Dry” is a relative thing – I’ve heard of a Dark Angels painter who starts with black and dry brushes his base coat (Dark Angels Green) on. He uses a lot of paint on the brush. It works for him. Anyhow, successive coats of dry brushing require either a lighter touch or less paint on the brush, or both.
Reasons for Layering
Layering tends to produce a very “clean,” just-rolled out of the Forgeworld look. Yes, this is opposite to drybrushing, which generally gives you a worn, well-weathered look. Layering also gives you precise control on where the color goes, and a lot of people like the technique because of it. It also photographs very, very well. Drybrushing does not show up so well on camera, and I suspect this is why the Citadel ‘Eavy Metal team typically goes heavy on blending and layering.
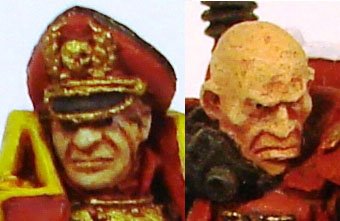
The “texture vs. clean” look: take a look at the commissar’s face below, and then the Inquisitorial Stormtrooper Sergeant’s face as well. I’ve done faces both ways, and I’ve recently started using a combination of both techniques. I was happy with the rough look the bald sergeant’s head ended up with. Sorry I can’t go with a little higher resolution with the photos; photography is a hobby for me, not a profession, and my little Sony has only got so much juice.
Tips on Layering
Mix your colors carefully and gradually. With practice, it’s possible to get your successive shades close enough to each other that you won’t notice the difference between the colors on the model itself, which produces a nice graduated or “blended” look. This is one of the reasons I don’t do a lot of blending; I haven’t quite got the hang of it, and I can get satisfactory effects with layering. If you end up with two layers that ARE significantly different, you can always mix up another tone between the two contrasting layers. If this happens to me, I’ll often mix up a little mid-tone and dry brush it around both layers, which can really help to take away the difference. Yes, it’s perfectly okay to mix the two techniques. As I’ll discuss below, I prefer a very thin mix of paint for layering.
Don’t be afraid to dilute. Layering takes lots of paint. For most projects, I would recommend going with three or four layers (base coat, intermediate(s), and final highlight). Sometimes for a little more quality (especially on commander types) I will go up to five. The Crimson Fists Space Marine (in the photo earlier) was done with five coats and a wash, but I wanted to spend a little more time on him. Don’t forget you have a primer coat under there as well. Four coats of paint can obscure a lot of detail- and painted on insignia, runes, etc. are going to be another 1-2 coats. I usually use a 3:2 or even 2:1 mix of paint to thinner to help with this. As an aside, water will work as a thinner for all acrylic paints (some better than others), but I prefer to use Vallejo thinner instead of water. The consistency is different and the paint is easier to control. I’m partial to Vallejo Game Color, so I try to use their other products (inks, thinner) as well. Not just out of brand loyalty; some brands won’t mix well with others. I discovered that the hard way.
…and remember, this is art! There’s no way to get it wrong, unless you don’t do it at all. Go forth. Have fun. Discuss. Paint.
~Bigred here. There is really a lot of depth of skill to be mastered wtih drybrushing. Once relegated to “tabletop quality models” you can really get good results out of it when used precisely and in combination with other painting methods. My Death Guard Fellblade for example was entirely drybrushed in several careful layers with final detail work being applied on top. You also need to know what type of finished look you want, which can tie into the type of army you play. I usually use drybrushing for my IG while only using layering for my Eldar for example. How do you guys paint in general and why? Comment away…

