40K HOBBY: The Average Guardsman


The first in a series of modeling and painting posts by Fade_74
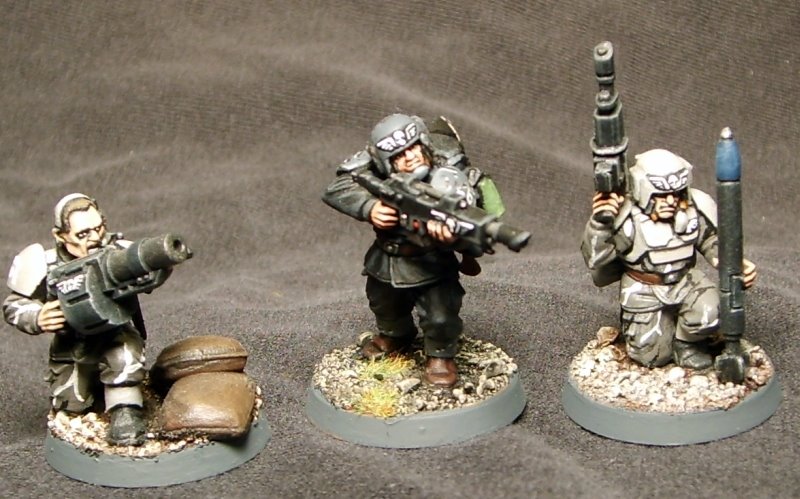
Hello folks! Ever wanted a painting and modeling article written by an average Joe for the average Joe? You have? Then rejoice, for your moment has finally arrived! Let me fill you in with what’s going on. I am going to write a decent series of articles (I hope) that will take an average Warhammer 40k miniature from start to finish. I picked the Imperial Guard because a Cadian has just about everything you could ask for in a mini to paint. It has cloth, flat armor plates, skin, and a few metallic items. They can be easily individualized since they are plastic. Plus, over the next few months I am guessing that a lot of people will be starting Guard armies, or adding troops to existing ones. So enough of the chit chat. Let’s get to work.
Assemble your troops!!
Yeah, if it were only that easy. First off, don’t attempt to put together your whole army at once. I make a squad, paint it, then make another. There is no more daunting a sight than looking at a hundred or so unpainted guardsmen. You can also get a better feel for the cohesiveness of your army if you do it a bit at a time.
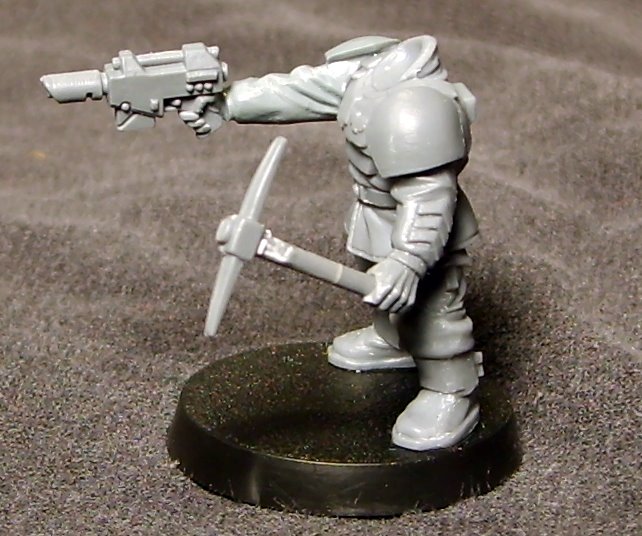
Did you notice that your guys are dirty? Yep, the moldlines need cleaning. I hate them, and you should too. Scrape them off with the edge of your craft knife. For really stubborn stuff, get yourself a set of files. No, don’t go to the hardware store, they won’t have what you want. Look to Games Workshop or Gale Force 9. They both make great files for just a minor bit of cash. Pay close attention to the tops of helmets and shoulder pads. Those lines will ruin your day because they really show up through paint. And yes, I see there are some mold lines still showing in my pics of the test mini. I left them for a reason. So I can show you how to disguise some flaws later down the road.
Start with a set of clean legs. Glue them down to the rear center of the base. Leave yourself some room at the front to add some nice scenery. I use Lock-Tite superglue. It holds great and dries fast. After your legs are down think about the position of the feet. Where are the feet going? Are they stopped or running? Your feet (as well as your mini’s) are a good indicator of what direction you are going to take. When you put a body on those legs pay close attention to way the chest interacts with the feet. The center of said chest should be no more than a few degrees from the pointing direction of the feet.
Now let think about how your arms should be. They should be in a realistic position as compared to the legs and chest. Get up out of your chair and position yourself as the mini. Does it feel natural? If so, then your are doing something right. If you are way off balance your mini will also look that way. Now would also be the time for some minor conversions. Hand swaps are a great way for the guardsman to stand out.
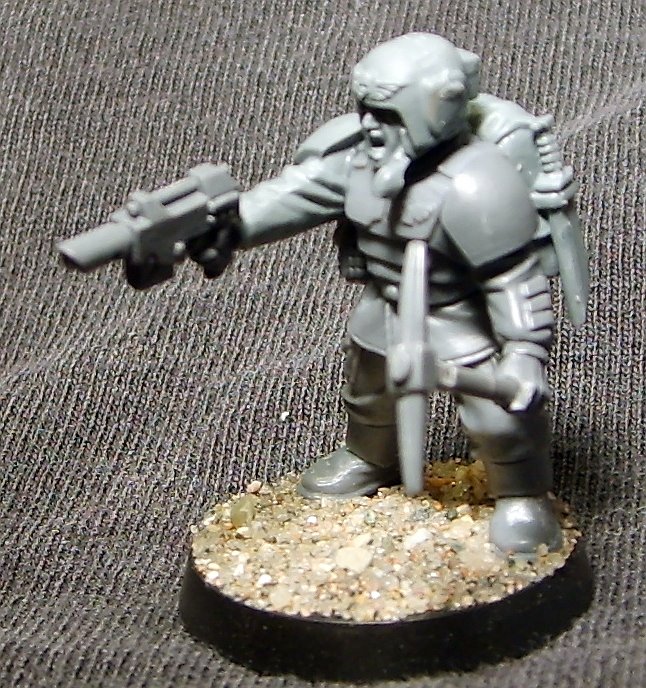
My example is going to be a sergeant, so he is going to have a laspisol and a close combat weapon. I dislike the laspistol arm that comes with the cadian box though. You can remedy this by using a little imagination. Hopefully, you bought a heavy weapons box or two. Look for the arm with the hand pointing into the distance. Slice off the regular laspistol hand and swap it with the hand on the straight arm. Voila, instantly better. No pinning needed, because they are such small parts. You can use the chainsword arm on the other side, but remember, anything can be a close combat weapon. Don’t be afraid to try out different arm combinations, you will have plenty of extras. I got a little bit silly with the pick axe, but I needed something to paint metallics on later.
Now for the head. Where should he be looking? Well for starters…..how about where his gun is pointing. If he isn’t pointing his gun, look at where his feet and chest are going. Tinker around a bit. Try different tilts of the head, but pay attention to realism. This is a guardsman not a demon possessed freak.
Now add some characterful accessories. Grenades? Backpack? Shrunken head totem….EEeeww. Use whatever you think looks right, but don’t go overboard. To much stuff can make a mini look to busy. If you have a buddy that you play against all the time, you could trade him some heads, arms, etc to use as trophies and such. Glue some sand or flock to the base. Use white glue, like Elmer’s. Wipe away any that gets on the sides.
Remember, the best looking paint job will look weak on a mini that wasn’t assembled correctly. With practice, it will come naturally, and you will be able to do it in no time.
Next time: Colors. Choosing a great cohesive color scheme to compliment your perfectly assembled models.
Fade_74 has been an avid gamer for 20 odd years. He plays just about everything. His favorite 40k army is Imperial Guard, but he has also been known to collect and play Necrons, Space Marines, and Tau. If you would like to check out some of his other work just follow this link. http://www.coolminiornot.com/artist/Fade+13
~Lets give it up for Fade_74. He’s a grizzled veteran Warhammer player who really wanted to contribute to the BoLS community with something for everyone, not just the high-end painters and converters. Comment away guys, I’m sure he will be along shortly to answer any of your questions.


