40K: Armored Might of the Guard


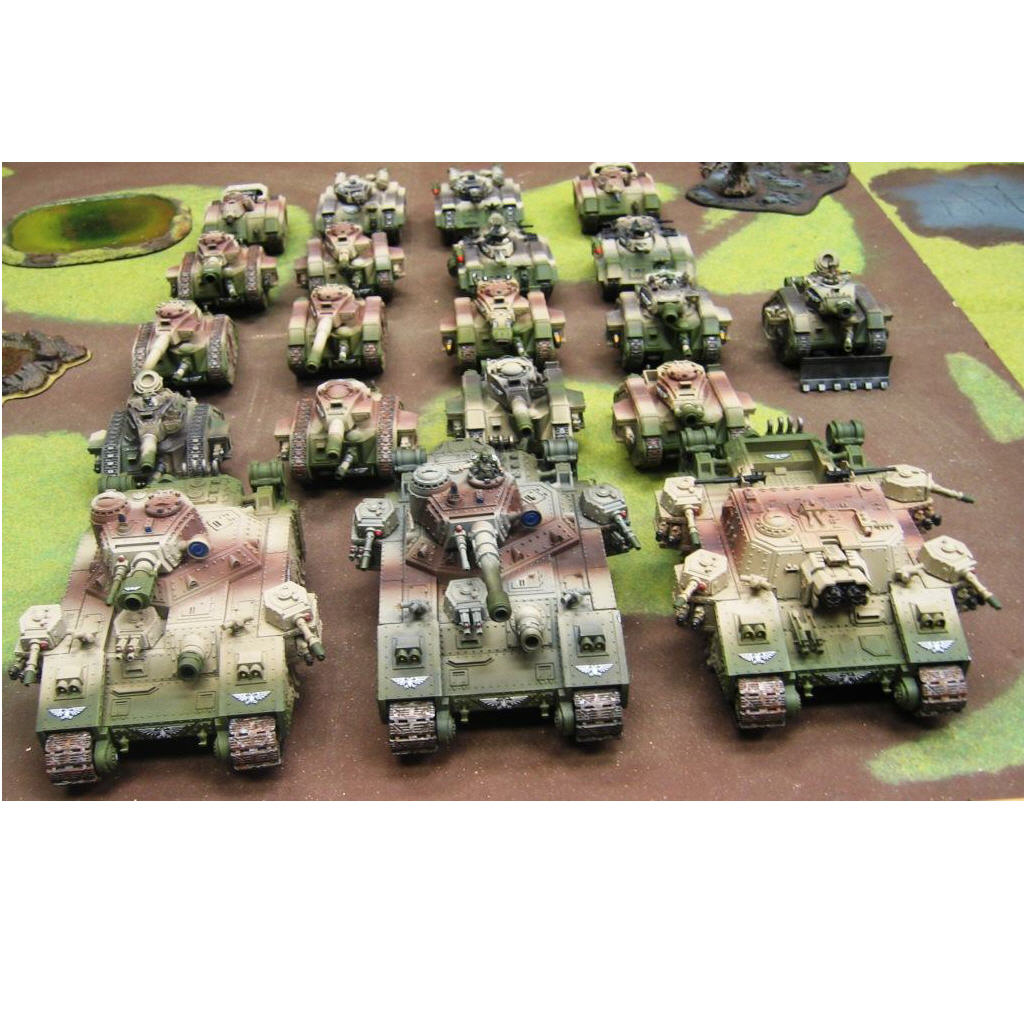
Painting large quantities of models can be done quickly with fairly good results. The picture above and the one just below show the massive quantity of tanks I’ve finished for my Imperial Guard army so far. This article is a follow-up to my recent articles on converting and painting Imperial Guard tanks. I’ve now finished painting all eleven of the vehicles that I air brushed about 17 days ago as of this writing. The other day I took them down to the local GW Annapolis store for a photo-op with the older tanks in my IG army that are temporarily on display there. I was curious to see how the whole thing looked together.
Now, the older tanks finished in 2006 do look a bit different because I used a darker camouflage brown and I used spray paint instead of an air brush on them, but I think the whole thing together still makes a pretty good cohesive whole.
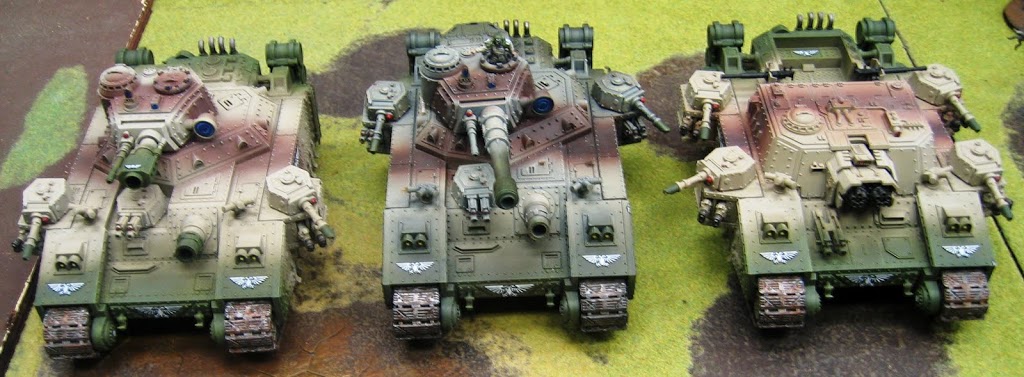
This photo spotlights just the Baneblade variants completed to date for my Cadian army. There is one last detail to complete: name plates for the Stormlord and Hellhammer. That will be done hopefully within the next few days, once I settle on appropriate names.
Using the tips I detailed in other recent articles like “Hounds Of Hell, Imperial Guard” and the aforementioned Russ tank article, it is possible to complete large numbers of models with relative alacrity. Here’s a summary of general techniques used to complete this fairly large project quickly plus some extra tips not included in the earlier articles:
1) Spray: Spray is your friend. Whether it’s an air brush, spray paint or GW’s Spray Gun (single action air brush), spraying your base color will give you a nice even finish in a fraction of the time possible with hand painting. This time savings is magnified even further on large models like tanks.
2) Dry Brush: Dry brushing highlights is relatively quick compared to hard edging and other highlight techniques. It yields a different finish than those other techniques, but I found it to be the preferred method for my IG tanks for multiple reasons. First, if built up very slowly and carefully it can be used to achieve a glowing, multi-layered semi-transparent finish and I’ve used it to achieve this interesting effect on some Space Marine vehicles in the past too. Try it with Space Wolves Grey over Shadow Grey and you’ll see what I mean. Second, in the case of the tanks shown here, it not only added dimension through highlighting, but provided a somewhat dusty look to the finish, quite desirable for Imperial Guard vehicles.
3)Tracks: Paint the tracks separately. I sprayed all the tracks for the Russ and Hellhound type vehicles black, then dry brushed them with Tin Bitz, Boltgun Metal and finished them off with stippling and washes for a grungy, dirty effect. By painting them separately from the rest of each model I avoided the time it takes to be careful not to get the track colors on the tank hulls and vice versa. After both the tracks and the tanks were completely painted, only then did I glue the tracks on the models.
4) Necessity: Only paint what is necessary. In other words, only take the painting as far as is necessary to provide a pleasing overall result. If you’re painting a tank for a painting contest, you may wish to shade around every seam and rivet, but if you’re batch painting large quantities and wish to finish with relative speed so you can move along to other projects, it’s possible to get great results without sweating every little detail. Instead, focus on the details that others will likely focus upon. By spending a little extra time on certain details it’s possible to spend less time on others while still ending with a satisfying, attractive result. This is true for smaller miniatures too, not just tanks. It’s the secret nearly all quick army painters use. Very few features on these tanks were shaded and highlighted, but all were at least highlighted. However, I spent some extra time getting the aquilas nicely shaded before painting, shading a bit on the main weapon on many of the tanks, picking out sensor lights, etc. Most models have a single feature that will draw the most attention from viewers. In the case of troopers it’s usually the face. In the case of tanks it’s usually the main gun, so give those focal points a little extra attention and people will hardly notice you skimped on painting steps on some other less prominent details.
What’s next for me? Well, I’ve got a Space Marine chapter of my own devising I started earlier this year to get back to and of course there are always Chaos projects in the wings. There’s even more IG stuff in my near future plans as well, like a few more tanks, some conscripts, new platoon command squads and an overseer for my psyker battle squad.
I hope this article helps encourage some of you out there to tackle a few of those large daunting hobby projects. Even an army with as many models as Imperial Guard can be fully painted with relative speed if you know a few tricks. Anyone with some “get it done quick” hobby tips of their own should feel free to share them in the comments area below. I’m sure others in the hobby community will be grateful for the assistance and we’ll all be happy to see more painted armies out there. Have fun!


