Hobby: Buying an Airbrush Setup
6 Minute Read
Jun 27 2010

Advertisement
Today lets talk about buyin and setting up your first airbrush. My first foray into the world of airbrushing was 12 years ago…
When I bought my airbrush I walked into the local art store and told them I was looking for one. They showed me the airbrush that I had learned how to illustrate with in art class and I bought it. After wasting $70 dollars on propellant cans I went back and I bought the cheapest air compressor they had. Needless to say this was quite possibly the worst way to buy an airbrush.
When I bought my airbrush I walked into the local art store and told them I was looking for one. They showed me the airbrush that I had learned how to illustrate with in art class and I bought it. After wasting $70 dollars on propellant cans I went back and I bought the cheapest air compressor they had. Needless to say this was quite possibly the worst way to buy an airbrush.
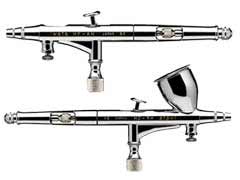
Let’s be clear about airbrushes. What Games Workshop sells is a more of a spray gun. It has airbrush components but in the end it is a spray gun. Useful, but ultimately you will end up getting airbrush anyway because it doesn’t give you the ability to vary your spray width and air control.
Buying an airbrush is an investment. It is an investment in money because you will have it for awhile. It is an investment in time because all of the time you will put into learning how to use it. This is why price really should be your last concern. If you’re being overly price conscious you will find something to fit in your arbitrary budget, but you might not get the airbrush that meets what you want to do.
When you start this process, start by reading about airbrushes. Watch tutorials on YouTube, and get a feel for what an airbrush is all about. After that start researching what the brushes will do, what mediums can be pushed through them, and what air pressures they will function at. There are so many features you will want to consider but make sure whatever you buy that it can use the paint you want.
When I realized that the first airbrush I bought was suitable for illustration and not suitable for acrylic paint I knew that I would have to buy a new airbrush. When I started looking again I began by looking for the following features: double action, a way to adjust the needle quickly, siphon feed, and the ability to use acrylic paint.
 Double action or single action is largely a matter of preference. There are many great single action brushes, and artists who swear by them. The advantage to a single action brush is that it has a lower learning curve. The drawback is that your ability to vary line width is based on the collection of needles and tips you have, and your skill with managing air pressure, brush distance, and paint viscosity.
 Double action brushes really become useful the more you get into detailing and needing multiple line widths in single passes. The drawback is the learning curve is much steeper, but that steeper learning curve will make you very proficient with your airbrush. Most professional airbrush artists will contend that as you grow in your airbrush skills that you will eventually switch to a double action brush anyways so it is better to start with a double action brush.
Adjusting the needle on a double action brush is pretty important. It is a level of fine tuning that really makes a difference. On most brushes you will end up pulling apart the handle assembly to adjust the needle. However, Badger, Iwata and Paasche all make models that allow you to adjust the needle without taking the handle off. The other real benefit to this type of handle is that many times this adjustment area also allows you to pull the needle back so you can clear clogs.
How your medium feeds through the brush comes in one of two ways: siphon or gravity. Gravity is nice because you will use every drop of paint and clogs are less likely. The drawbacks are color changes are slower, and clogs can be a bit of a hassle to clear. Siphon feeds are the exact opposite. I prefer faster color changes so siphon feeds are my choice.
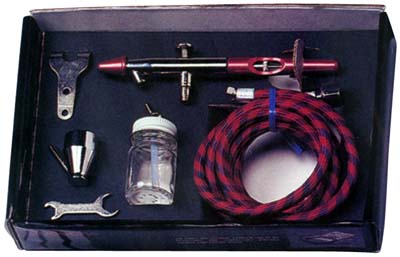
 When buying an airbrush look for airbrush sets. The various airbrush manufacturers have created some pretty good airbrush sets because they know what the average customer is going to need with their brush. Usually they contain a hose, wrench, bottles and sometimes additional needles and tips. The cost of these sets is usually cheaper than getting all of the components of the set a la carte.
I normally look for the lowest cost when it comes buying my higher dollar hobby items. Much like wine, in the world of airbrushes higher cost doesn’t always equate to better product for your needs. There will be things from all airbrush manufacturers that you will like and you will hate. So as I said earlier don’t let price dictate what you want.
When it comes to price you will always find cheaper prices online, but I would like you to consider buying locally. Here is why. When you start learning to airbrush it is handy to be able to go back to the store where you bought the item and ask them questions specific to your airbrush. Chances are good that someone at the store knows how to use your airbrush and they may also have free to low cost clinics on airbrushing. Also you can bring your airbrush along if you need some trouble shooting.
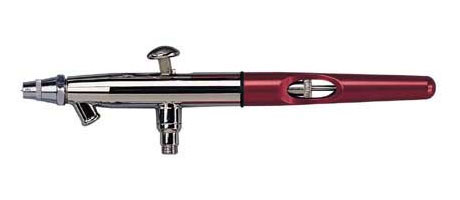
By now I’m sure that some of you are wondering what airbrush I use. I currently use a Paasche Millennium (pictured up top.) I started out with a Paasche V, which is a more demanding illustrators brush. The demanding nature of the Paasche V along with its inability to handle acrylics well made the Millennium a better choice. The Millennium is also nice in that it is an upgraded Paasche VL. Other than the body and handle it uses many of the same components as the VL
Now that we have discussed the airbrush let’s talk about that which makes the airbrush work. Air compressors come in all sizes and price ranges. They are made by all of the major airbrush manufacturers and have a variety of features. With the right parts and lines you can even hook an airbrush up to an air compressor used for power air tools, so don’t feel limited by what the airbrush manufacturers make.
The canned air available for air brushing is one of the biggest rackets out there. I say this because when I started airbrushing I used 3, 12 ounce cans to get to the point of being basically proficient with my brush. I realized after that experience investing in a compressor is a good idea because the cost of 7 cans of air was what I paid to get a compressor. I bought the most basic air compressor and have been fairly happy with it. Some of the other problems with canned air is that the pressure doesn’t stay constant, which contributes to short working times.
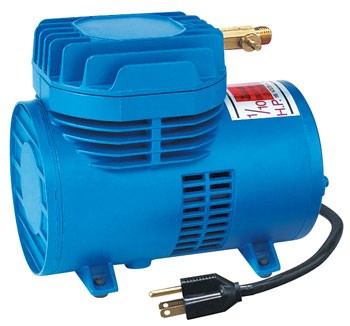
The model of air compressor I have is a Paasche D500 which is basic air compressor. It doesn’t have an on/off switch, no tank, and no pressure regulator/moisture trap. I was able to work around the no on/off switch by plugging it in to a power strip, and I bought a pressure regulator/moisture trap for it from the place that sold me the compressor. Personally, I don’t mind the way it is now, but my wife hates it when I airbrush because until I’m done the compressor is just running.
This brings me to noise levels. If you think you are going to get away without making a lot of noise you have another thing coming. When you read “quiet running” in the features list of an air compressor you should understand that this is a relative term. In relation to an air compressor that is used for power tools it might be quieter, but in relation to the loudest appliance you own you’re looking at something completely different. This is why if you live in an apartment you’ll really want to spend your money on buying a compressor with a tank.
When I buy my next compressor there are some definite features I will be looking for. I will be looking for a compressor with a tank, automatic on/off tied to tank pressure, a regular on/off switch, pressure regulator and moisture trap. The tank is really the biggest feature I’m looking for now because of how it will cut down on the continuous running noise.
The floor is yours. If I didn’t address something just ask. Over the coming months I’ll be posting Protips and basic airbrush use guides.
Author: Guest Columnist
Advertisement


