WFB Hobby: Creating Da Boss
4 Minute Read
Oct 22 2010

Advertisement
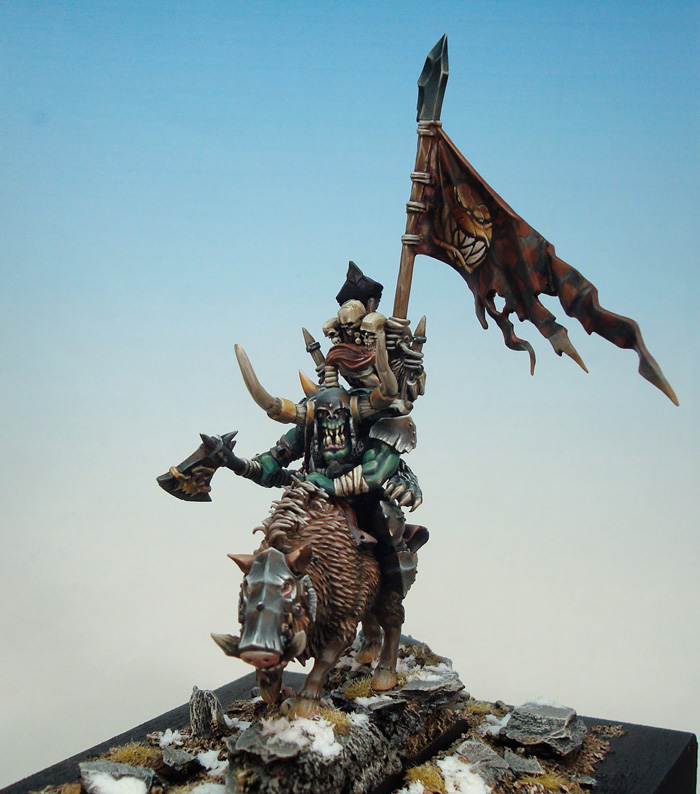
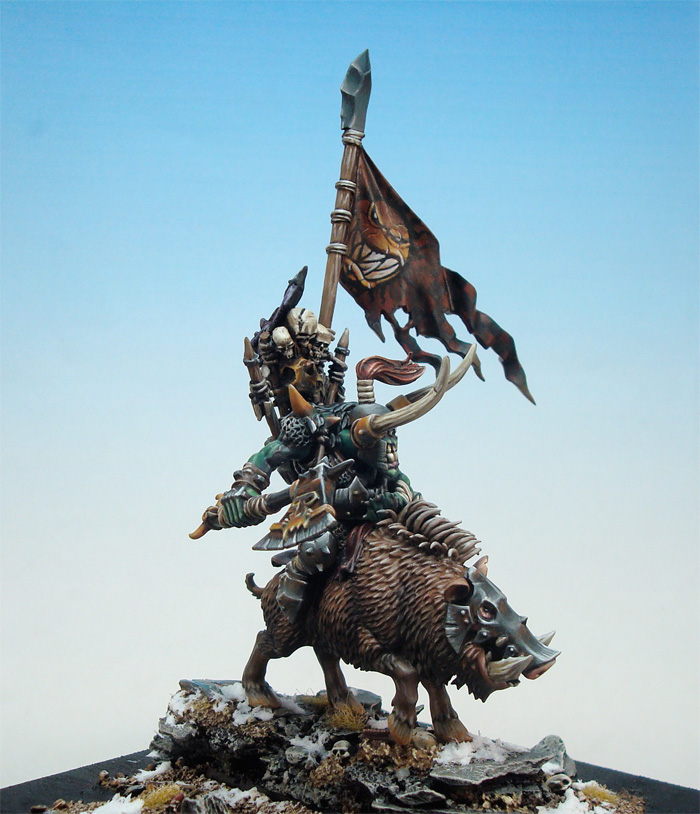
Every orc army needs a big bad boss leading it and to make him more badass he needs to ride a big bad boar. This is how I made mine.
Planning
My goal was to create a warboss slowly walking across the battlefield looking for survivors and have both him and the boar look in the same direction as if they had just spotted something.
I knew that I wouldn’t get the pieces I needed for my model just by using the parts in the boar boys kit so I started looking at what was available. I ended up using:
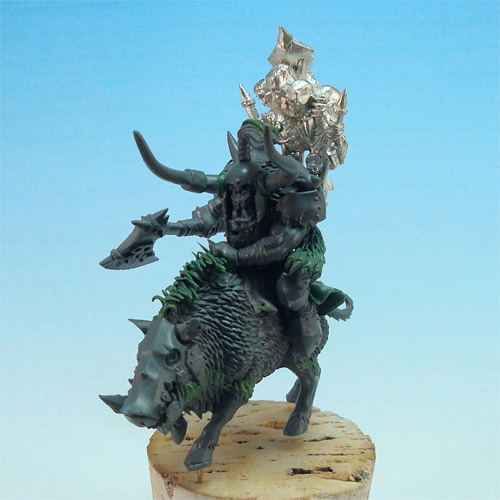
1) the boar boys kit – the boar, warboss’ head, armor, left arm and banner.
2) the warboss kit – the orc body, helmet horns and right arm.
3) the metal orc shaman on boar – for the back pack.
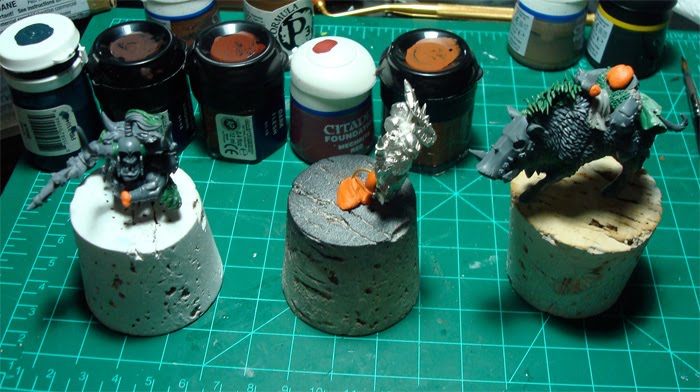
An important part of my conversion was planning on how to divide the model into pieces that are easy to paint. This meant I had to plan pinning but I could paint the whole model relatively quickly without any hard to reach spots.
Tip: Before you prime a model use sticky putty to cover all the pins and areas that will be glued. This way you don’t have to clean these areas up later.
The Boar
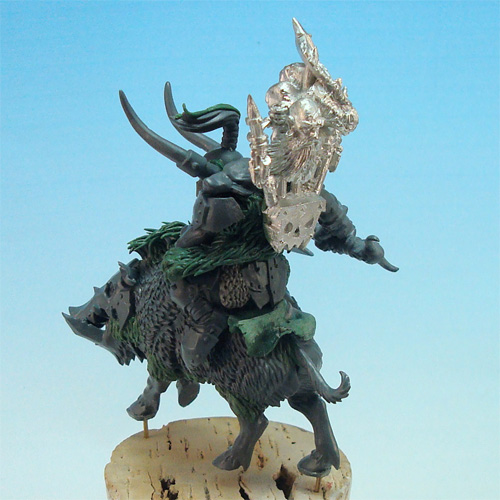
There isn’t a walking boar in the new kit – only running/charging ones so I had to use two miss matching boar halves and cut the legs of a third. I used green stuff to cover where the pieces met and to redirect the boars head so that it was looking in the direction I wanted.
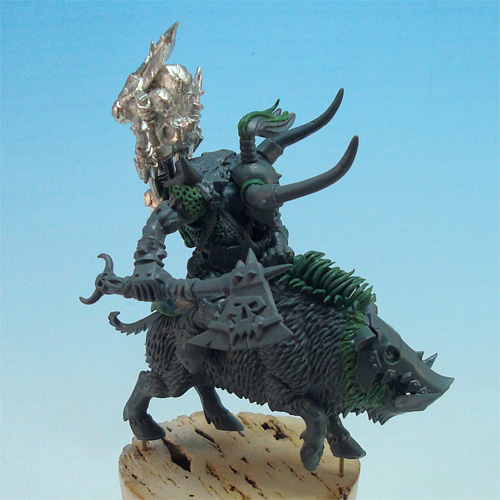
Since this needed to be the boar the warboss picked I sculpted extra hair on top of the ridge of it’s back – this gave it some bulk and will help the warboss stand out of a unit. I also sculpted chain mail on the boss’ legs and a blanket underneath him.
The Warboss
This was a pretty straightforward conversion as I used shoulder pads from the new boar kit as armor pieces that were positioned to help me hide the joints between arms and body and body and boar. These things are way over sized in a nice “orcy” way and made for perfect plate armor.
The most time consuming part was sculpting the fur and claw of the wolf pelt and the chainmail. Making the pelt was made easier by the weird cloak thing hanging off the back of the torso I selected.
The Orc’s head was made from one of the new ones – with spikes sanded off and using the Warboss kit’s boar tusks to make the giant horns (clip away the chain between them and sand away the leftovers – hide the joint with a green stuff rim).
Tip: When you make a conversions pick a direction for the imaginary wind of the model – then everything in the model that’s blowing in the wind need to point in that direction. On this model the banner, helmet plume, boar blanket and the longer hairs on the boar crest are all pointing in the same direction.
Painting
The model was painted mostly in warm colors to make the orc’s green skin stand out even though I shaded/glazed all the warm areas with cold colors to give the model more balance (for example: the boar fur was glazed with green and the red fabric was shaded with blue). I tried to mute the highlights everywhere but the armor and weapons to give a difference in texture between the “natural” elements like skin, fur and fabric and the metal ones.
Even though I used NMM for the armor I made sure that the blends were a little harsher than what I normally would do and the final highlight were painted on as lines to give the armor a rough/worn (or used rather) look. The rust was made with thinned down brow/red paint that was “dotted” into the areas.
On one side of the banner I made my own spin on the traditional sun face and on the other side I did a boars head. Both of them were made quite “cartoony” to reflect my own painting style. The faded checkers patterns were made by using real thin paint and filling in less and less of the checkers, further towards the ends for every layer.
Please let me know what you think and if you have any questions please PM me on the BoLS lounge, write a comment below or write me a question on my blog: http://www.mananarepublic.blogspot.com
Author: Mananarepublic
Advertisement


