HOBBY. Bringing the Dead to Life

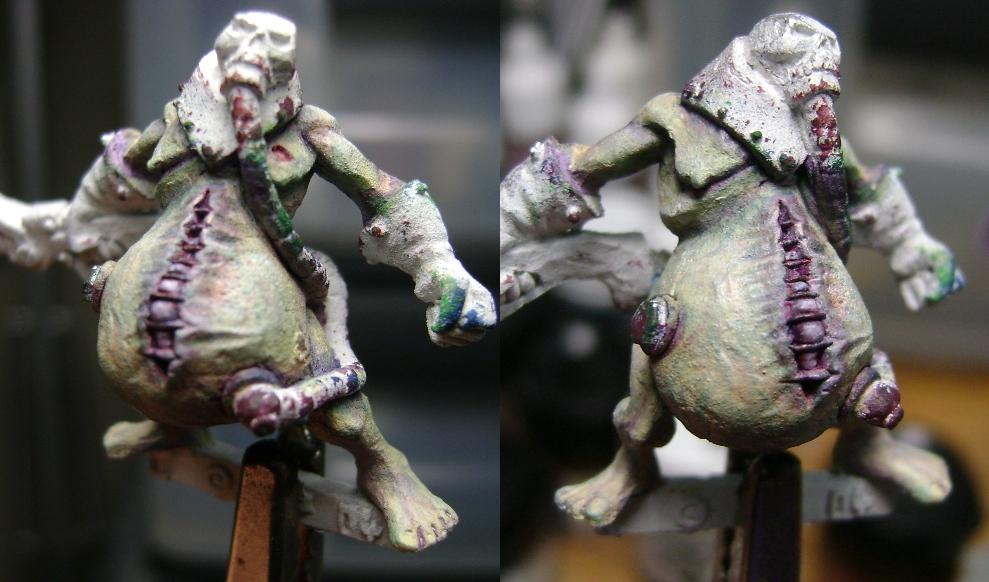
Howdy. Today I would I like to discuss the undead. More precisely undead flesh and how to paint it on wargame miniatures.
There is any number of ways that it can be done, and what I have is a little bit different but not at all difficult. One of the more commonly used methods is to use GW rotting flesh and then apply red for blood , apply a wash and that is about it.
What I am going to show you is how to expand on this, minus the blood. I am not a big fan of blood and gore on my models. The technique I am going to use is widely used in larger scale figure models, but can be very easily applied to wargame figures. This technique uses a sponge to apply paint on to the primed model. What this does is apply a irregular pattern all over the model in several colors that once painted over will break up the smooth even paint coverage for a more dead and rotted skin tone.
Step 1: Prime the model in white.
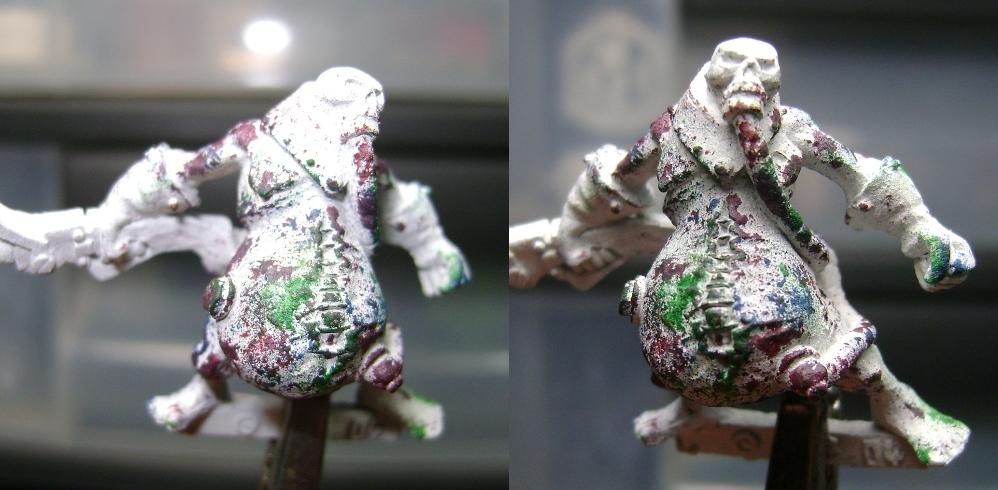
Step 2: Take a sponge and apply 3 or 4 colors all over the model. The sponge can be anything, a natural sponge, synthetic or the sponge foam in the blisters of most wargame models. The sponge is dipped in paint and then most of the paint removed on a piece of paper, very much like drybrushing. You only want a little bit of the paint to remain on the brush so the applied paint looks blotchy and uneven. I applied P3 Exile Blue, P3 Sanguine Base, and P3 Necrotic Green.
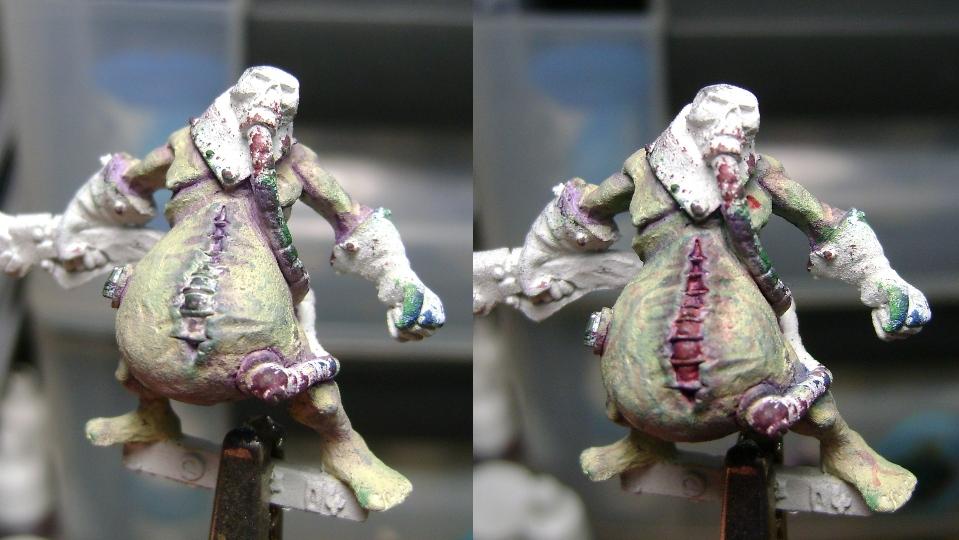
Step 3: Once the colors are dry, then apply a thinned down GW rotting flesh over the entire model. The paint should be thin enough that it still shows the blotchy paint underneath. I made my GW rotting flesh very thing and built up the layers over 6 or 7 layers.
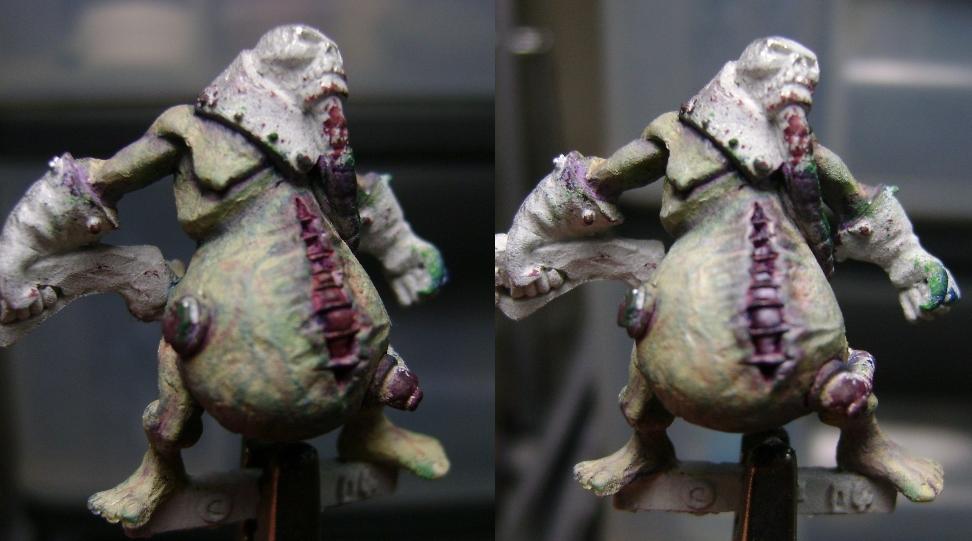
Step 4: Apply a series of washes to the model. The washes were applied at specific locations, the intent being not to cover up the skin color. I applied in order, GW Leviathan Purple, GW Orgyn Flesh, GW Thraka green, GW Asurman blue and then finally a glaze made from GW Griffon Sepia. The glaze is applied to tie all of the other colors together so the final look is not to stark or contrasting.
Step 5: Go back and apply thinned down GW skull white to the model as a highlight. This color is very thin, approximately 1 part paint to 8 parts paint.
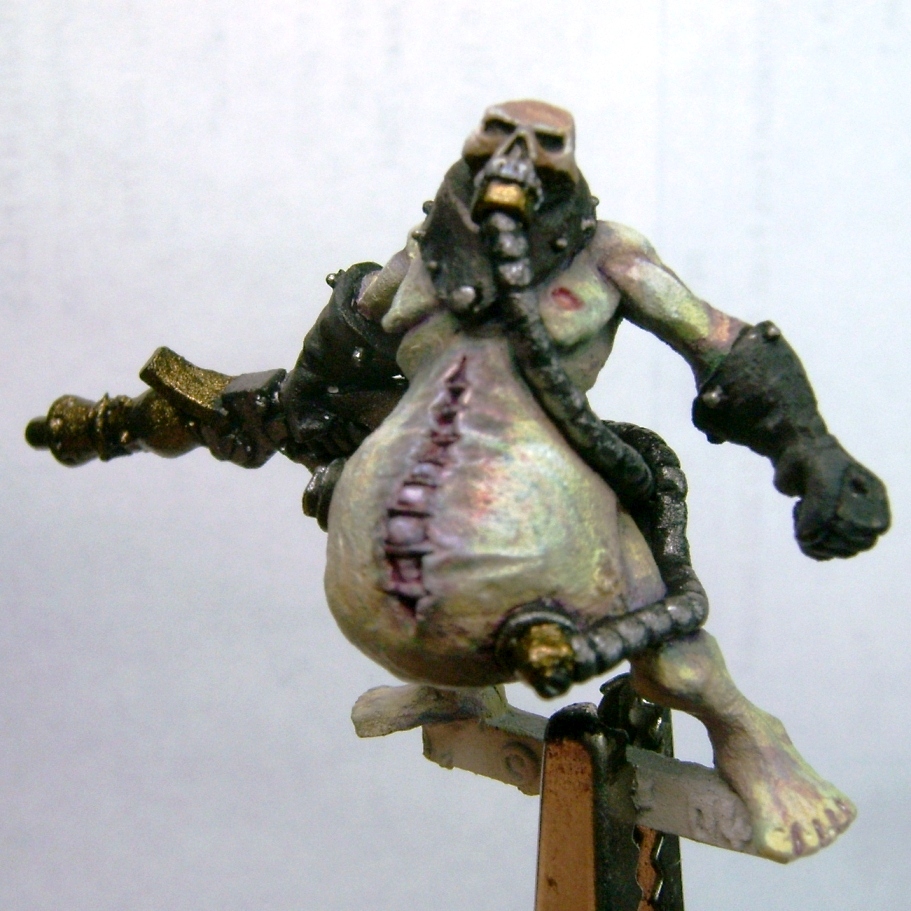
Next steps are finishing the model painting the skull, gloves, weapon and other accessories. This model was painted in about under 2 hours, most of that time waiting for the thin paint to dry, so this techniques will lend it self well to assembly line painting because you can work on other models while the paint is drying. It is a simple technique that can add just a little extra interest in your models. I hope you find this article was helpful.
What things to you all find as a challenge or daunting? Drop me a note, I’m more than happy to offer my thoughts on painting minis or models!
http://garness.blogspot.com/

