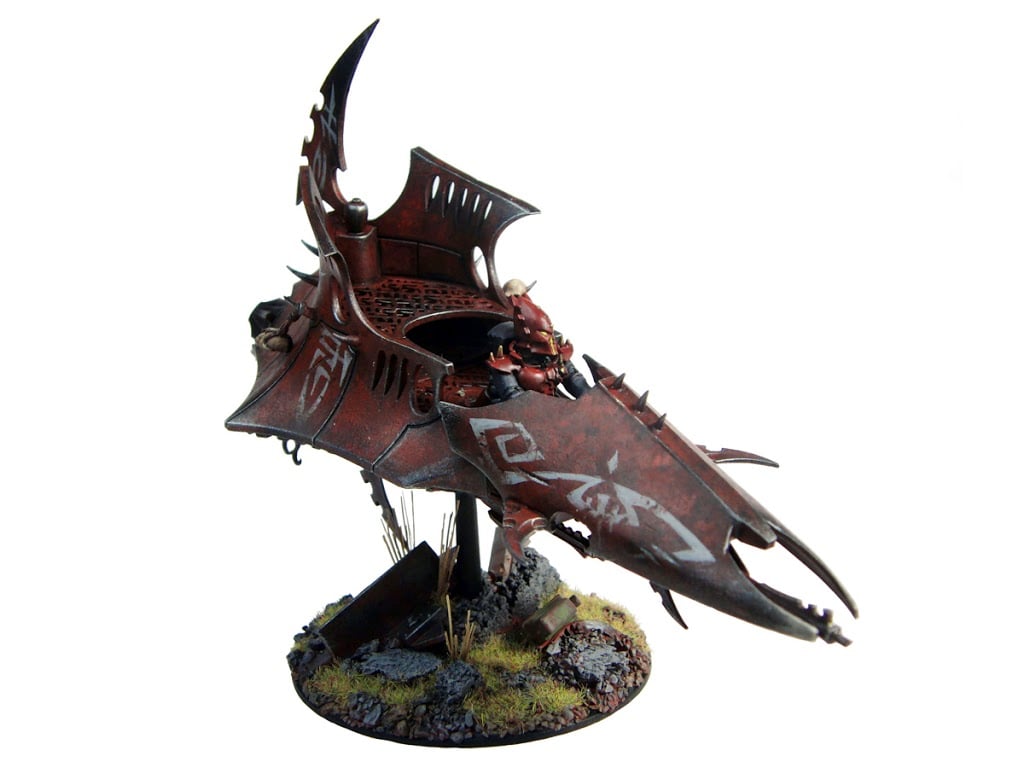
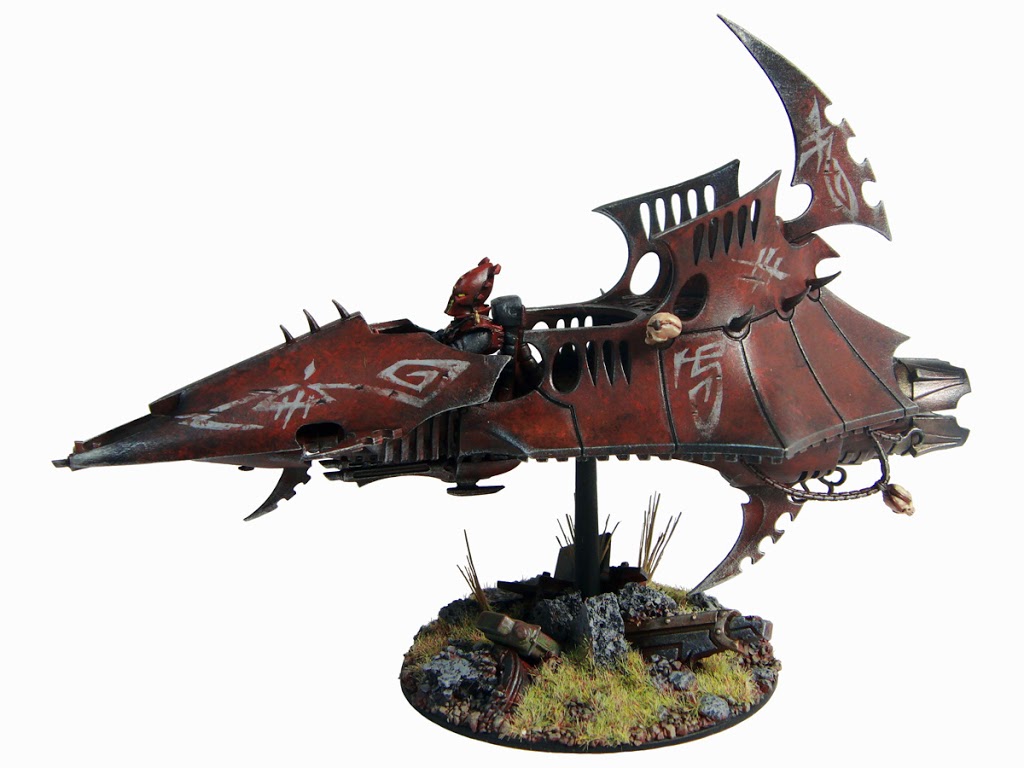
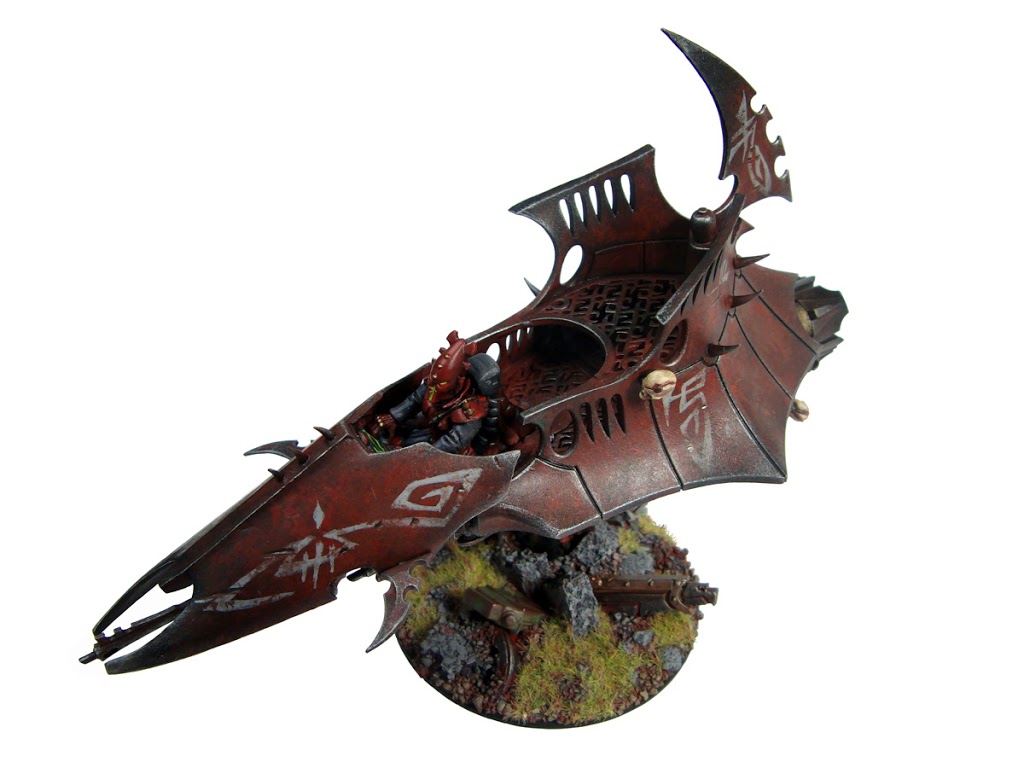
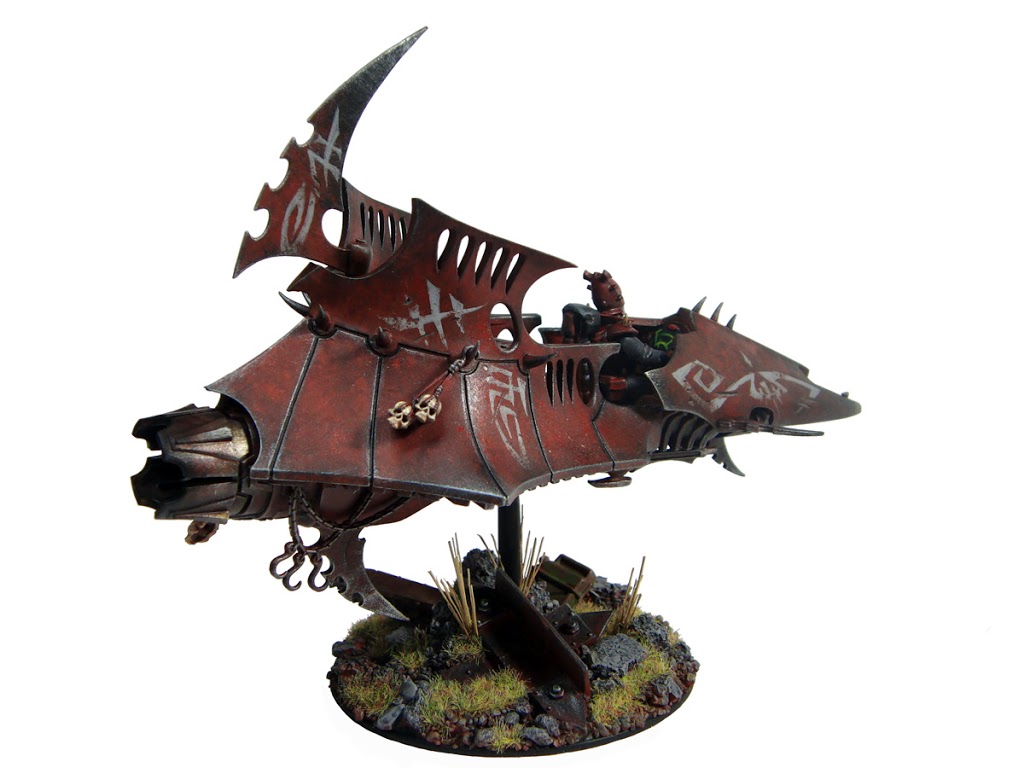
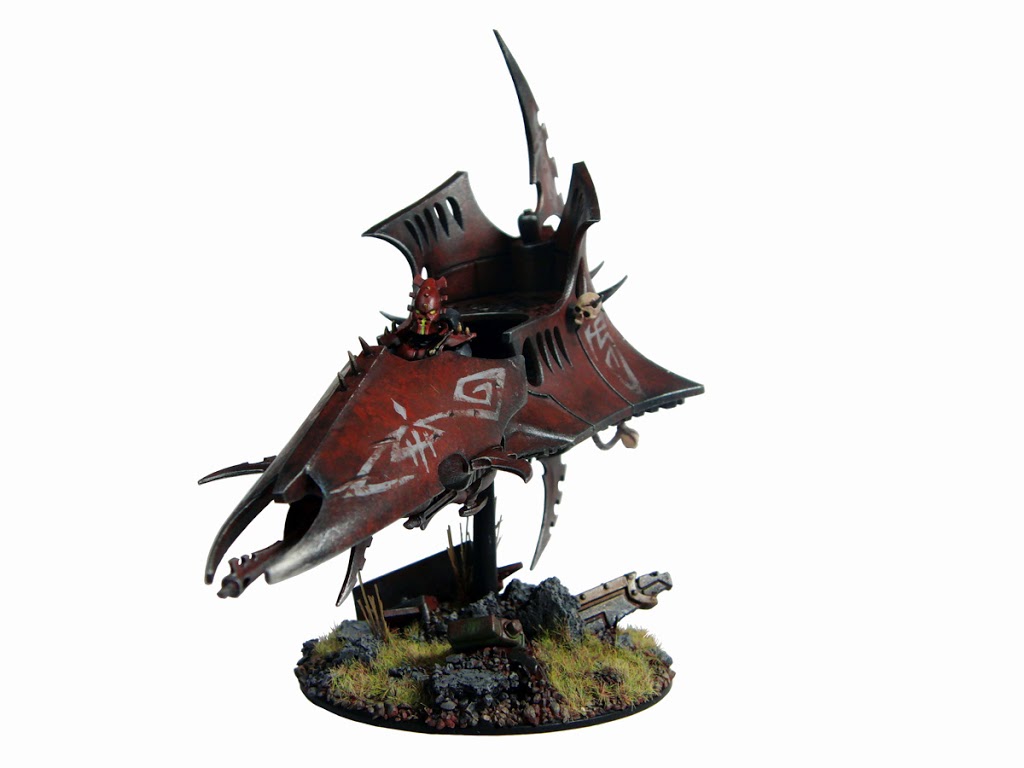
WINNER: BDub’s-Venom Walkaround & Tutorial

BDub has written up a piece on how he created his amazing winning entry to the SpikyBits Venom Challenge. Lets dive right in!
I have been actively pushing myself into participating in more contests these days, both to challenge myself, and to get more involved in the community. Some of you may remember my entry into the Warjack/Warbeast Challenge this summer. The Venom Challenge seemed like a great combo contest – a chance to do both some conversion and painting. And while I feel like my painting is somewhat weak, I can’t resist a good kit bash. So, a big thanks to Spikey Bits and Bell of Lost Souls both for putting this thing together. Now for the nuts and bolts!
Several weeks ago I had purchased some Reavers on a lark, because I really love their design, and I had plenty of Vypers on hand from back in my Eldar days. After looking over other peoples designs and reading the description of the Venom a couple of times, I decided I needed a Raider kit as well. From the very start I had wanted my design to look at home sitting on the table next to a new Raider or Ravager. So even if I didn’t end up using the Raider kit (not likely) It was going to be important to have one on hand to copy its lines and shapes.
I had a feeling that most designs for the venom would either be Raider/Reaver bits glued to a Vyper, or the back portion of a Raider married to a Vyper or similar vehicle. I wanted to avoid these options for a few reasons. First, I felt it would be hard to disguise the Vyper’s lines and make them match those of the new Dark Eldar kits. Secondly, with a Raider kit on hand to dry fit ideas, I quickly realized that using the back-end would make the Venom overly wide bottomed in appearance. I wanted my Venom to match the Raider’s lines, but not compete with its dimensions or silhouette. Also, The Raider’s engine arrangement is too complicated and overpowering for a smaller craft like the Venom, so I needed a way to scale this down. My solution for both was to use just the front of the Vyper and the the front of the Raider spun round.
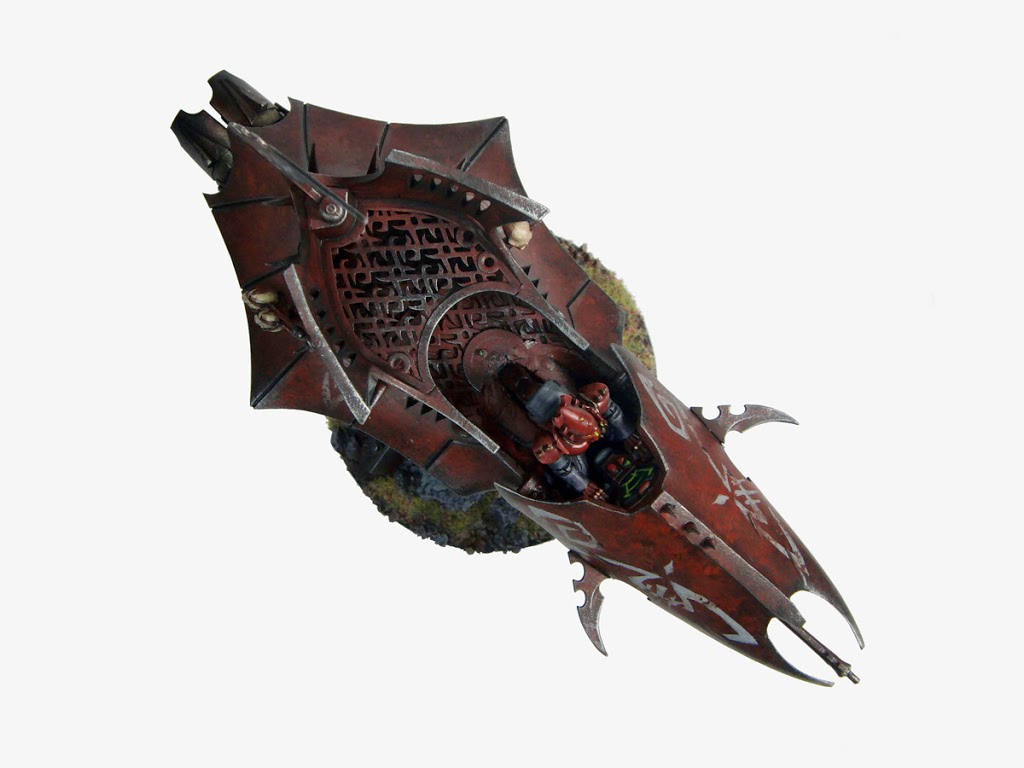
To start, I partially assembled the Raider, gluing the hull sides, floor and bottom together. Then took a rough guess as to where to cut this assembly in half – about three quarters of an inch back from the curved hand-rail. Once cut, I test-fitted this with the Vyper front to get a sense for the lines I was getting and was very pleased with the silhouette. In particular, the sloping lines from the upper handrails angled down nicely, giving a very exotic and fast looking appearance. Of note is that cutting the hull like this left a rough flat edge that would stick out past the side of the Vyper section. I cleaned this up by shaping this into a curve and then fronting it with plasti-card, shaping and filing it into a smoother and narrower body line that from the top matches curves with the lower edge of the nose cowl.
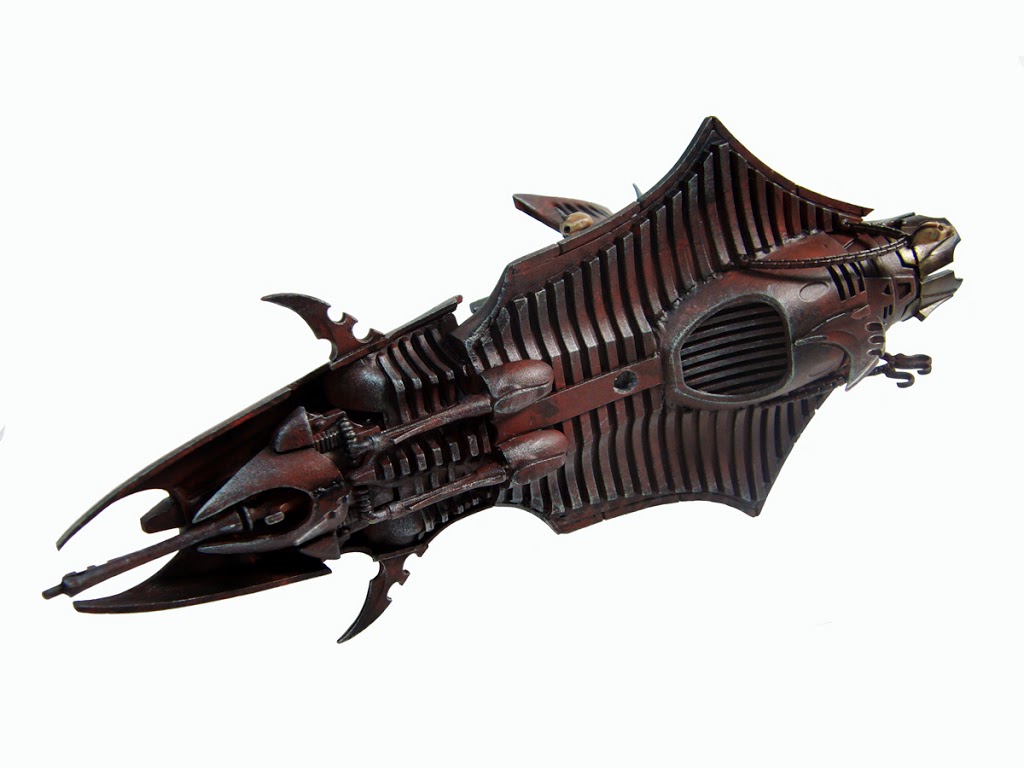
I knew I wanted to use the main engine of the Raider if possible and settled on cutting the intake and engine nozzle loose form the back half of the Raider bottom. I cleaned this up and glued the top half of the nozzle to the loose engine and began dry-fitting this to the front bottom half of the Raider. I found that the engine nozzle lined up beautifully with the cut-out for the shock prow. From here I cut down into the bottom of the Raider a place to seat the engine. This was one of the hardest and messiest parts of the project because of the difficulty in cutting a smooth line through the ribbing on the underside of the ship.
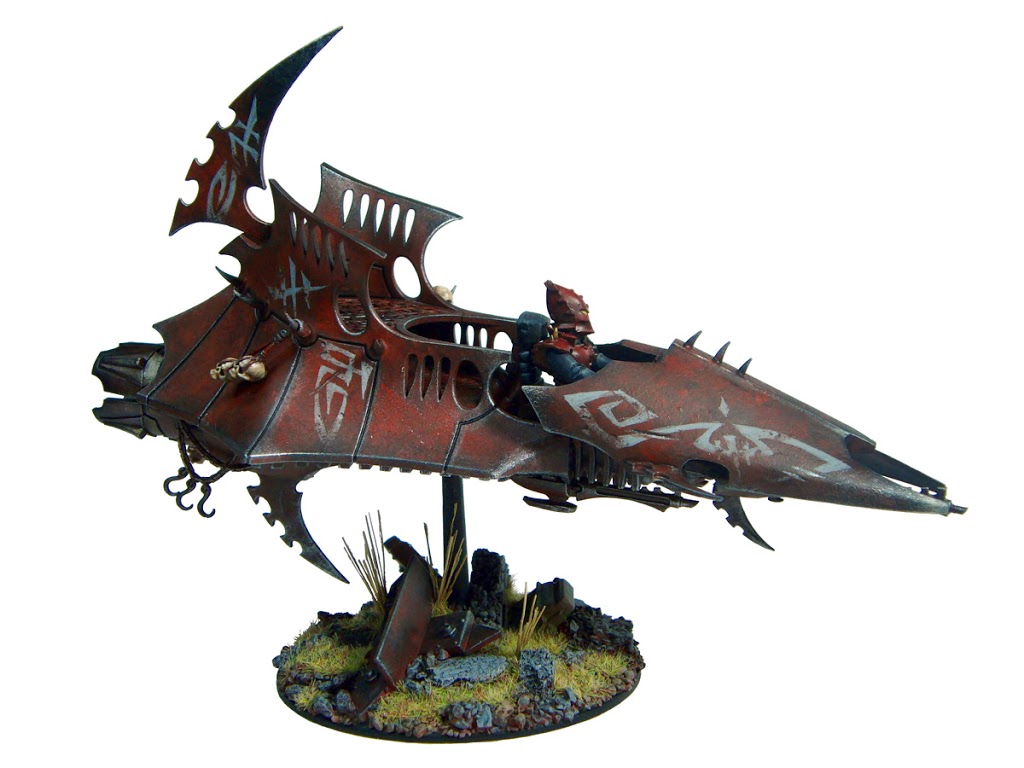
For the front of the Venom, I took my cues from the Reaver Jetbike cowls, noting how they had a squared-off spine running down the top center, and ovoid cutouts with a blade like appearance. To do this with the Vyper canopy the first thing that had to go was the roll bar portion over the drivers head. I cut it loose following the natural curve where the roll bar intersects the rest of the cowling – this gives a sort of bat-wing edge to the cowl almost immediately and streamlines the whole look. From here I cut two ovoid shapes in the location of the small vent like structure at the bottom center edge of the Vyper cowl. This let me get rid of that obvious Vyper feature and made the cutting easier to do. Next, I glued a strip of square styrene rod down the center of the cowl leaving a portion extended past the front lip of the cowl. Later I would shape this with a file to taper it a bit. I used green stuff to fill in and level out the depressions in the double-bubble design of the Vyper cowl. I felt this was absolutely necessary to kill the distinctly Eldar look of the canopy. After letting the green stuff set up over night I filed this smooth with emory sticks flush with the edge of the styrene rod. The result is a smooth, aggressive shape that looks faster and deadlier than the Vyper’s and echoes the Reaver’s own lines.
While fitting the Vyper pilot seat into the Raider portion I noticed that the Bottom of the Vyper had the same ribbing that all the Eldar and Dark Eldar vehicles have and this was an opportunity to use that to tie the two craft together nicely. I cut and squared the bottom of the Vyper to sit flush with the ribbing on the Raider half. This also necessitated carving a recessed semi circle out of the decorative floor of the raider and filing down the Vyper around the pilot seat to match that shape in order to set the Vyper back far enough to make the ribbing meet on both halves. Had I started with a Vyper that wasn’t glued together in this area I would have left/cut off those portions and slotted the seat directly into the Raider floor for a cleaner fit.
The next issue to resolve was the weapon locations. I used the shuriken catapult bit of the Vyper as the base since it already fit there. Using the blast shield from the Raider’s dark lance, I fashioned a skid plate that echoed the shape of the nose-cowel and used this to integrate the main weapon (splinter cannon) into the center under the nose. I cut down the shuriken catapults till they were just little ammo bins fitted next to the new skid-plate. Since I didn’t have a shuriken cannon, I had to reshape the end of the dark lance from the Raider kit. The Splinter Rifles are from the Reavers and are filed and shaped to fit on the bottom front of the Raider portion.
After all of that, there was just polishing off the silhouette with appropriately placed blades, being careful not to overpower the hull lines. I opted to use a piece of the Raider’s rudder, cut down, and inverted, and place in the sport reserved for the Dark Lance mount on the Raider. Placing another blade on the engine intake gave a nice continuous line through the profile of the vehicle, giving it a deadly shark-like look. To smaller blades were fitted horizontally on the nose cowl, behind the oval cut-outs to break up the wedge appearance when seen from the top.
The conversion took so long that I only had 2 days to paint, so i settled on something I knew I could do in time and it also fell in line nicely with the fluff I had in mind. I had joked with my friends that I wanted to give people tetanus just by looking at it. I think there is much more horror in a rusty knife than a clean one so in my mind this paint scheme was very Dark Eldar. Here is the fluff I sent in with my submission;
Jagged – The 3rd Venom of 10 in the pirate fleet of Duke Sepsis. Know for hiding in asteroid fields and spacehulk debris for unwary passers by, or raiding the bowels of Hive Cities, all ships in Sepsis’ fleet are devoid of decorative paint and other cosmetic affectations. The ships are simply allowed to rust and patina – the better to blend into their usual hunting grounds. However, the pride of many of the crews gets the better of them, so a certain amount of tribal and squadron identification is permitted, if only to pacify the more treacherous members of the war-band.
Painting was done using a straight forward technique I developed when doing Ork Def Koptas and Truks. Starting with Krylon Ruddy Brown Primer as your base, wash this with a thin black and/or dark brown paint to make the lines and detail pop. I find this helps me perceive the shaped better as I’m working. After this is dry a begin to stipple and mop the model in a patchy haphazard way to break up the evenness of the primer coat and create patches of differing value to paint over. It’s much harder to get the rest of the paint job away from the smooth appearance if you skip this step. After this, begin lightly stippling with a well used brush the following Vallejo Model colors; Cavalry Brown, Flat Red, and a touch of Light Orange and/or Scarlet. I used these straight and unmixed and any areas that I think have gotten out of hand I tone down with Flat Brown. I alternate this as needed all over the model until I am satisfied with the look. After this come a lot of slow and steady build up with a dry-brushed Black. The idea here is to give the appearance of the rust either being worn off or not allowed to happened due to wear and tear and handling of the vehicle. It also mutes the saturation of the rust color as it approaches the models edges. After this is a subtle dry-brush of Oily Steel and then edging in silver on the most worn or sharpest areas. Note that on broad surfaces with shallow edge angels I will sometimes us Gunmetal Grey and edge in Oily steel – this is a subtler approach and looks lest sharpened.
To finish up, I spent about 45 minutes sketching runes before chancing my nice rust-job. The runes were painted in a thinned down Medium Sea Grey by Vallejo Model Color and then stipples of Flat Brown and Cavalry Brown were used to weather and blend in the rusted bodywork. While waiting fro things to dry I constructed and painted the base, which is composed of a few left over GW scenery bits, cork tile and ballast.
I hope you find this helpful in you own Venom projects. Feel free to PM me in the Lounge with specific questions I may not have covered.
Thanks,
BDub

