Hobby SHOWCASE: Daemon/Chaos Aegis Defense Line

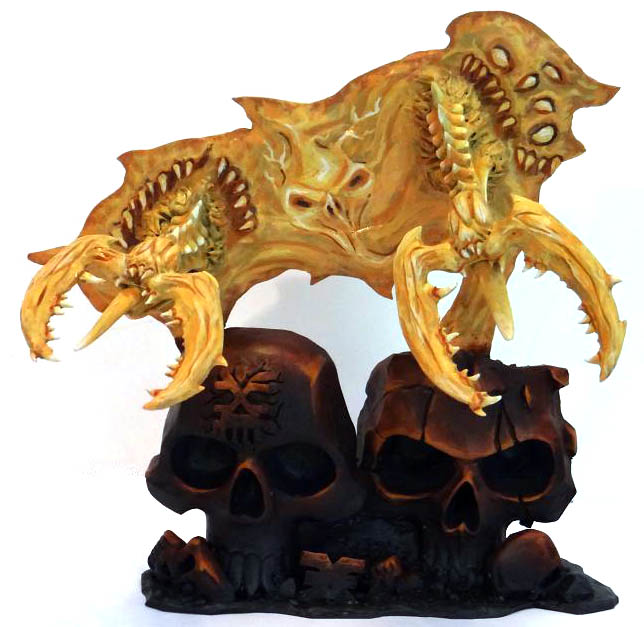
My khorne daemon army needed something to give it a base for protecting objectives and some anti-flyer capability so a defense line seemed just the ticket.
Showcase Conversion by Isotope99
I’m a big fan of the new fortification options in 6th Edition, but as usual GW has only given us imperial versions and I’m too proud to go third party.
If you’ll forgive me a tactical digression, daemons actually have great troops for manning a defense line being pseudo-fearless, decent BS, generally not too shabby in assault and often you have to get through some scary stuff to get to the squishy. Even ignores cover weapons like Smart missiles and the baleflamer will have trouble getting rid of every single one with their invuln save.
– Bloodletters are BS5 on the quad gun and benefit from the extra point of cover save as well as being tougher than average to run off in assault;
– Plaguebearers get a 2+ save without going to ground and TL BS3 still hits 75% of the time;
– Daemonettes are BS4 & rending if I’m reading the rules right;
– Horrors get their re-rolls of 1, especially handy if they have to go to ground for a re-rollable 2+;
– The line can also block LOS to a portaglyph with OK scatter.
Construction
I was raiding my bits box for interesting stuff and started fiddling with the leftovers to see what interesting warp creatures I could make when I rediscovered the idea of a warp rift (I was originally going to do this for an all Legion of the Damned space marine army with vehicles cut in half and emerging from warp portals but never got round to it).
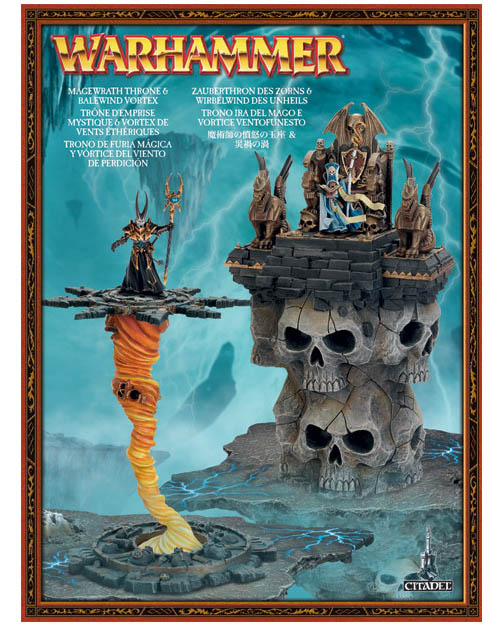
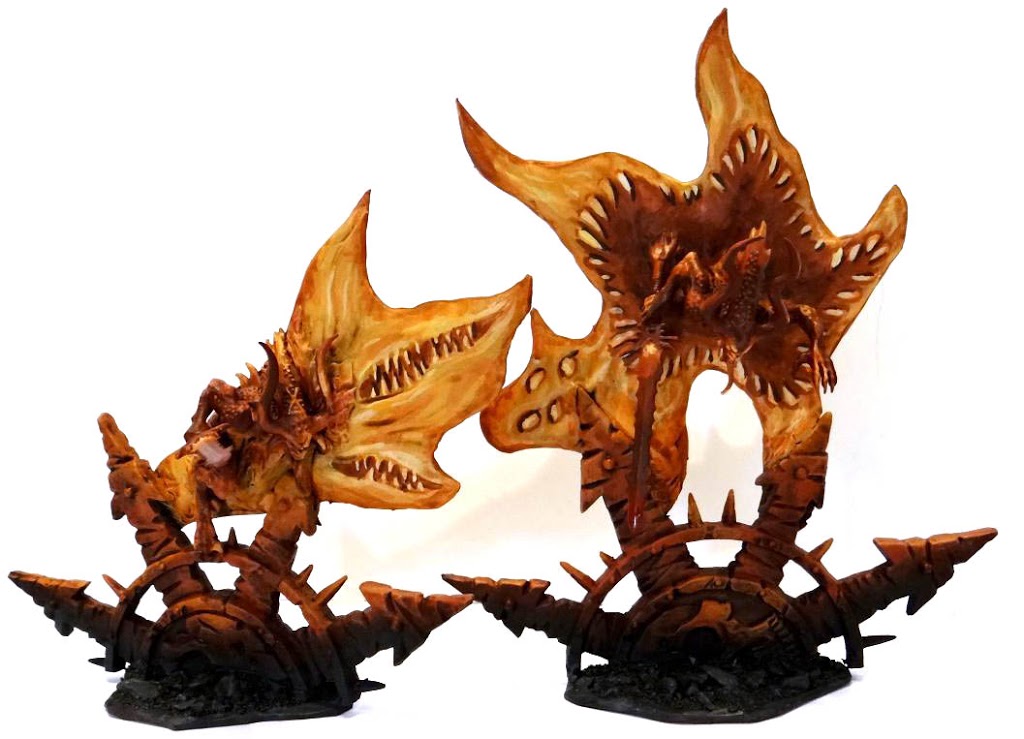
The line itself is mostly made of parts from the fantasy storm of magic arcane fulcrum (I already used the vortex on my dark eldar webway). It conveniently comes with lots of skulls that are approximately the size of the real aegis line pieces, slightly taller but not unreasonably so (about 0.5”).
Ingredients
– 1 Arcane Fulcrum;
– Thick plasticard for the bases (4*5” lengths + 4*2” lengths);
– Thin plasticard for the rifts;
– Milliput (at least 2 packs but it’s pretty cheap);
– Sand, slate etc.
Optional – Any daemonic bits or ‘victims’ you can get your hands on, particularly good sources are:
– Slaughterfiend bits;
– Chaos spawn;
– Spares of your chosen troops or enemies.
Putting It Together
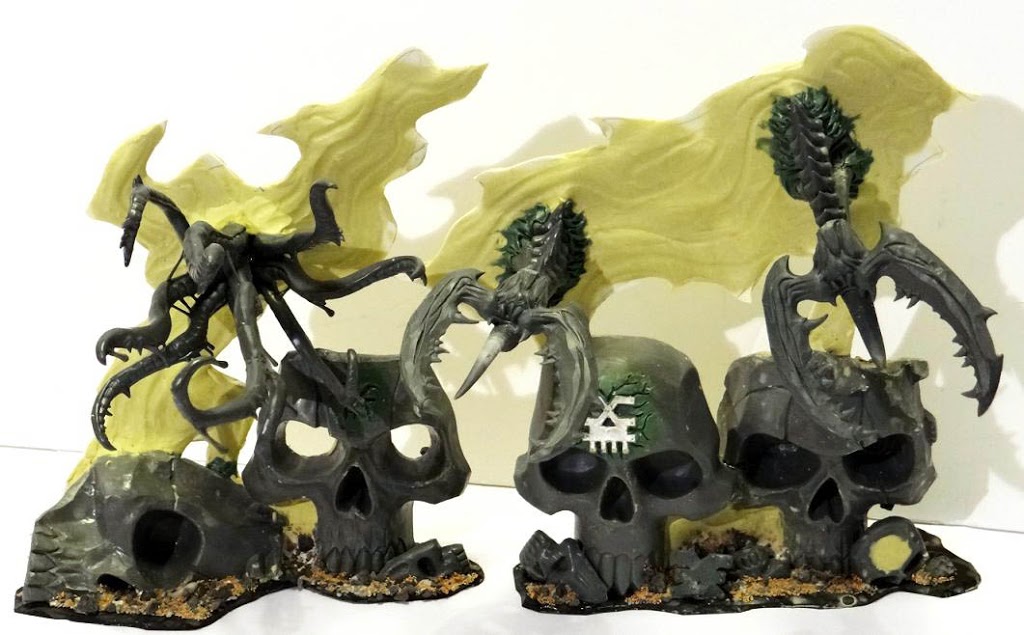
1. Step 1 is to separate all the skulls from the tower thingy. The fulcrums are unfortunately inferior quality plastic to GW’s normal kits so you’ll need a strong saw and knife to cut them up (watch your fingers, I speak from experience). The kit comes with enough, including the big chaos symbol and gargoyles and some can be sawn in half to make up the 12 panels of a full aegis line.
2. Step 2 is to cut up the base pieces and edge them off to look like broken rock, you can then glue on the skulls at whatever angles you want. A jumbled look like they’ve fallen from the sky or are being forced through the ground is better in my opinion.
3. Step 3 is to fill the backs of the skulls with milliput. This step is optional but looks better. Leave some open plastic to glue the rifts to though.
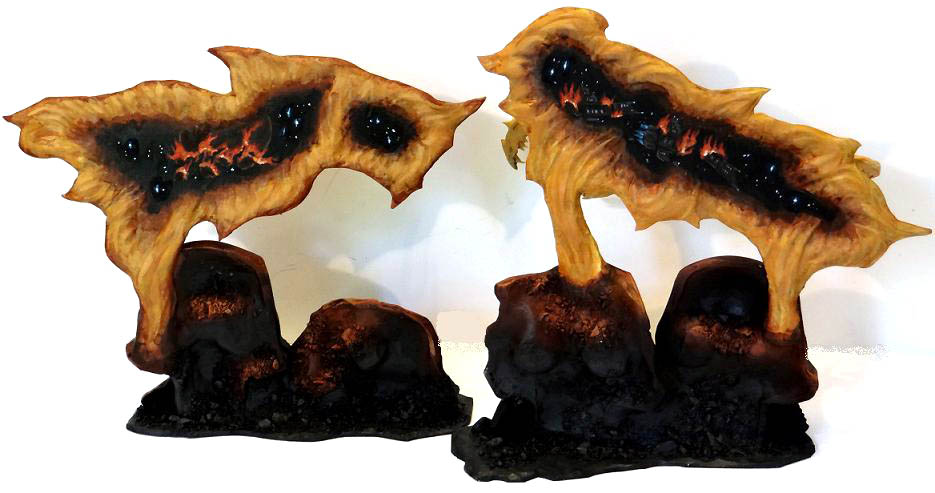
4. Step 4 is to cut out your warp rift pieces from the thinner plasticard and attach to the line, big scissors will do the job to make it look like a ragged tear in reality. By anchoring them at limited points, you can have it suspended in the air which looks cool and helps get round any LOS complaints (you can generally see between the rift and the skulls as you would be able to with a normal defense line, and hopefully everyone knows it’s a 4+ cover save.
5. Step 5 is to attach whatever escaping horrors you want coming through the warp. This can include as much or as little as your budget and bits box will give you. Green stuff/milliput eyes, crude mouths and fire can make up for any big gaps later.
Remember, this is chaos so you don’t need a rational explanation for stuff. You can stick just about anything in the warp rift, disembodied faces, floating dismembered bodies, mutated horrors etc.
6. Step 6 is to texture the rest of the rifts. Spread milliput as thin as you can over the exposed plastic then press patterns into it with the rounded end of a paintbrush before smoothing with water. Finally, flock the base with whatever rock/sand like material you would normally use.
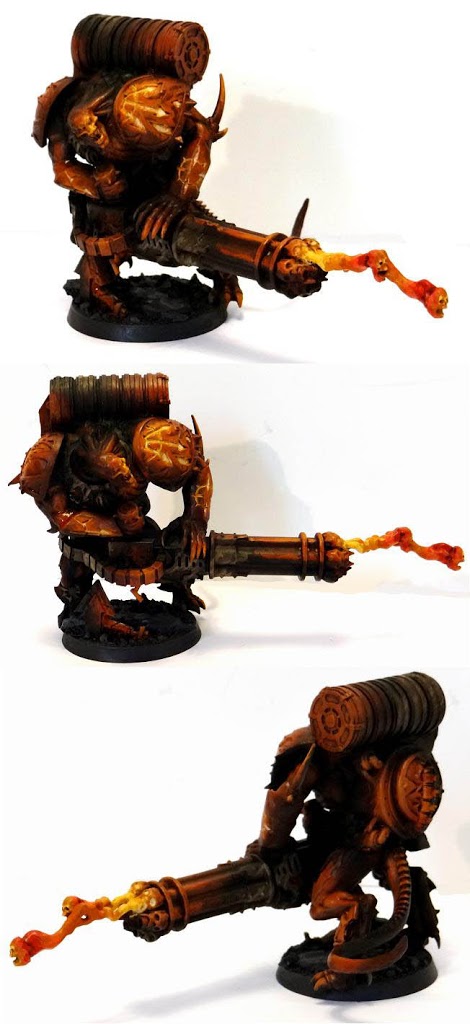
7. Step 7 is the gun emplacement. I’ve done a daemon prince with chaingun as a separate conversion project (because it was cool) but the fulcrum vortex works fine as the summoning of a warp storm, the flat top needs something on it but a spare daemon as a herald summoning the storm should do the job. You can cut it off short or mark the actual height of the quad gun’s barrels (about 2.5” up – where the ammo pack is on my guy) when painting, for measuring LOS from. Alternatively there are plenty of other Chaos guns you could slap together to make an emplaced weapon of about the right size.
Painting
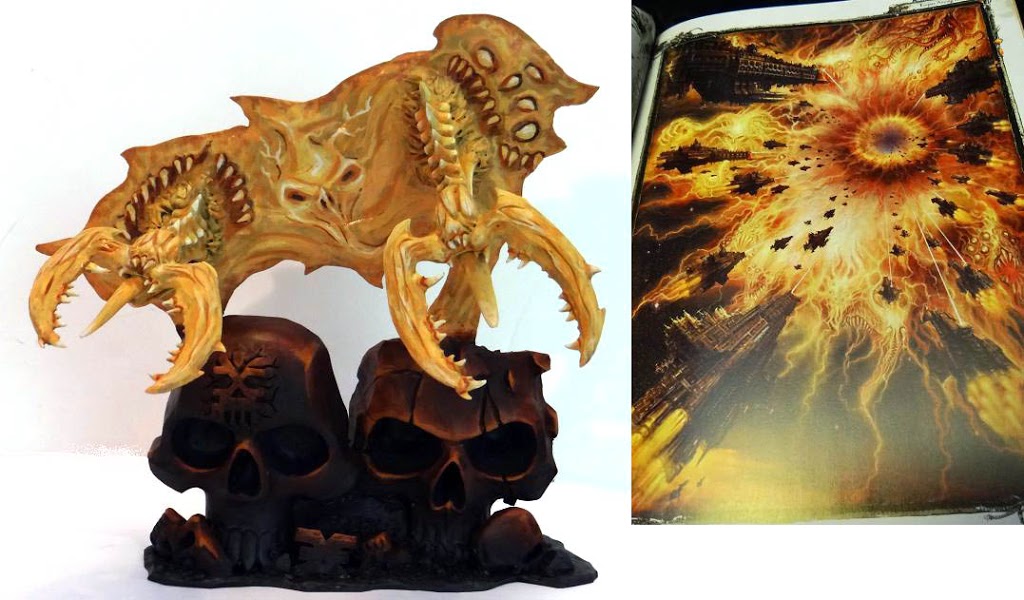
As with modelling, painting a warp rift can be whatever you want. If you’ve got a decent printer you could scan your favourite 40K artwork, print it and stick it to the rifts as a portal to somewhere else or freehand the same, though it’s difficult getting the detail.
For mine, I chose to borrow from the artwork in the rulebook as it fit the extreme OSL style I’m going for on this army. The blend of 2D freehand into 3D models seems to work.
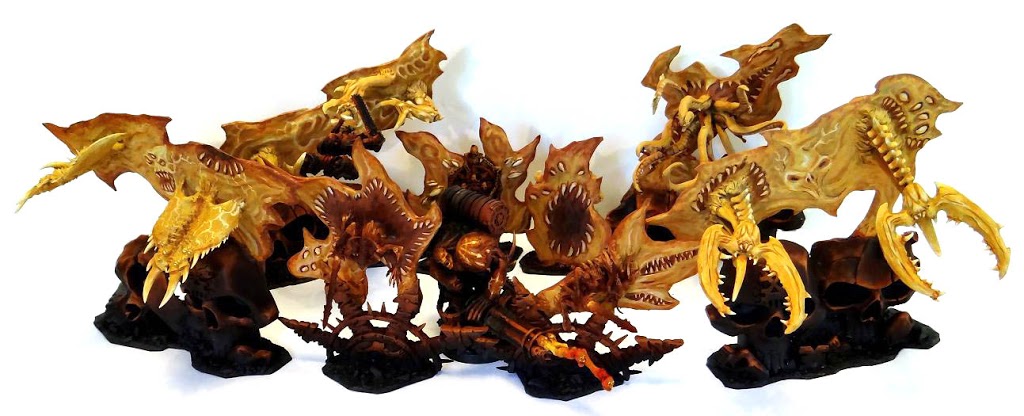
…And the final product, suitably intimidating and chaos-y. Khorne says: “Come get some puny mortals!”

