Warmachine: Painting the Gobber Tinker Pt. 1

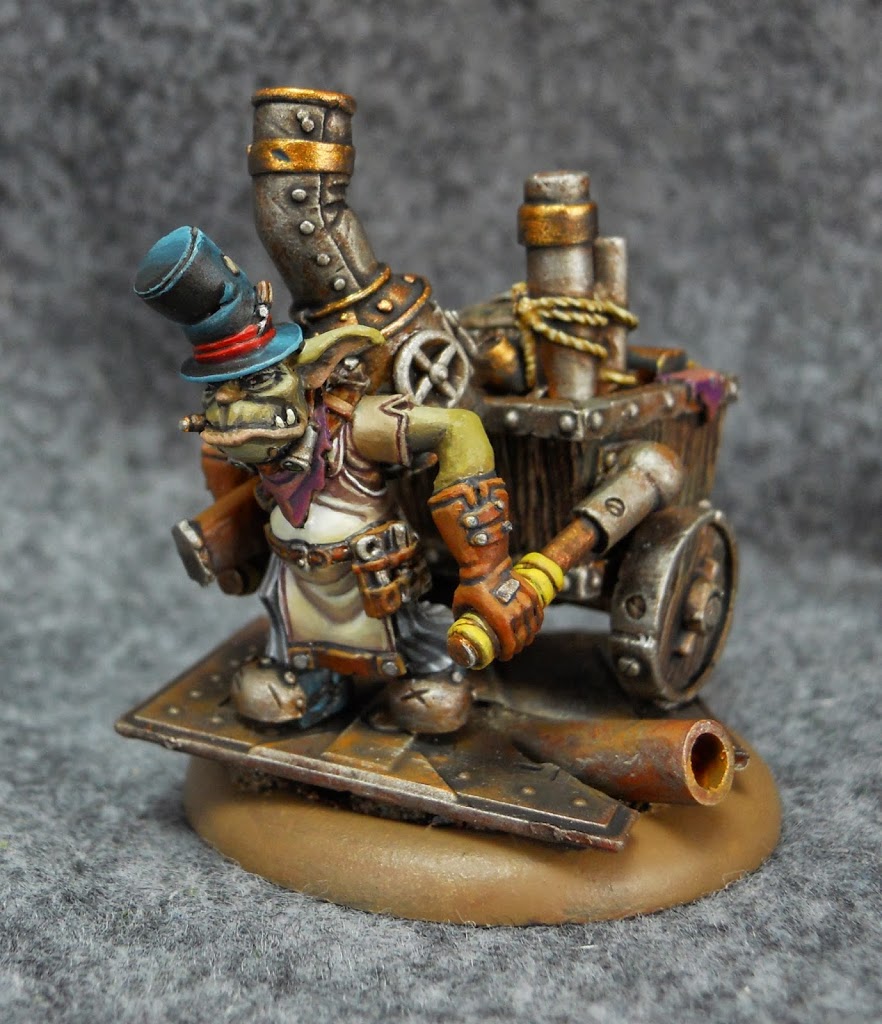
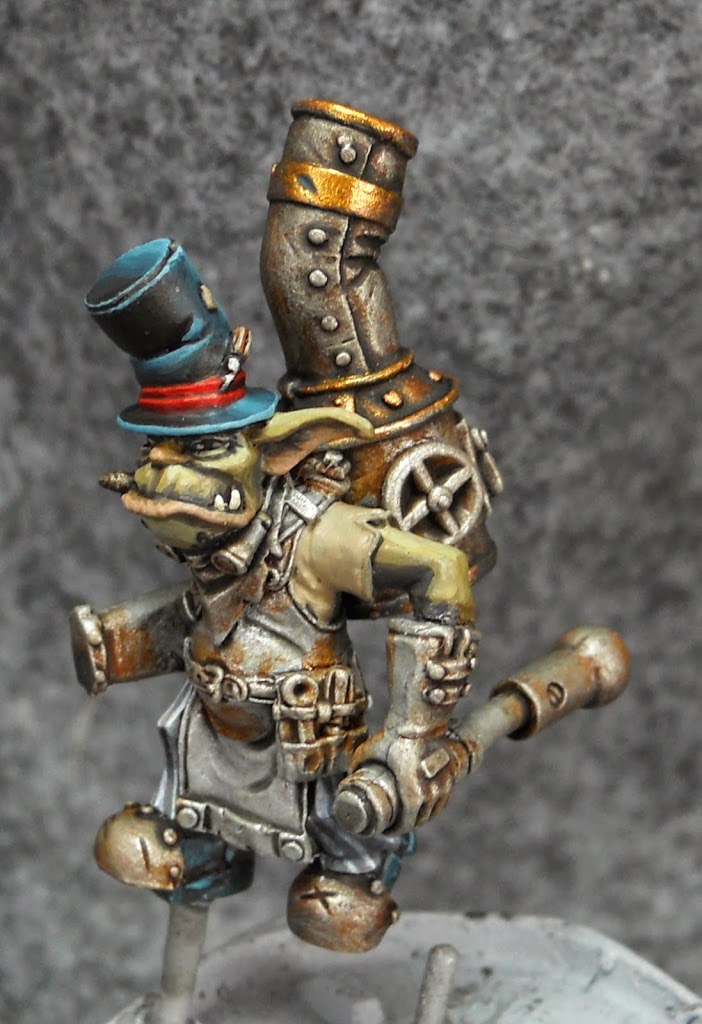
It’s just a solo this time for my latest Warmachine painting article: the new(ish) Gobber Tinker.
Before we go any further, I know what you’re thinking: “Hey that’s a Hordes model not a Warmachine model.” Well, this guy might have been released in Hordes:Gargantuans, but he’s a Mercenary first and a Minion second. Where do you really expect to see him – chasing around War Wagons and Animantaraxes (Animantari?), or fixing up Galleons and Earthbreakers? I think we both know the answer.
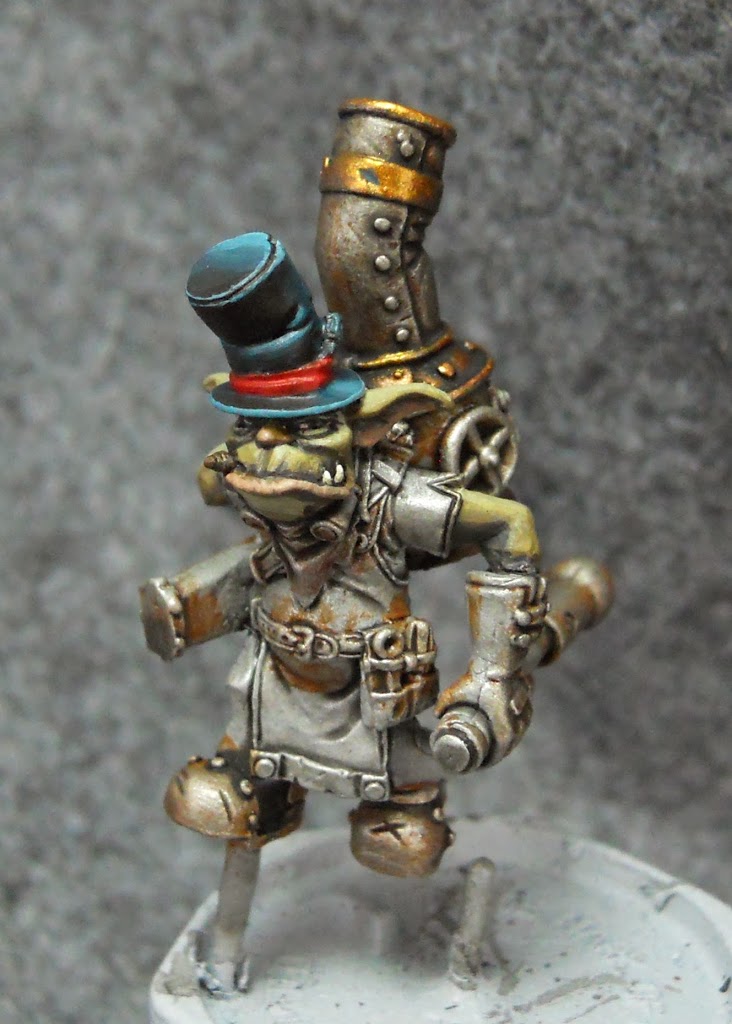
Moving on, after priming him a light gray, I paint all the metal areas with Bloodtracker brown. Like most of the paints I use, this is from the P3 range.
The brown areas are all drybrushed with Radiant Platinum before getting a wash with my custom metal mix: a mix of 2-1-1 Agrax Earth, Nuln Oil, and Guilliman Blue, thinned down with a few drops of water plus a few drops of matte medium to make sure it still binds properly. All the washes are GW. I’m moving on to copper areas next. These start off with a base coat of Coal Black.
The Coal Black is drybrushed with Hashut Copper (GW).
Then I wash it with the same metal wash.
Next I gently drybrush the copper with Rhulic Gold. Then I start on the gobbers skin with Traitor Green.
I add Umbral Umber and Exile Blue to the Traitor Green to shade the skin.
Sulphuric Yellow is added to the Traitor Green as a highlight.
Some Thrall Flesh is added to lighten it up even more. The eyes are also painted at this time using Ryn Flesh.
Next some Bootstrap Leather is painted on the nose, lips and ears.
Midlund Flesh is blended into the Bootstrap Leather to highlight it. I think it always helps to have some fleshy parts on your greenskins. Regardless of what system they’re from, it really livens them up and keeps them from feeling too plastic.
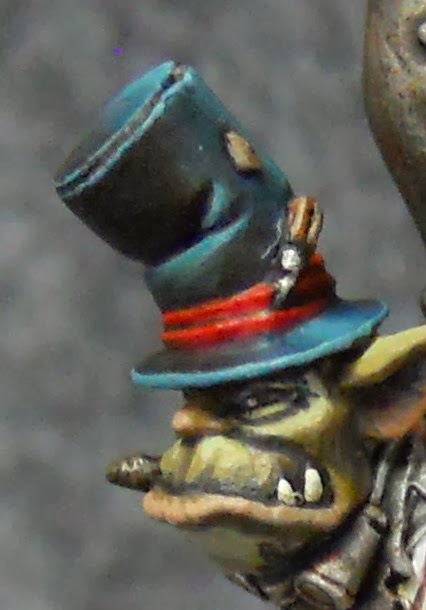
The hat is next. I start it off with Coal Black.
I blend in some shading with some Thamar Black toned with some Bloodstone to give it a warmer feel.
Highlights are added to the hat with Trollblood Base. For final Highlights, I add a little Underbelly Blue to the trollblood base. The shoes end up getting the same treatment as the hat, but I forgot to start on them until a little later. 🙂 I also begin on the hat band with some Skorne Red.
I add a little shading to the band with a mix of Umbral Umber and Thamar Purple. I also start adding some definition to that little awl/screwdriver he has tucked in up there.
I try to put a little wood grain on the screwdriver thingie with some Bloodtracker Brown and Hammerfall Khaki. Meanwhile, the patches on the hat are painted with Gun Corps Brown followed with a little Hammerfall Khaki as a highlight.
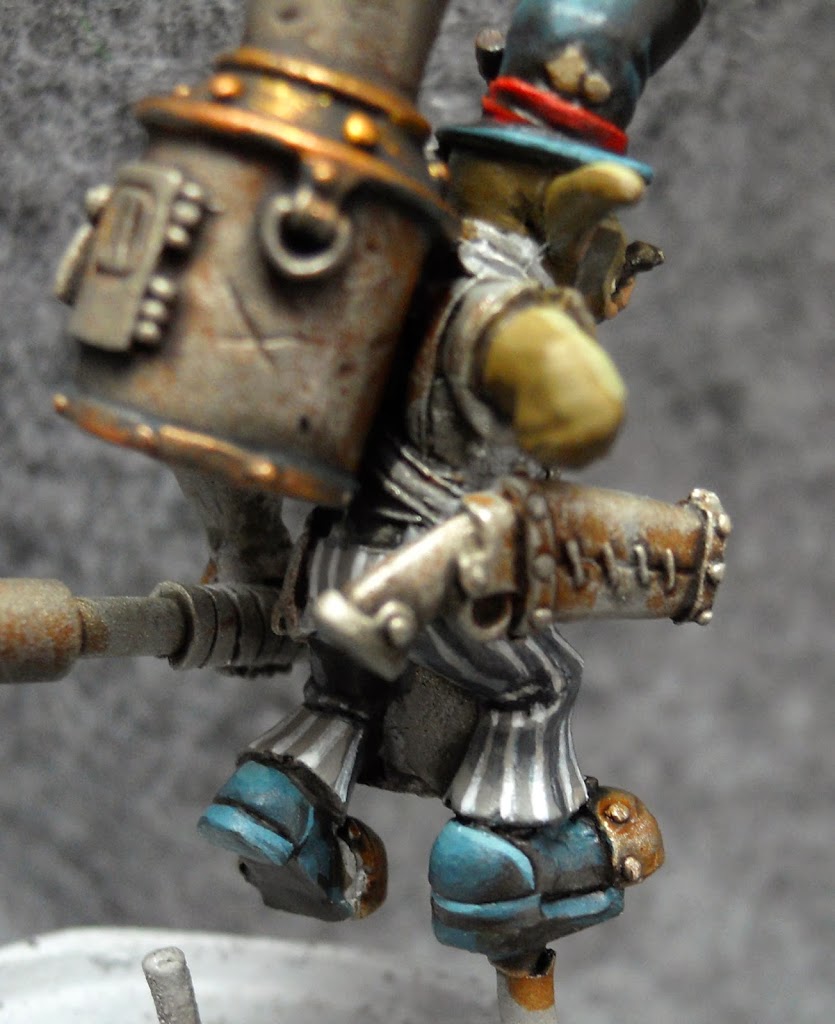
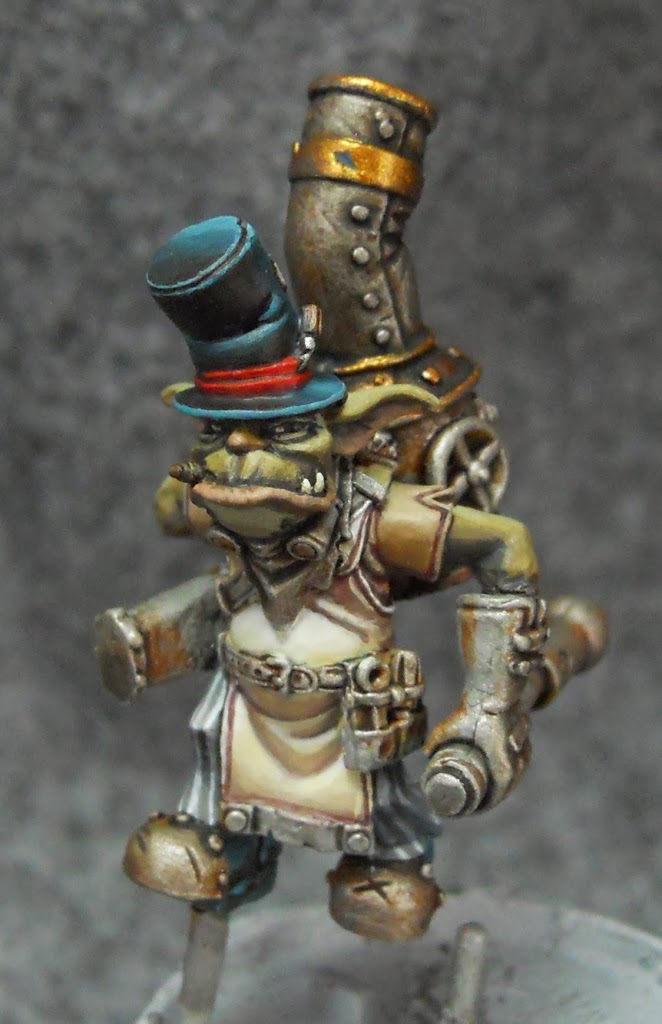
I thought some pinstripe pants would go nicely with the Top Hat. I start these off with some Ironhull Gray. Then I carefully add some lines of Morrow White.
I apply a few layers of my metal wash from before in the recesses and under any overhangs. After a couple of applications it starts to look like shadow. In a few places it gets a bit too dark and I have to reapply my stripes. Wherever this is necessary I use Trollblood Highlight (a really light warm gray) instead of white so the contrast isn’t too unnatural.
Its onto the shirt now. I start it off with some Hammerfall Khaki.
This is shaded first with Gun Corps brown, then with an Umbral Umber/Beaten Purple mix in the recesses and in the lines along the trim. Then I start on the apron with some Menoth White Base.
I shade it with Hammerfall Khaki. In the darker recesses I mix some more of that Purple/Umber mix in with the Khaki to make it even darker.
I blend the Menoth White Base into the Khakis some more, then highlight it with Menoth White Highlight.
I very sparingly add some Morrow White in places as a final highlight. Then I run a thin line of the Umbral/Purple all around the trim to define it.
~ And that’s it for part 1. I’ll be back soon to finish him off.

