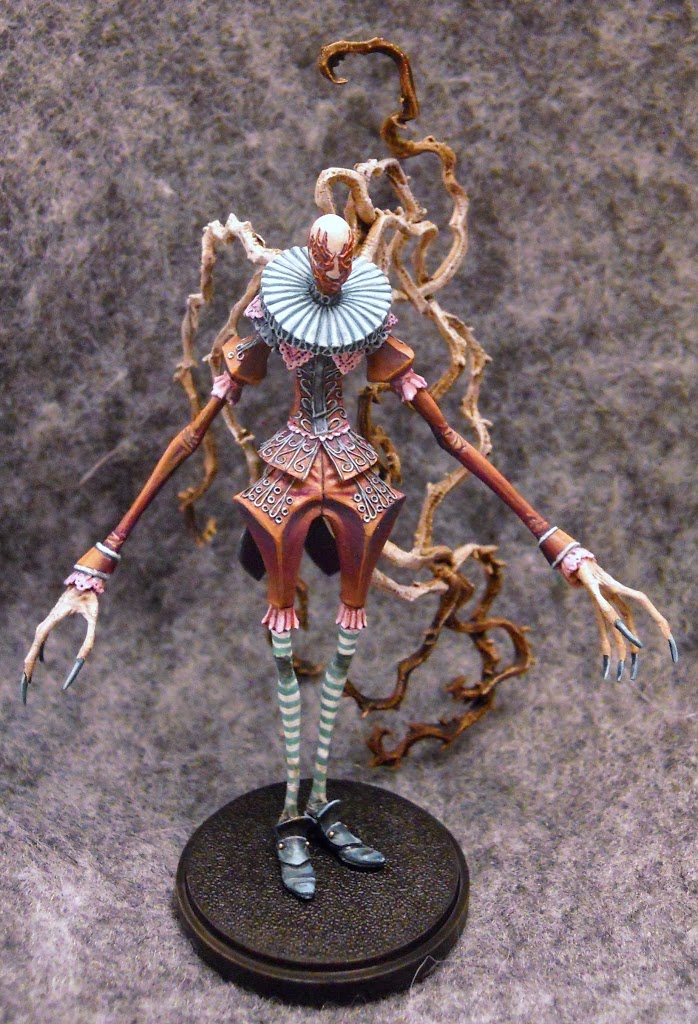
Kingdom Death: Painting the Slender Man Pt. 1

I mostly assembled him before priming, although one of the two groups of tentacles is not glued in place so it can be removed if need be. If you are planning on assembling one of these guys sometime soon, be aware that the left (his left) and lower group of tentacles connect. If you glue the pieces on without releasing this you might be left with too much gap between the two to pieces to connect them properly. I only bring this up because I didn’t notice myself at first. You can see the gap if you look closely enough. But the resin had enough give that I was able to connect the pieces without much issue late into the project. Moving on…
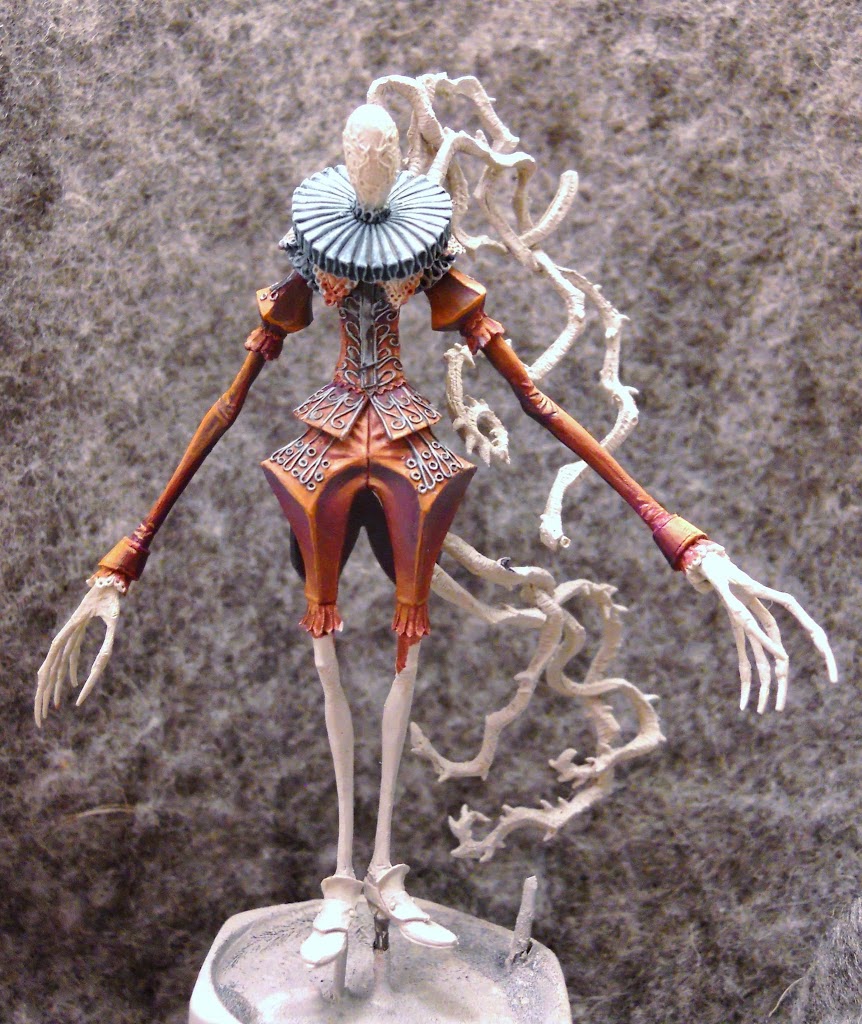
So yeah… lot of stuff going on in this picture. I started with a base coat that was about a 2:1 of Ember Orange and Beaten Purple. These are both P3 colors like all the ones I’ll be using with the exception of some washes. While the base is still wet, I go in with the highlighting and shading. For highlights I mix some more Ember Orange into the basecoat along with some Menoth White Highlight. For shading I use pure Beaten Purple. I use Matisse Drying Retarder to help the paint stay wet a little longer.
As things start to dry I can start to clean them up a little more. I add a bit of Coal Black into the darkest areas (this is more of a dark turquoise than a Black)and continue lightening the highlights with more Ember Orange and Menoth White.
…and after some more clean up with additional highlights and shading.
Next I began to work on all the little bits on his clothes. I kinda want these to be a little silvery in appearance, but first I need to pick them out from everything else. Each individual little thread and ring gets painted with a Navy Blue mix I like to use that’s about 50/50 Umbral Umber and Exile Blue.I also started on his color since I planned to give it an ink wash that I knew would need to dry. The collar is painted Underbelly Blue and washed with thinned down Guilliman blue with just a bit of Agrax Earth mixed in.
I add some Frostbite to the navy and start lightening it up.
Next I add a little more Frostbite.
I move onto the skin, painting it with a 1:1 mix of Ryn Flesh and Frostbite. Then I realize it’s really not time to do the skin yet, and go back to some other cloth areas.The cuffs and frills are painted with a pink I mixed up with Ryn Flesh and Sanguine Highlight.
I give them a purple wash, then drybrush them with a lighter mix of the pink (basically I just use more Ryn Flesh this time around). In a few places some manual touch ups are necessary.
I clean it up a little more with a few final highlight and shadows I that I paint in manually.


