Painting GENCON Winner Dozer and Smigs Pt. 2

And we’re back for part 2 painters! Grab you paintbrushes and follow along.
Part one of the tutorial is here.
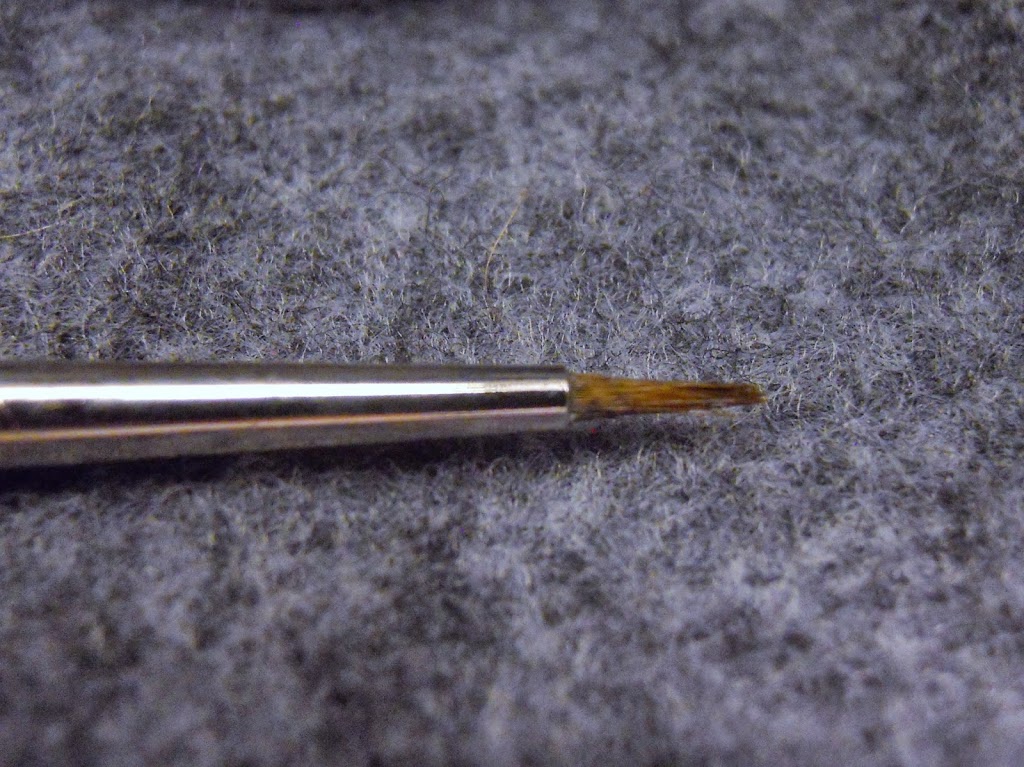
Before I get to the painting, I want you to take a look at the brush I was using for these next steps. It started life as a perfectly respectable Windsor Newton Series 7. It’s a size 0. Pretty small, but a sight bigger than the 000 I use for all my really fine detail stuff. I try to take pretty good care of my brushes, but eventually they start to break down. Over the years a lot of paint has built up in the base of this one, making it harder for it to hold a point. But it does still work quite well for stippling.
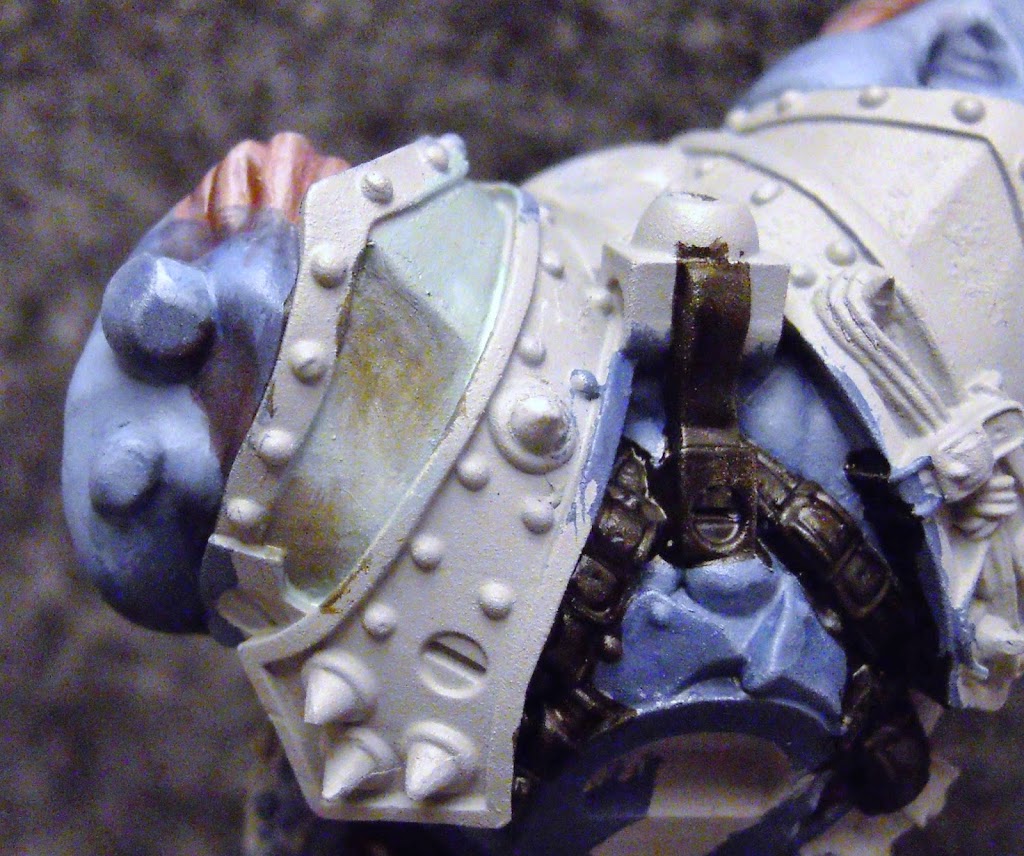
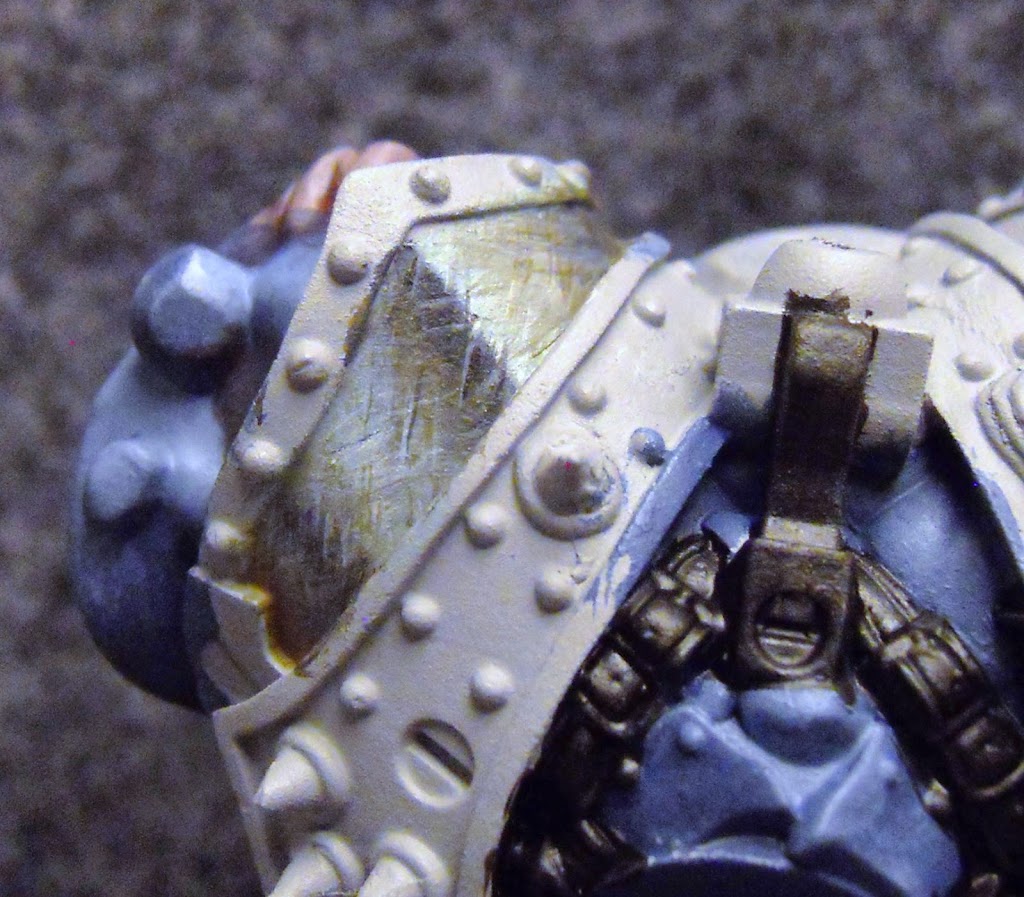
And that’s how I’m doing these metals. I started with a base of Underbelly Blue. I mix the Underbelly Blue with some Thornwood Green and stipple that at the edges of this shoulderpad. I’m going for a beaten steel look.
I add some more Thornwood to darken the mix, then mix in a tiny bit of my Black Mix. I talked about this color last article, but to repeat, it’s Thamar Black mixed with some Bloodstone. I also add some “scratches” with Menoth White Highlight here and there. These will be covered up, but I’m building everything up in very thin layers, so they will show through a bit and add to the texture.
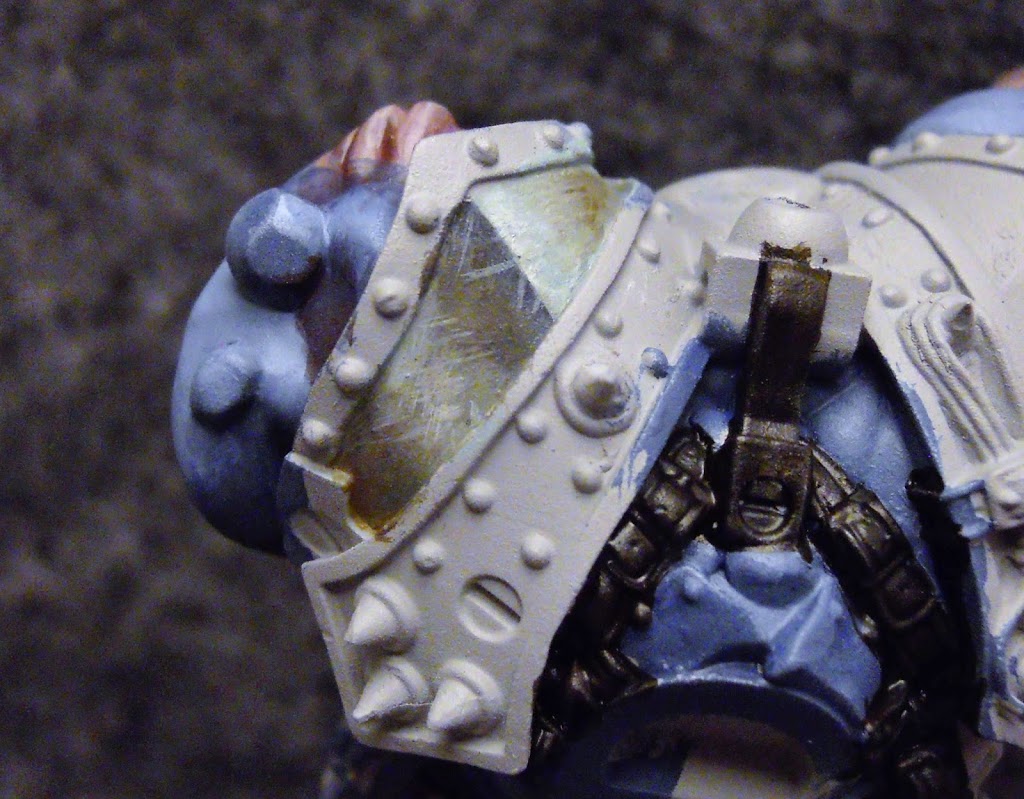
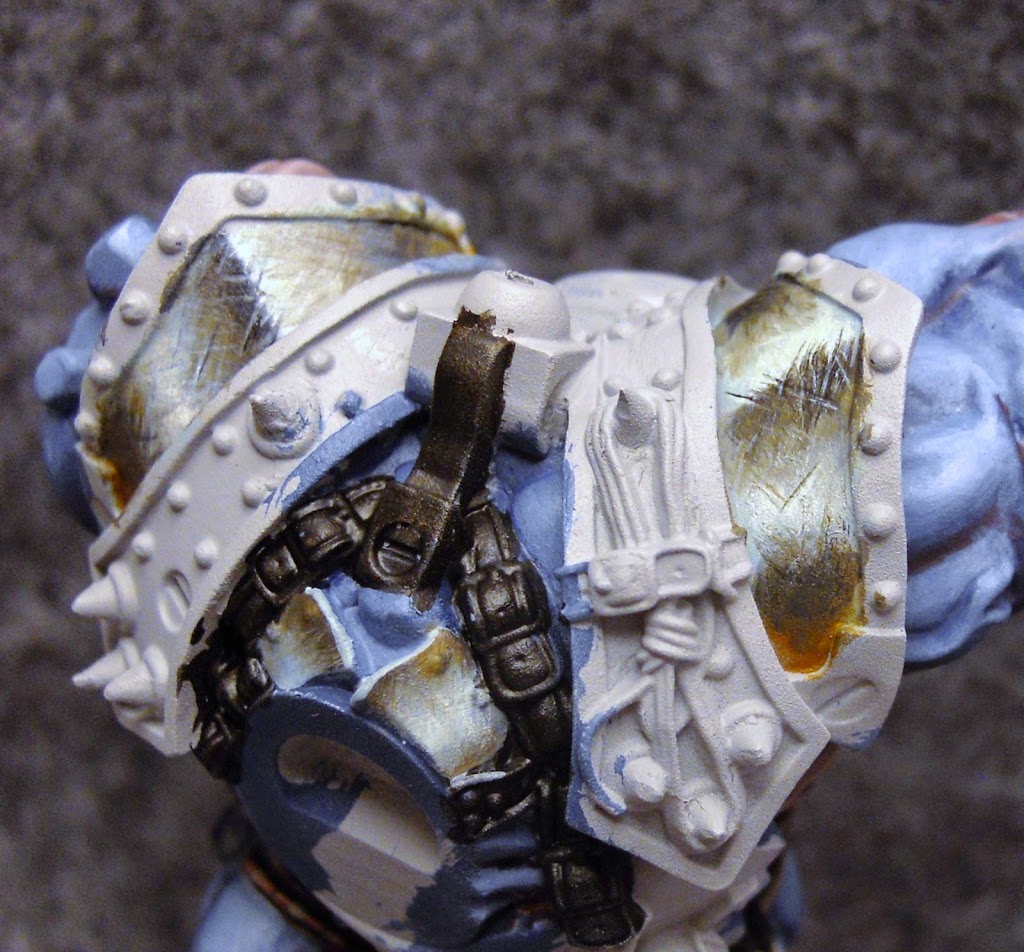
I darken the darks with a few more layers of the black mix, and also stipple on some highlights with Menoth White Highlight. I also add a very thin glaze of my favorite Navy Mix over some of the Dark areas. This is a color I mix with about 50/50 Exile Blue and Umbral Umber. Then I add even more scratches, sometimes adding a dark line above the light line to really make it look like they go deep into the metal. At the base I add just a tiny bit of Bloodtracker Brown to make it look a bit rusty.
And here is the other shoulderpad.
Here’s a look at the same metal technique on the gauntlet.
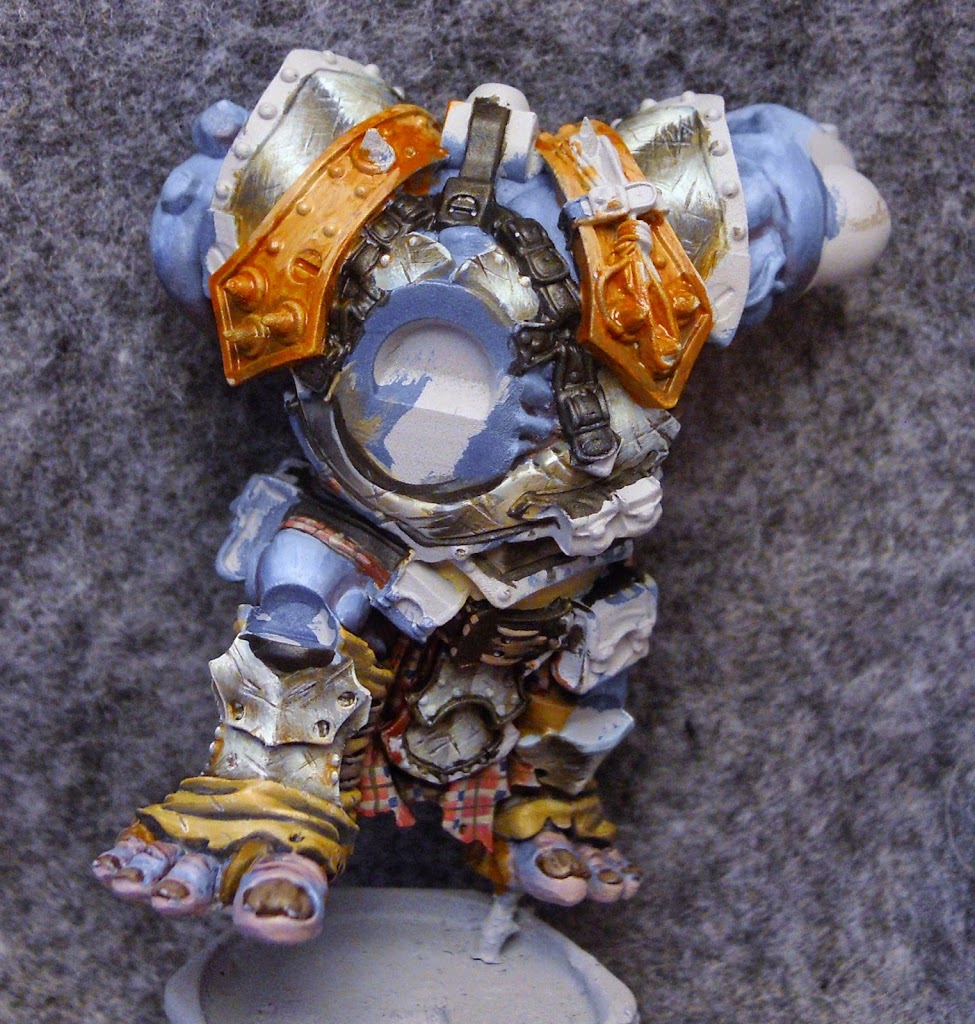
In order to really wow the judges, I want to include no less than three different types of metal. The other shoulderpads are done in copper. These start as with a basecoat of Bloodstone, which I shade with Coal Black and Highlight with Frostbite.
And then I build them up some more.
Then it’s time to add those scratches. I also add a little tarnish with some Trollblood Flesh. I also define all the edges with thin lines of Frostbite mixed with a little Bloodstone. In some places I use pure Frostbite to really emphasize a sharp reflection. Any edge facing the ground is lined with Hammerfall Khaki, to show that it is reflecting the ground rather than the sky.
The final metal is going to be a brass color. I start with Battledress Green. I mix some RucksackTan and Menoth White Highlight into it to to highlight it.
More Menoth White Highlight is added to lighten it even further. I use the navy mix as my darkest shade color.
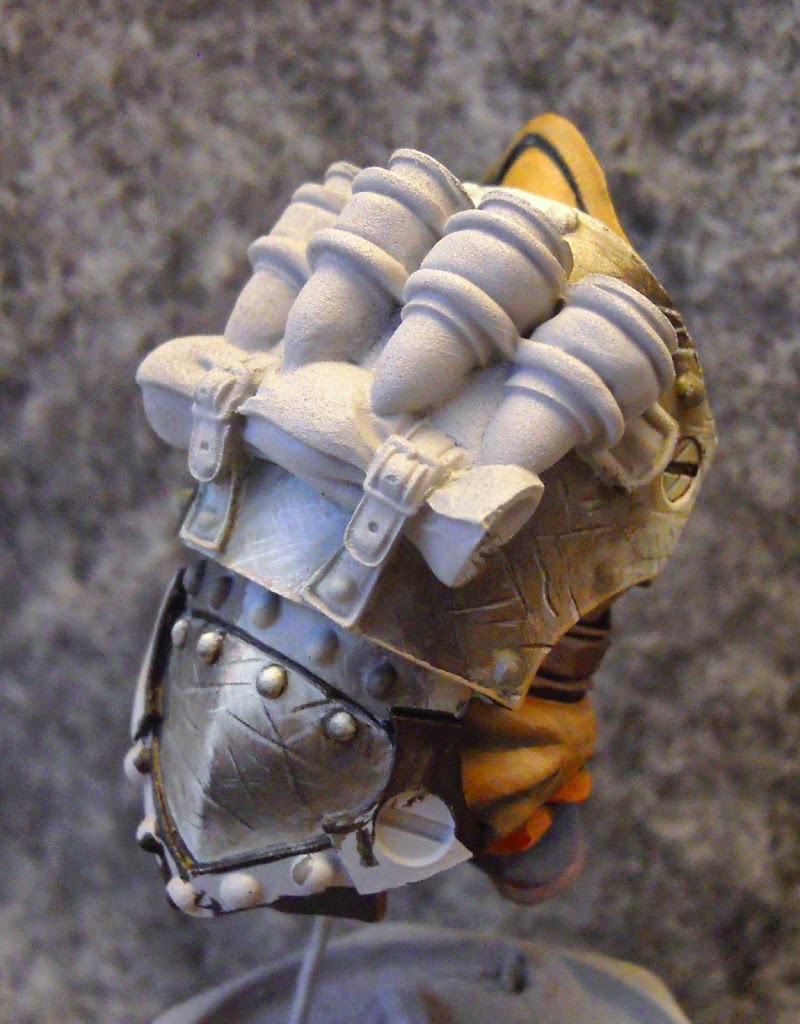
Here is the head with the same metal steps going on. Take a close look at the rivets at the top of the helmet. Each one has a very thin line of Hammerfall Khaki along the bottom. Light reflects off of all angles on a metal surface, and little touches like that really help with NMM painting.
I finish off the brass, defining all the edges with a mix Menoth White Highlight, Rucksack Tan, and just a tiny bit of Battledress. Pure Menoth White Highlight is used in a few places to really emphasize the reflections. I also have gone back over the rings on all the spikes and done them using the same brass color scheme. You might have noticed before that the kneepads weren’t attached before. I painted them separately and glued one of them on to see how it looked with everything else. Painting your models in different pieces is often necessary, especially with big guys like this. But a lot of times when you start gluing things together you notece they don’t look quite how you planned them to. I was pleased to see it looked like it was working pretty well. Take a close look at the spikes on those kneepads. Note all the different directions light is reflecting off of m. Once again you can see how important reflections are to getting that metallic look.
On to the leather pouches now. I start these with Bloodtracker Brown, and begin shading them with a mix of Beaten Purple and Umbral Umber.
Thrall Flesh is used as a highlight. When the leather is done I paint the buckles with the same colors as the rest of the steel.
There are still so many little bits to finish… There’s that rope on his shoulder. I paint that with Trollblood Highlight, carefully detailing the gaps with my navy mix, and adding a few highlights with Menoth White Highlight. What else? More spikes… the toenails….
At this point I just had to glue the head on. I knew I should really finish every little bit – the bigger the model the trickier it is to hold on to and rotate. But I had to know how it looked. All those other little bits could wait.
~And you’ll have to wait too. Just one more article and I’ll be all done.

