HOBBY: Painting with Washes!


I have been really inspired by the painting techniques of James Wappel, an amazing artist whose painted models rank among the best. I decided to try out one of his techniques!
Hi, Pezman here from Santa Cruz Warhammer.
I recently purchased a few of the James Wappel painting pyramid videos and was really surprised by his unique approach to painting models. Essentially, James applies a very fast basecoat of colors to the entire model using shades of color that are slightly lighter than where he wants the finished model to end up. From that point on, he primarily paints with only washes and glazes. Essentially, he goes over the model in a series of thin layers of dark colors adding shadows and color variety all over the model.
I decided to give this technique a try on my copy of Enigma Miniatures Driatram I’ll be using this model as a Wight King in my Vampire Counts Army. In the two pictures above you can see the pallet of washes (mostly Secret Weapon here, but the GW ones work quite nicely as well) I decided to use and the basecoat I put on the model. I kept the colors on the basecoat very light, possibly too light. Notice the huge difference between the color values on the basecoat (very light) and the washes (mostly darker).
You can see in the photo below just how quickly the washes darken the model and begin to create distinction among the various shapes. One of the principles of painting in this way is that you cannot just slop on a wash all over the place. These are single thin layers of color. In most cases, a single brush stroke of the wash was more than enough. I kept a paper towel handy throughout the process to dab away extra moisture and washes. That said, you are working with very thin washes on the entire model at once, so inevitably, the colors will run and bleed together a little. However, if you’re not over applying the wash, this should be manageable. and in most cases create a desirable effect. Once the model was washed all over, I dried the paint with the hair dryer after each step.
Below, you can see my 3rd and 4th passes over the model with the same washes. I tried to focus my blue colors into the armor and the yellow greens into the robes and clothes. I also realized I would need to add some more warmth to his skin to keep the model from looking washed out so I applied some of the red (Secret Weapon Drying Blood) to his face and hands. Also, I realized that I had gone a little too far in some areas with the wash and things really looked quite muddy… I applied too much wash. So, I went back with some traditional, opaque paints and highlighted the bottom of the robe, the armor, and the bandages on his arms. These highlights were all applied quite quickly with little more than a drybrush. As you can see at this point, I was simply making minor adjustments as there is very little change in appearance of the model between the steps.
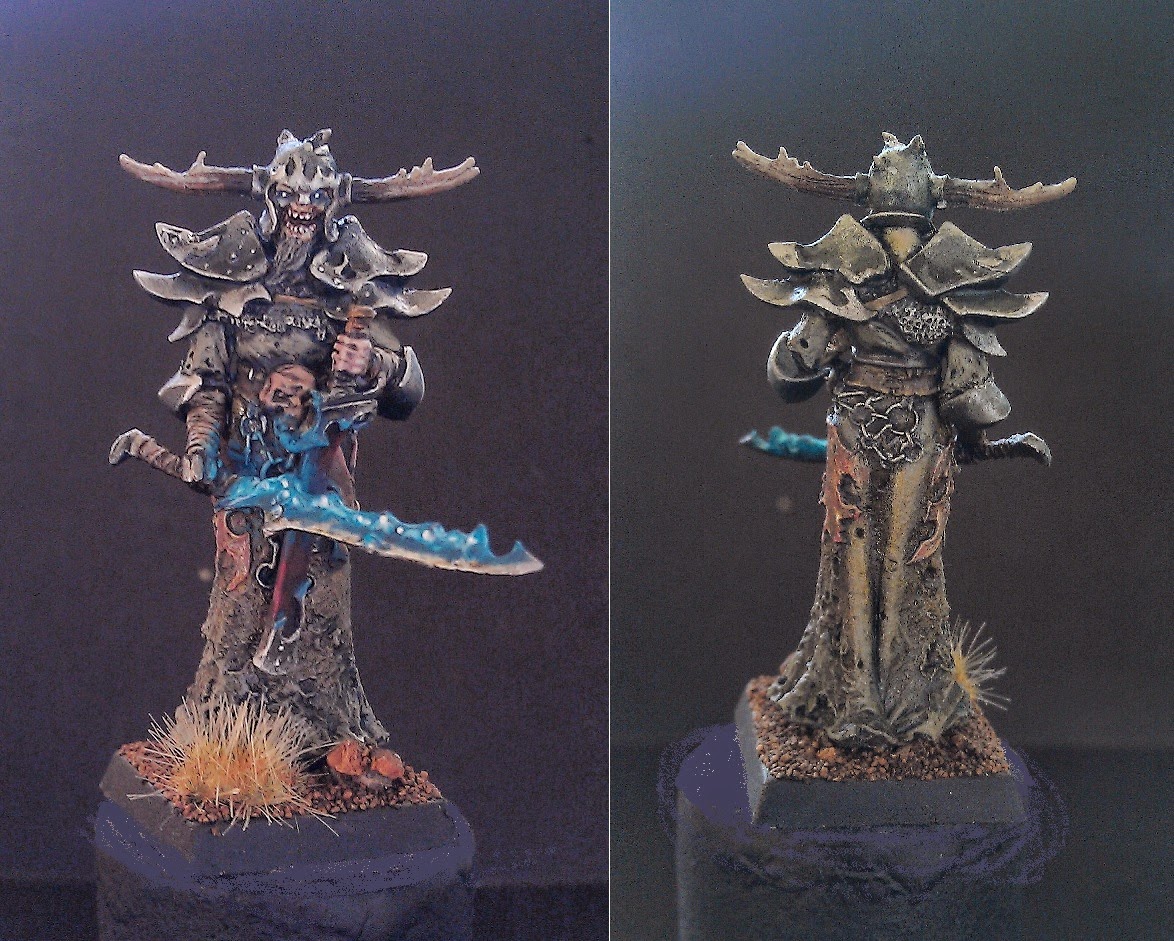
With the final steps, we return to traditional opaque paints and pick out a few highlights and details. I added a flame effect (still working on getting that OSL right) to the sword, and added some edge highlights to his face, armor, and small details. Overall, this technique is really quite easy to use and allows for a lot of very subtle blending and color variation without spending hours and hours working with super thin traditional paints. Total time spent painting between the first wash and the picture you see below was about an hour and a half (30 minutes of which was spent on the OSL). Now, in the spirit of full disclosure, this technique does have a steep learning curve, as it will feel odd to most people to allow their paints to ooze and mingle all over the model, but with a little bravery the effects can be quite nice indeed.
As always, thanks for reading, and if you have other techniques you’d like to see me cover please don’t hesitate to request.
Cheers!
Pezman


