X-Wing: Top Gun – Back To Basics Part III
It’s time to learn a “Hard” Lesson – Let’s take a look at the Hard Turns in X-Wing!
X-Wing: Top Gun is all about explaining some of the more complicated maneuvers and tricks you can pull off in X-Wing. The concepts may help you take your maneuvers to the next level.
Hello X-Wing Aces, we’re back with our series of mastering the basics of X-Wing maneuvering. If you’re not caught-up on the series you can check out Part One – The Straight Maneuvers Here and Part Two – Banks Strike Back here.
If you haven’t guessed by now we’re going to cover the final movement templates today – the Hard Turn Maneuvers. These maneuvers aren’t as tricky as Banks and might not cover as much ground – but they offer both a good speed (in terms of ground covered) and something Banks don’t have: simplicity.
Take a rookie X-Wing player and have them guess the final direction of a Bank vs a Hard Turn. Guess what, they probably nailed the direction on the Hard Turn and were probably off on the Bank. You know why? Because visualizing a 90° turn is a lot simpler than the bank’s ~45° turn. It’s just plain easier to know with square bases what a 90° turn looks like…because they are square, duh. Anyhow, lets get back to the basics!
Just to make sure we’re all on the same page for that, if you see a distance written out as 3.5 that means it’s 3 distance 1 straight maneuvers and 1 width segment. You can check it out for yourself by messing around with the straight segments and seeing the relationships for yourself – in fact, I highly encourage you to do so!
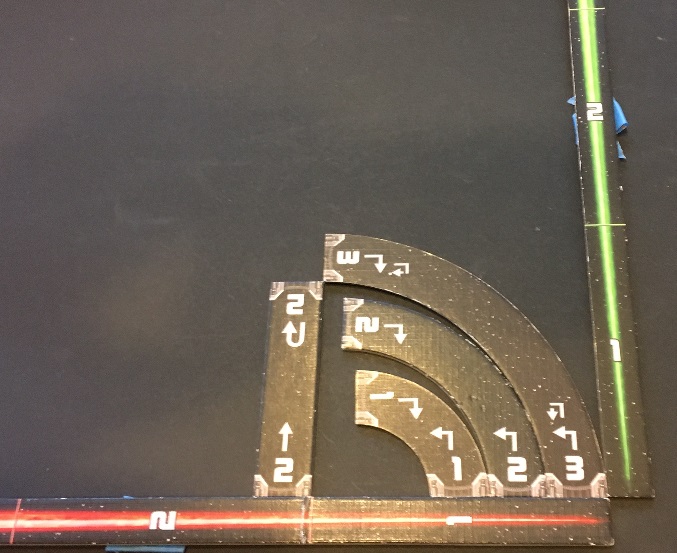
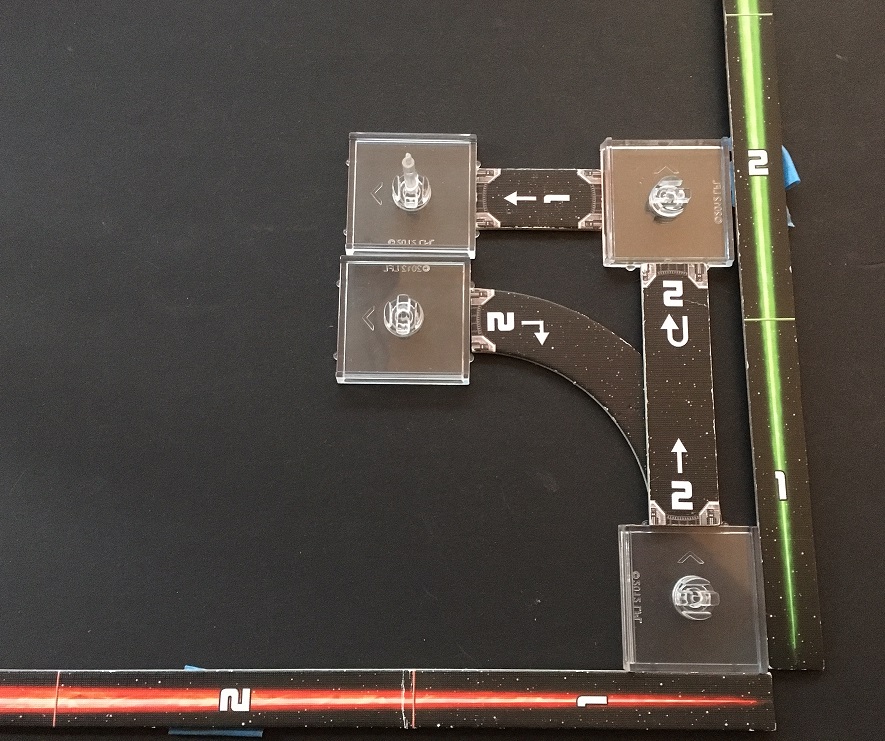
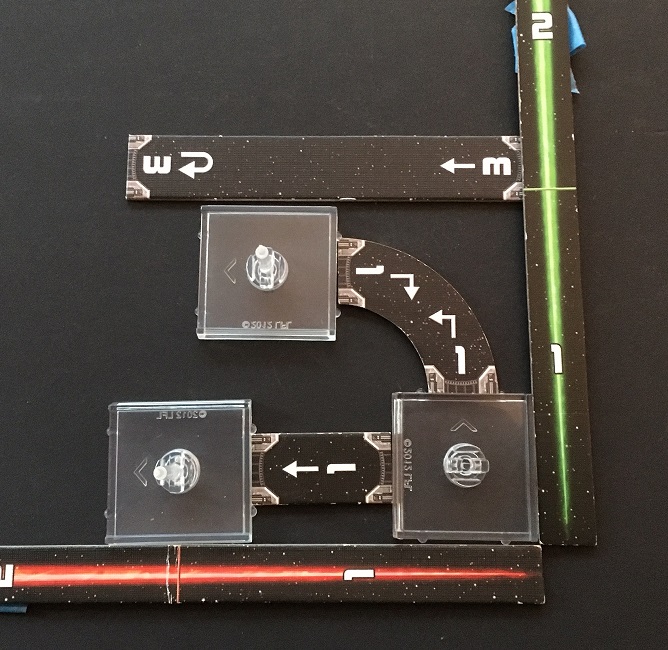
Alright – here one of the most important visuals to see today. This is all 3 Hard Turns next to each other. You can see the distances for yourself and you can see that their final positions don’t quite line up nicely. the 3 Hard does put you at roughly the same vertical distance as the 2 straight. More on that later…
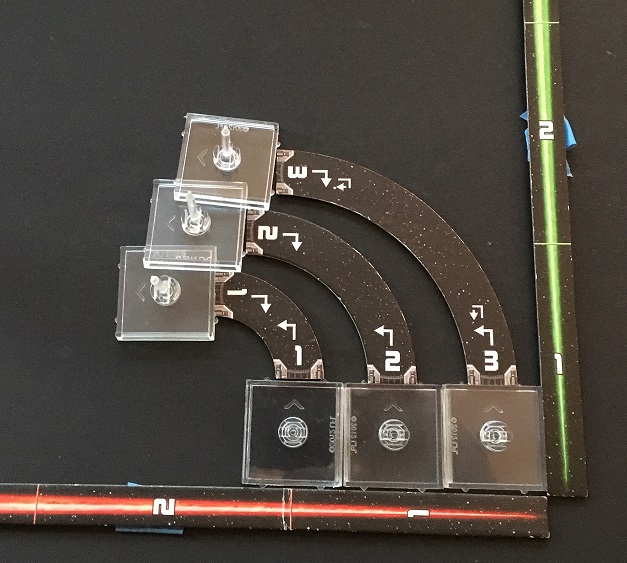
In this picture I’ve added bases. Again, I’d like to take a moment to apologize for my templates being beaten up and shifty. They tend to slide around a bit so go set this up at home and try if for yourself.
The important thing to note here is that if you tried to execute these maneuvers in a formation with each ship touching you’d have a giant parking garage. It’s bump-city at the end point. Only 1 and 3 would clear leaving the 2 to cause a lot of issues. Now, maybe you want to cause your ships to bump for whatever reason…I’m not here to judge.
Also not the distances traveled vertically and horizontally compared to the range finders.
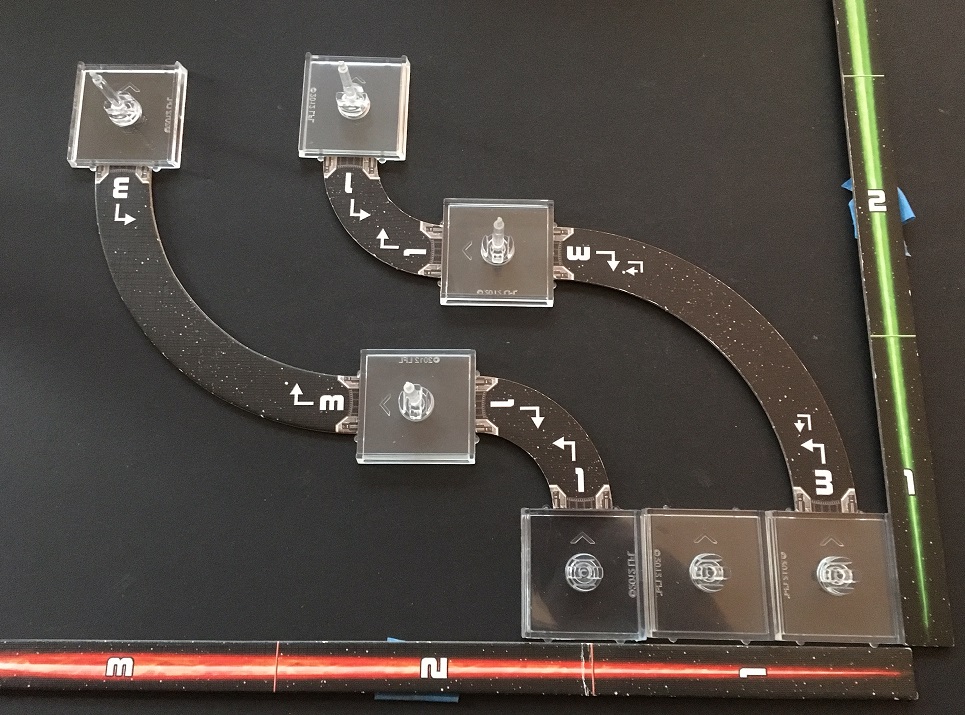
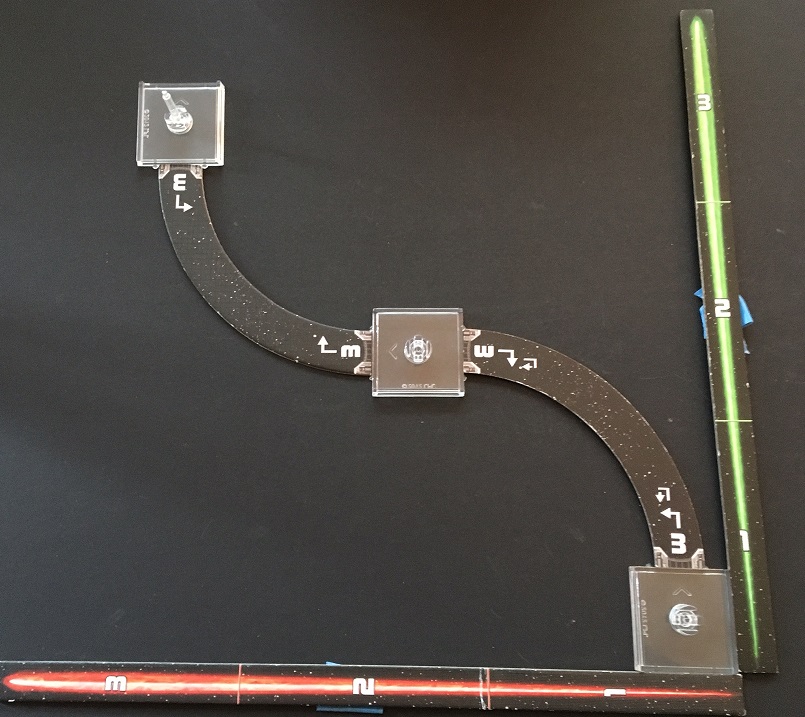
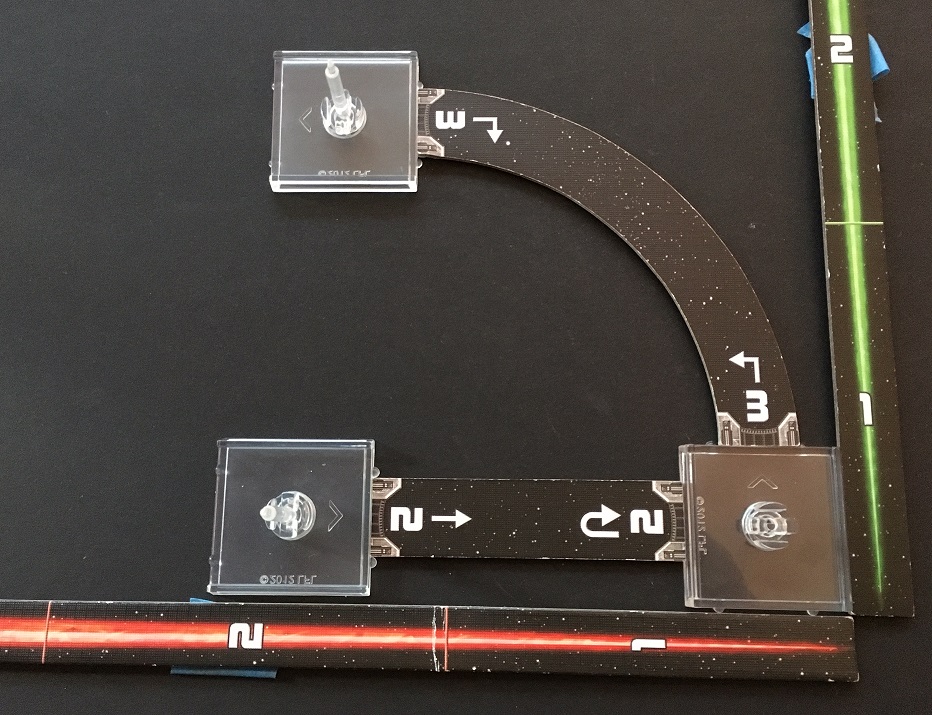
In this picture I demonstrate that even if you execute alternating 1’s and 3’s with a distance of 1 between each ship you’re end position will probably still be slightly off. Why? A combination of operator error and tool malfunction. “Huh?” you say. Let me explain:
Mathematically, those bases should line up perfectly and I would be able to place a 3rd base in the middle with them touching – perfect formation flying. However, because those cardboard templates get mushy overtime the distances get skewed. This is a strong case for players to pick-up a set of acrylic or plastic templates – at least if you want to compete in tournament play or if you want to execute these types of maneuvers. I’d almost say they would be mandatory if you wanted to fly in larger squadron formations. Not only do those templates hold-up better over time but you won’t have these types of errors that could cost you in a game.
Another way to think about it is like this: Would you even be able to tell those were off if the rest of the templates weren’t there. In a real game, you don’t get to see the “shadow” of your maneuvers. Bumps happen. Slight nudges to position due to us being clumsy with our hands happen all the time. Hopefully it’s accidental and you’re not playing against people who are cheating you, but it’s a fact that it happens.
I think Hard Turns are particularly affected by this phenomenon. I think it has to do a lot with the forces we place on the templates and the directions of those forces, but that’s a whole other physics discussion I won’t get into… /rant over.
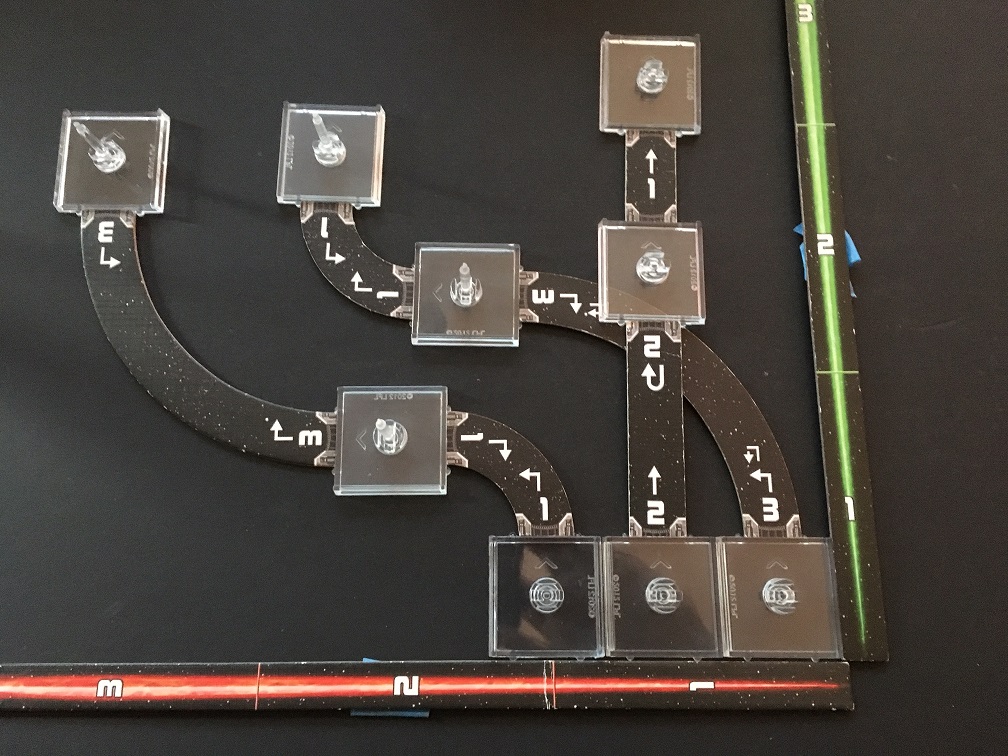
If you’re going to fly in formation (a topic we WILL cover later) then a good way to avoid bumping is to simply have the middle ship do couple straight maneuvers instead. Those ships are still pretty close in range to help cover each other in case of a firefight. You can also see they are roughly in the same line with the middle ship slightly ahead. That’s still close enough that a ship flying straight at all three of these ships is probably going to have a bad time.
Just for simplicity sake, I wanted to remove all the other distractions and take a look at the Hard Turn 3. You can see how much ground is covered. It’s not as tight of a line as say alternating Bank 3’s, but you’re also shifting your firing arc a full 90° which is a pretty substantial move. At the end of this series of maneuvers you can see that you’ll end up with the same facing and you’ll have traveled a good chunk of distance. If you executed another left Hard 3 you would be facing 180° from your starting direction.
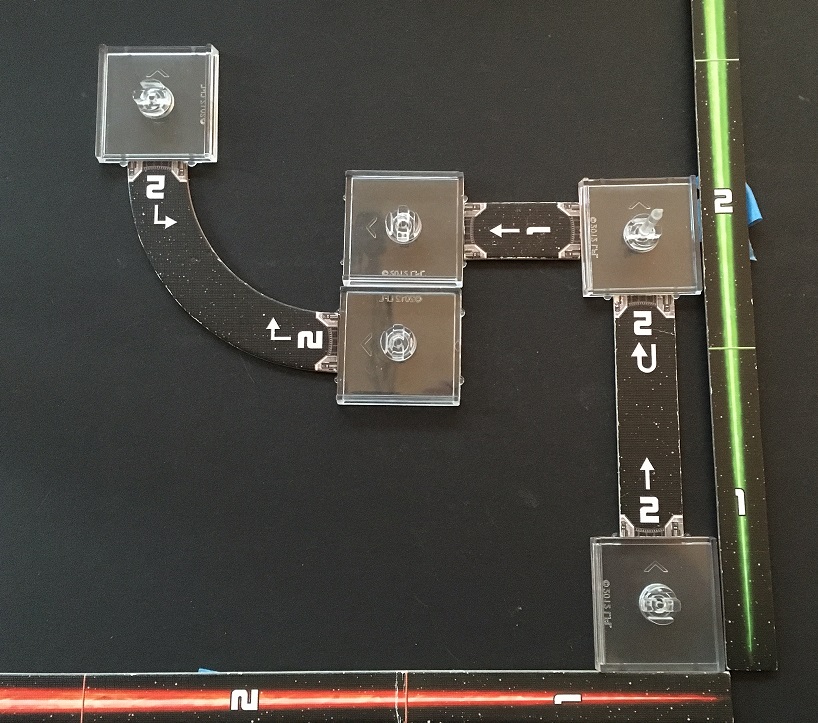
This is when I learned that I didn’t have a 2nd Hard 2 Maneuver to share – so I got creative. And in doing so I learned a cool thing. Turns out mistakes make for great learning tools.
The cool think I learned was that if you execute a straight 2 and did a barrel roll you could end up 1 base off from where you’d be if you executed a Hard 2. (I turned the top left base so I could use the Nubs to correctly position the 1 straight.) Now, because a barrel roll lets you slide along the width, you could end-up all over the place, but it was a cool observation. Also notice the distances in relation to the ranges. Always keep ranges in mind with maneuvers!
Because I didn’t have a 2nd template, I wanted to at least share what the final position would be if you executed an alternating Hard 2 series. If you look at the horizontal range you can see that you’ve traveled the length of ranges 1 and 2. Interesting, no?
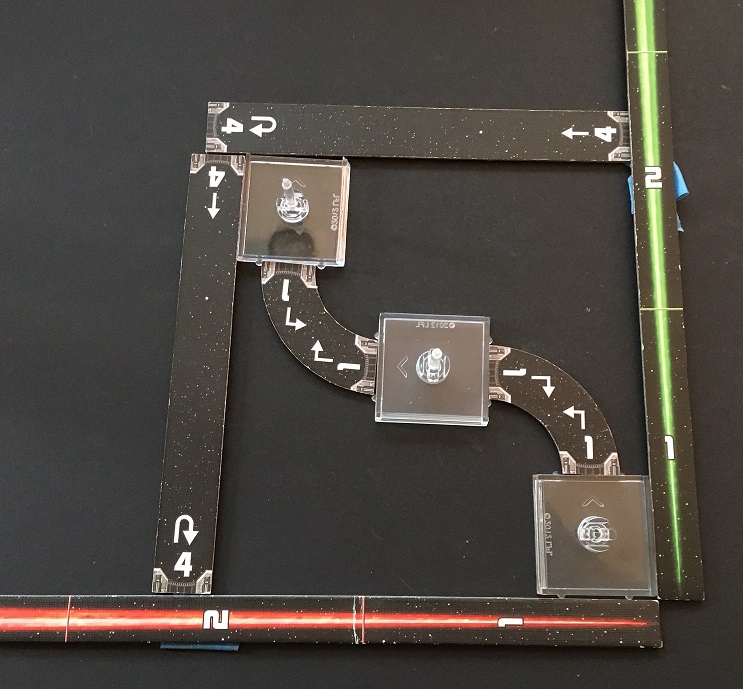
Here’s the same alternating maneuvers but for the 1 Hard Turn. I added the straight 4 to show better illustrate the distances traveled. Looking at the first part of the maneuver, it’s intresting to note that if you execute a 1 hard turn you’ve basically moved along the length of the range 1 line which, as we learned in the first part, is the same distance as 5 widths of a maneuver template.
Here is a better shot of what I’m referring too. 5 widths of the maneuver template is a distance of 2.5. Just something to think about.
That got me thinking about the distance of the 3 again, so here you can see total distance (outside base to outside base) of the end position is a distance of 3.5 horizontally from the start.
For many folks seeing this stuff laid out won’t make it click – but for us visual learners it’s very helpful exercise in visualizing the positions of things. The more relationship you can establish with the bases, movement templates and range finders the better off you’ll be when you’re trying to eye-ball a position on the table.
Join us next time when we put all this together for some practical exercises you can actually try out to become a better pilot in X-Wing!
Homework: Take a look at your templates if they are cardboard. Are the ends getting mushy? Maybe test out some of these maneuvers and see if you get the same “user errors” I noticed. I might be time to upgrade to new templates… Class dismissed!


