SHOWCASE: Blood Bowl Marauders Team


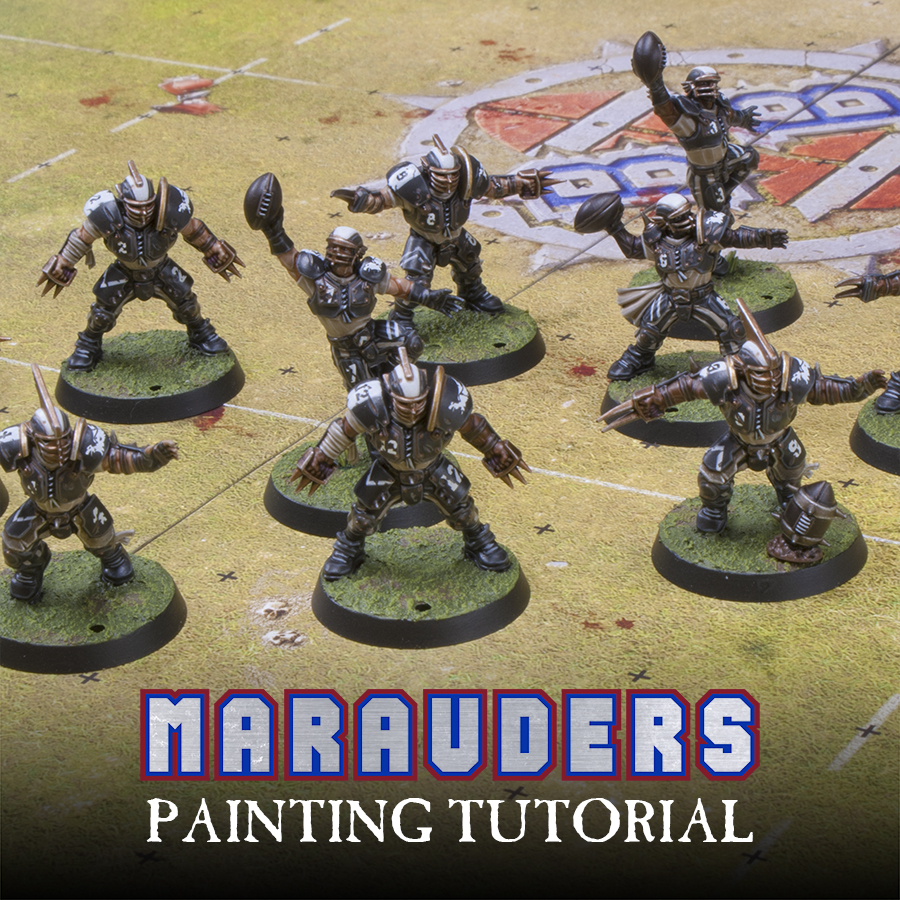
Today I have a step by step tutorial on how to paint your Human team from Blood Bowl as the Marauders. Follow along!
Today I have a step by step tutorial on how to paint your Human team from Blood Bowl as the Marauders as well as a gallery of my finished team including a 360º video. Unsure on how to paint up your own team, then take a look!
I saw this color scheme on the Blood Bowl Facebook awhile back and instantly liked it. It seemed simple, yet had areas of complexity that would make the finished model look more polished, mostly the stripes on the pants. With no official guide out on how to paint the Marauders I had to come up with my own. Usually I just paint one text model for these tutorials, but I decided to paint all 12 members of the Human team at the same time to make sure I got them done and didn’t get distracted by another project. After a week and a half they were done! Here’s a step by step guide on how to paint your own Marauders team.
The Armor
Step 1.
The model is primed black.
Step 2.
All areas that will be black are painted a solid coat of Eshin Grey. This includes the armor, pants, socks, and shoes. This take about two to three coats to get a nice solid coverage.
Step 3.
All of these areas then get a heavy wash of Nuln Oil.
Step 4.
This is followed by a second heavy wash of Nuln Oil. You want the finished color to be almost black, but still have a grey tint to it to give it some definition. The will help make all of the black areas feel a bit warmer as well as help us about a bit with highlighting later on.
Step 5.
All of the recesses of the armor are painted with watered down Gorthor Brown. This is to simulate dirt and grime and also help break up the black a bit. I watered the paint down to about the consistency of a Shade paint.
Step 6.
After this all of the armor as well as any other area that will be black got an edge highlight of Dawnstone Grey. This includes the pants, socks, and shoes.
The Skin
Step 1.
I basecoated all of the skin with Tallarn Flesh, which is actually a discontinued color. It’s super similar to Cadian Fleshtone though, so if you use that than you skin should end up looking the same as mine. Tallarn Flesh is just an old Foundation Paint, so like a Base Paint nowadays. Cadian Fleshtone will take a few layers to get a solid coat.
Step 2.
All of the skin was then shaded with a Reikland Flesh/Lahmain Medium mix. It was about a 50/50 mix. After the first shade was dry I went back and gave the hands a second coat to darken the shadows a bit as well as a few extra shadows on certain muscles if they needed it.
Step 3.
Lastly I did line highlights of Flayed One Flesh to pick out the edges of all of the muscles, fingers, and so on. You want to make these lines as thin and controlled as you can.
Now I decided to add some diversity to my team and painted half of the models with darker skin tones. Not only is this, you know, more inclusive, it also helps differentiate the models from each other. Since you get 12 models, but only six different sculpts, that means each pose is in there twice. Now with them all having different skin tones it helps make the team not look so samey and will also help me on the field when I have to keep track of who did what. I decided to do two different skin tones besides the standard caucasian we usually see.
Mid-tone Skin Tone
Steps 1 – 3.
For my first darker skin tone I base coated all of the skin Mournfang Brown. This was then shaded in the same was as the other skin, but with Agrax Earthshade instead of Reikland Fleshshade. Finally I highlighted it in the same manner as well, but with Bugman’s Glow instead of Flayed One Flesh.
Dark Skin Tone
Steps 1 – 3.
For the last one I painted the skin with Rhinox Hide. This was then shaded in the same manner as the other two with Druchii Violet (Thanks Duncan for the tip!), and lastly highlighted with Gothor Brown.
The White Cloth
Step 1.
All of the areas that were going to be the white cloth were base coated with Rakarth Flesh. I also base coated the stripe on the helmet at this point. Even though it will end up being a brighter shade of white, using the Rakarth Flesh will help give me a smoother white later since the surface area is so large.
At this point you also have to paint the stripes on the pants. For my guys each leg ended up with seven stripes around it. I started on the front. I knew that one stripe fell on each side of the knee pad, essentially “touching” the circular part of the knee pad. I also knew that one had to go down the outside side of the leg, partially covered up by the thigh armor, and that two went down the butt. This left another two to go down the inside of each leg. I tried to keep the thickness consistent throughout, but often the stripes on the inside of each leg ended up being thinner. This isn’t a huge deal since they are mostly hidden anyway. There’s not much of a trick to this besides being careful and having a steady hand. It helps if you’re paint if watered down too so it flows easier. Make sure that all of the white areas, including the stripes, have a nice solid coat of Rakarth Flesh.
Step 2.
All of the cloth areas were shaded with a 50/50 mix of Agrax Earthshade and Lahmian Medium. For the stripes on the pants I only painted this into the exact folds I needed it in instead of all over. You want to get as little as possible on the black parts of the pants.
Step 3.
Lastly I highlighted everything with White Scar. I just picked out the edges and folds in the fabric. Again, you need to be careful here with the pants and not get any on the black parts. You only want to pick out the folds on the pants, not the edges of the stripes. I also painted the laces on his shoes and the front of his armor with white at this point.
Leather
Step 1.
All of the leather straps were painted with Rhinox Hide.
Step 2.
A wash of Nuln Oil was applied to all of the leather areas. On the straps and belts I just focused it near where I wanted to define shadows.
Step 3.
This was then all edge highlighted with Gothor Brown.
Markings
Step 1.
At this point I painted all of the markings on the armor including the stripe down the helmet. I painted these with Ceramite White and had to do a few coats to get solid coverage. I did not large vertical stripe down the right shoulder pad and then did various arrow marks on their left thigh guard and belt buckle (if they didn’t have a spike on it). You can look at the official Blood Bowl miniatures for inspiration on these.
Step 2.
I then went back with the armor color to add scuffs and scratches. Since our armor was a grey with a bunch of black washes over top of it I had to use a mix of Eshin Grey and Abaddon Black. Just mix it until it looks like the same shade is your armor. You want to be kind of random with this step so it looks natural, but don’t go overboard with it. Less is more. I also went back with Gothor Brown to add dirt back in, mostly on the helmet, but if any of your other white marking went over where you had dirt before, you will want to add it back in.
Metallics
Step 1.
I base coated all of the metal areas at the same time. Most of it was done with Balthasar Gold, but any errant spikes not on the brass knuckles were picked out with Leadbelcher and the shoulder guard rims were painted with Retributor Armor. I also picked out all of the rivets with Balthasar Gold.
Step 2.
All of these areas were then shaded with Agrax Earthshade, even the Leadbelcher. This made them all look suitably dirty. The only thing that didn’t get shaded were the rivets.
Step 3.
I then edge highlighted all of the metallics with Stormhost Silver except for the rivets. I left the rivets alone since they are so small, otherwise they would just look silver and not gold.
The Weapon Grips
Step 1.
There aren’t many of these across the models. I base coated all of them with Screamer Pink.
Step 2.
This was then shaded with Nuln Oil.
Step 3.
I then line highlighted it with a mix of Screamer Pink and Screaming Skull.
With that you’re done! You can base yours however you want, but on mine I used the Lustrian Undergrowth texture paint. This was actually just discontinued, but I’m sure you can still find it at a local hobby store if you want, you won’t need much, so one pot or two should last you a few Blood Bowl teams. I then painted little patches of dirt on it with watered down Gorthor Brown just to break it up a bit. It was then drybrushed with Elysium Green and rimmed with Black.
I also added team markings and numbers on using the transfer sheet that comes with the set. I used the larger solid white number on the leg guard, the small white number on the right chest plate, the small black number on the white stripe we painted on the shoulder guard, and the outlined large white number on the back plate. They didn’t have the actual team logo for the Marauders, so I chose one of the generic ones off the sheet and put it on the left shoulder plate. I then weathered all of these in the same manner that we weathered the white markings earlier. I definitely recommend using Micro Set and Micro Sol to help you with putting the transfers on. I will have an article looking at those soon, but you can find them at most hobby shops and they help the transfers conform to the shapes of the model.
The Blitzer
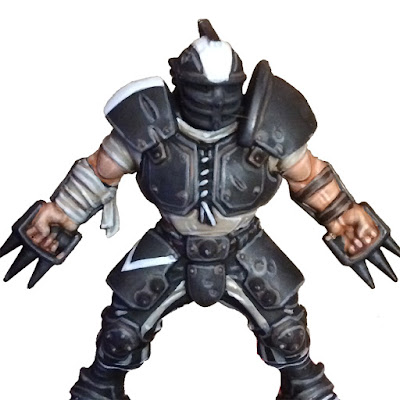
The Blitzer is one of my favorite models, he’s also the most heavily armored. You can see that I painted the extra layer of armor on his legs as bare metal. Just do this when you paint the rest of the metal.
Here you can also see one of the loose footballs that comes with the set. I just painted it in the same way as the leather, which is how all of the footballs were painted. The metal rings were painted in the same way as the rest of the silver metal.
The Catcher
This is by far the most dynamic human in the whole set. On him I switched which leg got the number and which got the markings. The pad the number is on is quite textured, so you’ll really have to use the Micro Sol to get it to conform to it.
The legs are also in a rather unique pose which means you will have to get creative with painting the stripes. Remember, just try and imagine how the fabric would be twisting in real life to get the strip right. I left off a stripe on the inside of his legs because you can’t see it at all.
Lineman
The other lineman are pretty similar to the one we painted, so you won’t have to vary how you paint them much if you don’t want to.
The Thrower
The Thrower has the trickiest legs to paint because his left leg is really twisted, so make sure you twist the stripes accordingly.
And here’s the whole 2016 team so far. You can see how varying the skin tones helped make the models look more unique even though the sculpts repeat. I definitely plan on adding to this as they come out with more players so I can get up to the full 16 players.
Check out a 360º video of my completed 12 man team below!
Until next time,
Tyler M.
Tyler is a life long painter and hobbyist and took home his first Golden Demon award at the 2012 Chicago Games Day with a follow up at the 2013 North American Games Day. More of his work can be found at his blog, Mengel Miniatures.


