8th ed 40k List Builder by Reecius


Hey everyone, so I finally had time to get this done. Here’s my list building spreadsheet for 8th ed 40k.
Check out our 40k 8th edition archive for more great 8th edition related content!
First Things First
- I made this for myself, it is not meant to be a professional, supported product. I am sharing it as a free tool to be used by others if they choose to.
- You will need the original source material to input points, wargear, etc. They are not built into this sheet.
- Feel free to modify this in any way you see fit!
- I use it on Excel, but you can easily convert it to a Google Sheet if you don’t have Excel which is free. You can do this from the drop down menu when you open the sheet using the link below.
- If anyone out there is a level 20 spreadsheet Wizard and can improve on this and wants to replace mine with a better version, let me know and we will do so and I will happily give you all the credit!
- It would be cool to update it to have drop downs for the various factions, detachment types which auto-populate Force Org requirements, Command Points, etc. Ping me if you think this sounds like a fun project!
Download the Builder Here
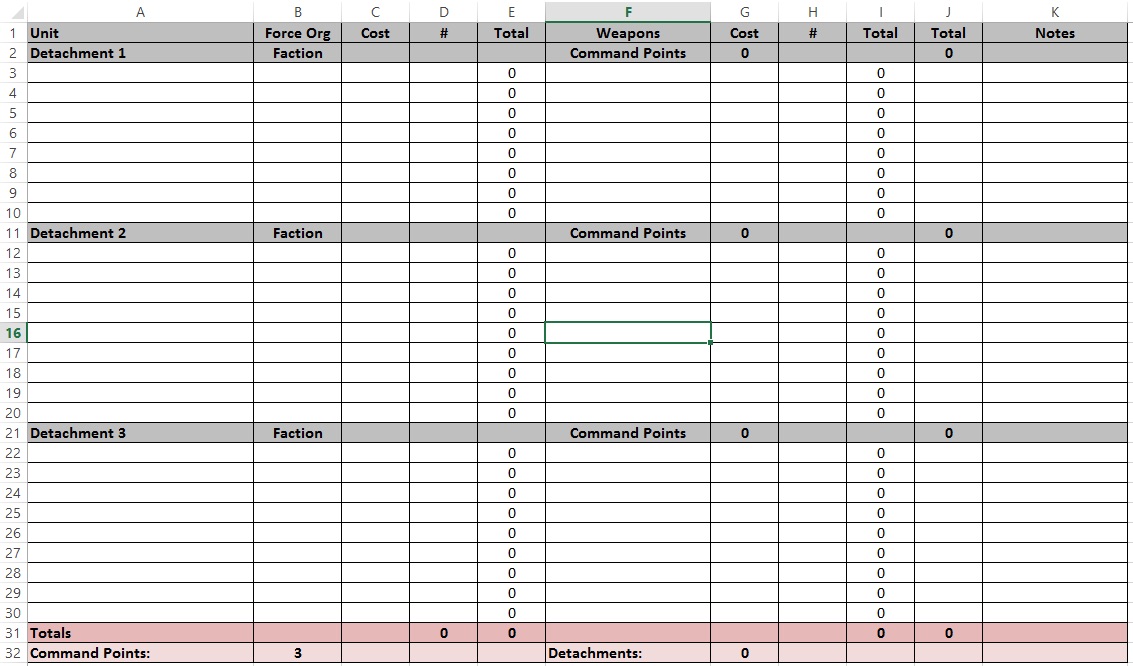
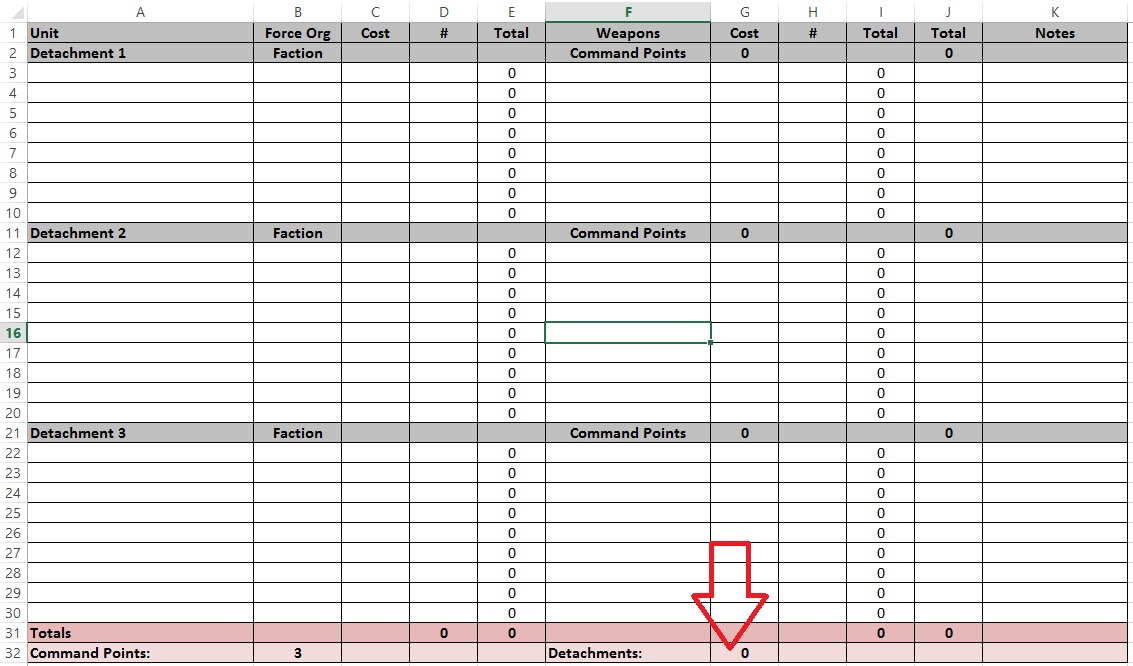
That’s what it should look like when you download it and open it up. I recommend saving it twice, once as a blank template and once as a back-up to the blank template titled something clever like “Blank Template 2.” The reason being is if you are like me and constantly accidentally overwrite the template by hitting save instead of save as, this will save you lots of time, lol.
How to use the List Builder
So, it’s super easy….to me! That’s because I made it for myself, but it actually is pretty straight forward.
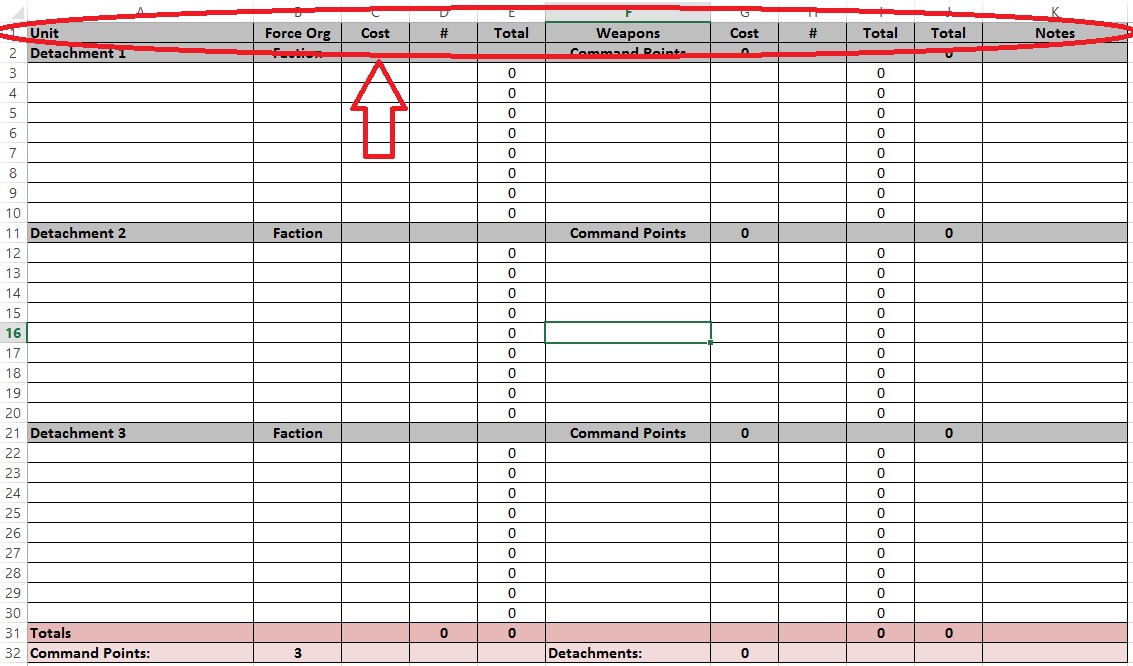
- Row 1 (rows go horizontally, columns go vertically) you don’t touch. That’s just organizational stuff and tells you what goes in the columns beneath them in the white cells.
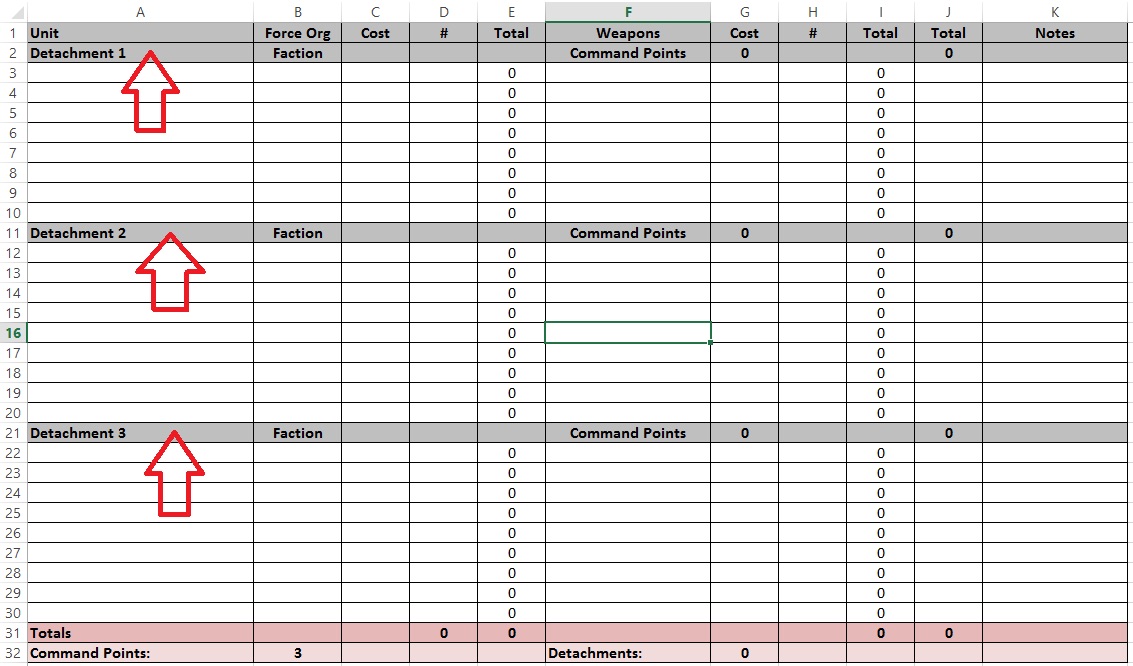
- Rows 2, 11, and 21 in grey (which may change as you add or delete rows) separate the detachments in your army. You fill in the detachment type in the place of the space holder “Detachment X” text in column A. You also overwrite the “Faction” text with whatever faction that detachment is in column B. You lastly will input the number of Command Points the detachment gives you (if any) in column G. The Total in column I auto-populates as you fill in the points of your list so don’t worry about that one! This is an easy way to see which detachment has the most points for your ITC Faction tracking.
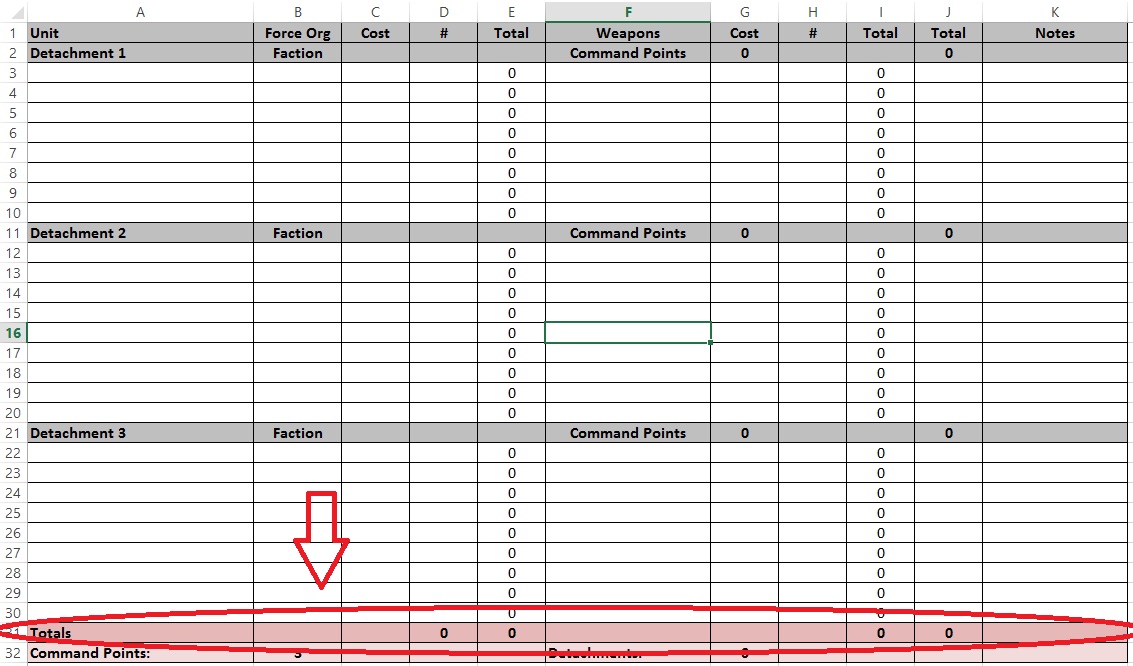
- Row 31 (which may change as you add or delete rows) in darker pink you do not input any data into, the functions in the cells will do that work for you. Column D gives you your total model count. Column E gives you your total amount of points spent on base units. Column I gives you your total amount of points spent on wargear and upgrades. Column J gives you the total points of your list.
- Row 32 (which may change as you add or delete rows) in lighter pink only requires you to input the number of detachments in your army in column G. The number of Command Points in column B will auto update based on the numbers you put in the corresponding cells as instructed above. You will note it starts at 3 per the BRB guidelines and goes up or down from there depending on the detachments you choose.
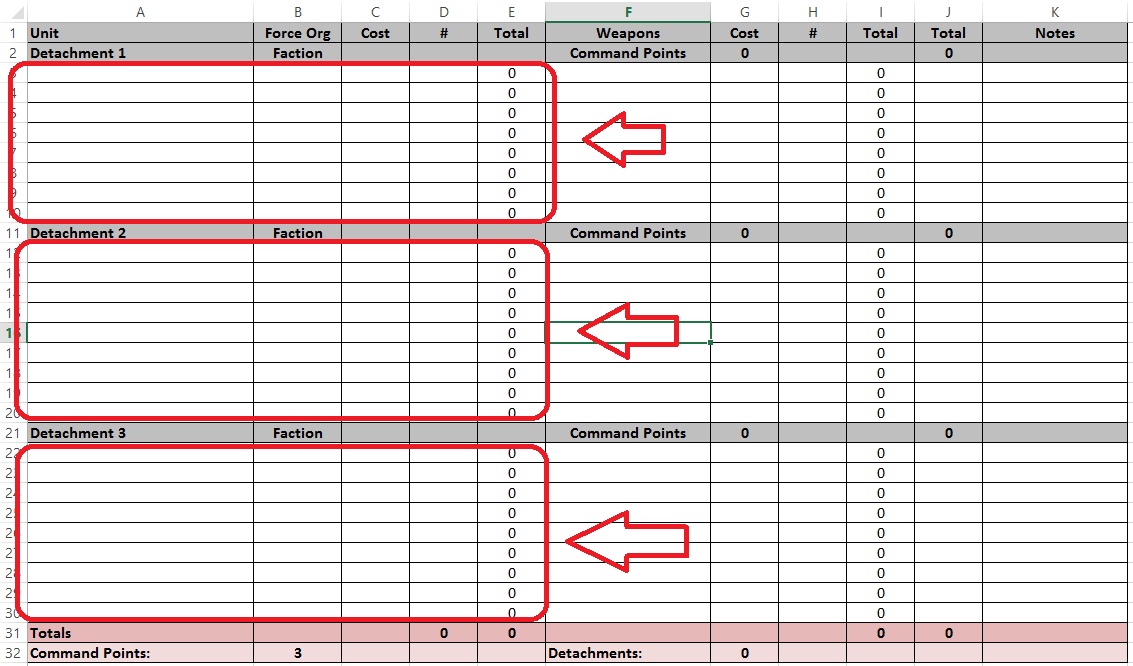
- For inputting actual units into the sheet, that all happens in the white cells. Add the unit name in the appropriate detachment in column A. Input their Force Organization slot in column B. Enter the base cost of the unit in column C. Enter the number of models in this unit in column D. Column E will auto-populate the total cost for you. Before adding in the next unit, make sure to add all of the unit’s wargear as explained in the next step.
- Note: input the base cost of the unit without wargear here unless the unit comes with all wargear included, such as with most named characters.
- Note: if you need more rows, input them by right clicking on the far left column and clicking insert. Just be sure the functions in the cells transfer to the new row. To do this it is super simple: just click on a cell in the same column that has the correct function in it, hover your mouse over the little square in the lower right corner of the cell, click on it and then drag it up or down to the cells that need formatting and the spreadsheet will do the rest for you.
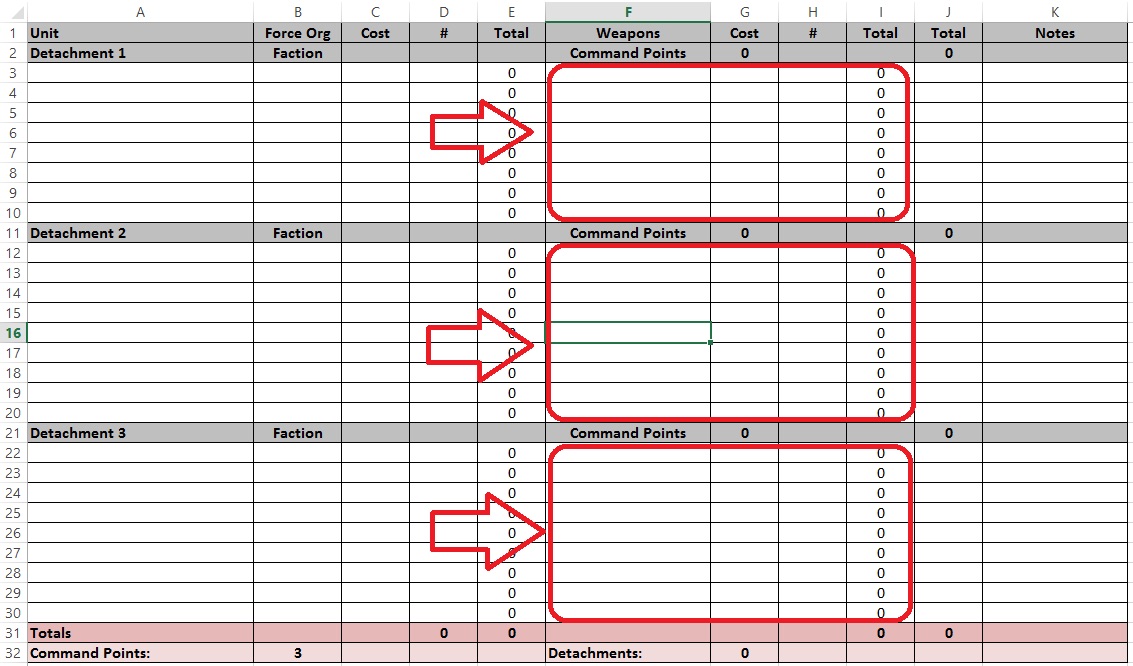
- For wargear and upgrades, you input that data into the white cells adjacent to the unit entries. Similarly, input the name of the item in column F. If the unit has multiple wargear entries, you can add them in the row below. Do this before moving on to the next unit as it may take several rows to cover all of a unit’s wargear. Next, input the cost of the wargear in column G. Input the quantity of this wargear item in column H. Column I will atuo-populate the total for you, so don’t input anything there.
- Note: if you need more rows, input them by right clicking on the far left column and hitting insert. Just be sure the functions in the cells transfer to the new row. To do this it is super simple: just click on a cell in the same column that has the correct function in it, hover your mouse over the little square in the lower right corner of the cell, click on it and then drag it up to the cells that need formatting and the spreadsheet will do the rest for you.
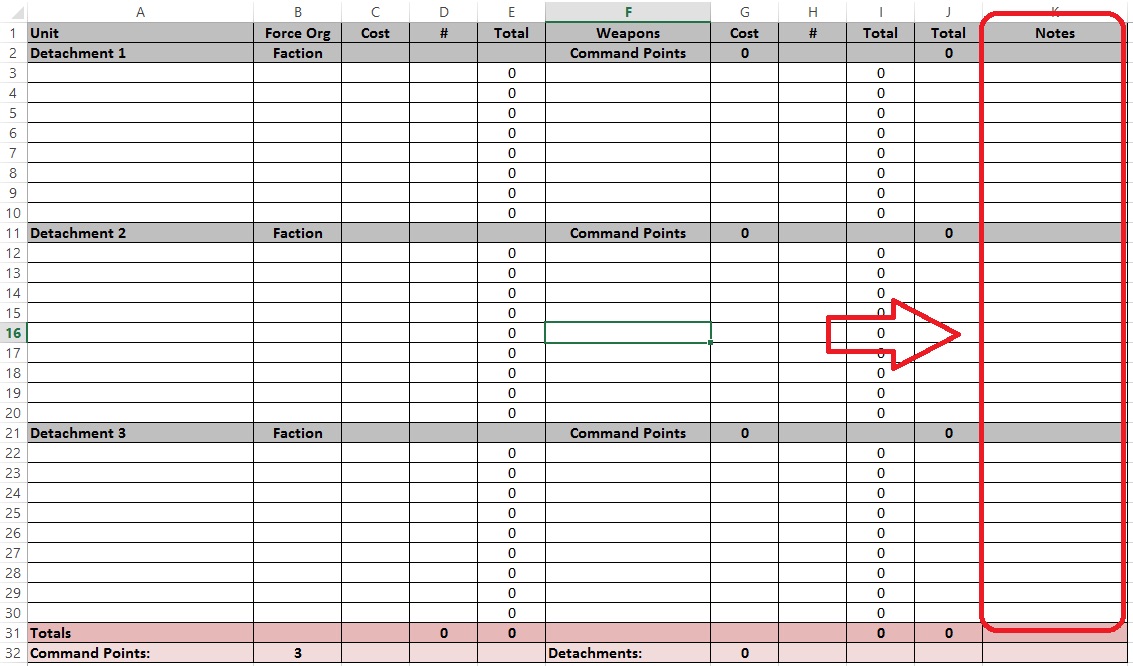
- Column K is for general purpose notes on a unit if it has something funky about it, to notate who is your Warlord, what warlord trait they have (although this is picked before each game, it doesn’t have to be put on your list in advance) writing down psychic powers (again, these can be picked pre-game, you can just jot them down here before the game if you want), any special items they have, etc.
- Note: This is also a great place to note a unit’s Power Level if you are using Power Level Kill Points.
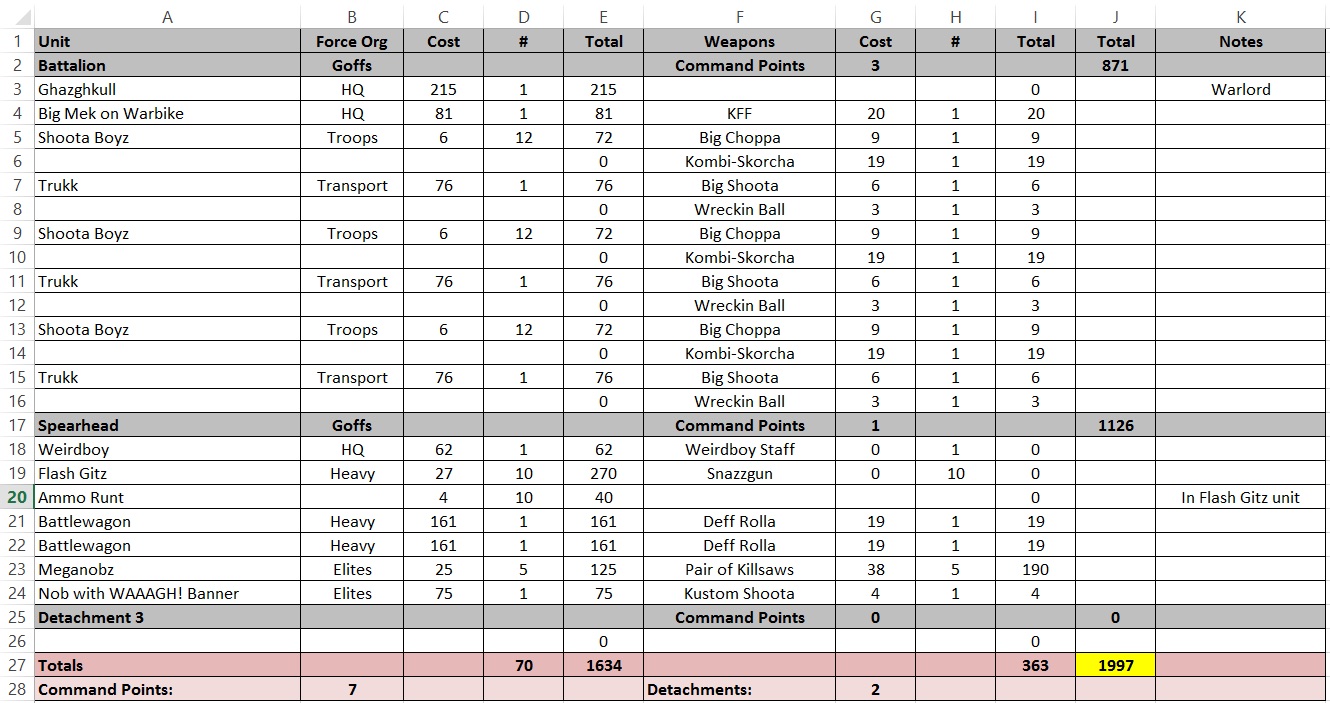
- When it is all filled in, it will look something like the list below which I include as an example.
- So as you can see, this is an Ork army but more specifically the Goff sub-faction of Orks as Ghaz is a Goff. So, I made sure to designate that all of my Orks are Goffs. Many characters’ aura abilities only work on other models from their sub-faction so it is important to notate this detail. For ITC ranking purposes I would still be competing in the Ork faction, but everyone would be able to see that I was in fact playing with the Goff special rules and theme.
- I noted that the Ammo Runts were a part of the Flash Gits unit, not a separate unit. They’re separated on the list though as they cost a different amount of points than the Flash Gitz per model and I wanted to include them in my total model count for my army, requiring that they be put in a new row.
- All the pertinent information is included here including the number of detachments, command points, etc. As you can see, I sometimes get lazy and do not write out all of the free gear that comes standard on a unit as it isn’t necessary and takes up a lot of space. You of course can if you want to, but you don’t need to.
- This sheet also gives us a lot of fun information like model count, what the ratio of wargear to warm bodies is, which detachment is my largest and therefore my ITC faction for rankings (it is the Spearhead detachment as you can see!), etc.
- Detachment 3 is left blank as I didn’t use that part and I deleted excess rows to save space. If you aren’t using a detachment, just don’t delete the row for the detachment (row 25 in this case) as it goofs up the functions in the other cells.
- It should print out onto a single sheet of paper in most instances (just be sure to print in landscape orientation!), which is great for tournaments, pick-up games and league nights!
- Lastly, if you make a mistake the undo button is your friend. Simply click it until you get back to a point in your work prior to any errors.
Well, there you have it. Hopefully this helps! Let me know in the comments section if you have any feedback on ways to improve it or questions on pars that are unclear.
And remember, Frontline Gaming sells gaming products at a discount, every day in their webcart!


