BoLS logo Today's Tabletop & RPG News
Advertisement

40k Tutorial: Death Korps of Krieg

6 Minute Read
Feb 24 2010
Advertisement
 
Hey guys, Col_Festus here! I’ve had numerous requests for a tutorial on how I paint my Death Korps of Krieg, so I decided to write up my recipe for you guys. 

First a little background. The Imperial Guard have been my favorite army since I started playing back in 2nd edition. I’ve owned and painted 3 entire IG armies over the years, one of which I can now proudly say is being fielded by Mkerr. With the release of arguably their best book of all time I decided it was time to pay homage. I wanted to paint a showcase level army that I would be keeping for good. Now we all know that an Imperial Guard army is quite the painting challenge because of the sheer number of models. That being said I knew it would be a long project and the models would have a ton of time invested in them. My favorite IG models are by far Forgeworld’s Death Korps of Krieg and I could think of no better time to take the plunge. With that in mind I placed an order for 30 infantry to start off my army.
I began the army by painting a few non-DKOK test minis to get the look and feel down right. Now anyone that knows anything about the Death Korp knows they are as gritty as the IG come. Troopers aren’t even assigned a name, simply a number. They view battles as simply an issue of resources and manpower, victory is already a foregone conclusion, its just a matter of how many men it will take. I really wanted to capture this in my miniatures and I will describe why I chose to do each part of the model as such along with the techniques/paints required to complete each step. So with the background taken care of lets jump right into the tutorial. 
Now one of the most recognizable pieces of the Death Korps equipment is their trench coats. I wanted the coats to have a very lived in feel, to reflect life in the trenches. I knew I didn’t want a flashy coat so I went with grey. In order to achieve a worn in look that was seamless I decided to do all their coats at once with an air brush. I started by spraying each model with Vallejo’s Model Air U.S. Grey. This is the same color as GW’s Codex Grey. I sprayed on a fairly solid coat. The beauty of Model Air is that you don’t have to thin the paints down so you never have to worry about getting proper coverage, its always the same. After this was done I took Babdab Black and painted it in the darkest folds. Be sure to shake your wash extremely well in order to get a fine smooth wash. After this wash is complete move on to highlighting sharp edges on the coat with Codex Grey.
Now some of you maybe scratching your heads and wondering why I’m highlighting U.S. Grey (which is Codex Grey) with Codex Grey. The beauty of the airbrush is that you can put down multiple layers to get that wonderful blending that airbrushes are so well known for. When you take out a brush and highlight with the same color it is in fact a bit lighter because the black is darkening the airbrushed layer. The result is great highlighting that is subtle enough to look good, but keeps the coat from “popping” thus keeping the grungy look intact. With that the coat is done until the final step of the model. For the remaining parts the process is fairly simple and I’m going to break down each part into more of a recipe style for easy of use.
Facemasks
  • Start by giving the mask a coat of Khemri Brown
  • Wash with Devlan Mud
  • Go back with Khemri Brown making sure not to cover the creases
  • Highlight the ridges of the mask with Kommando Khaki
  • Give the gasmask ring a few thin layers of Dwarven Bronze
  • Wash the Bronze with Devlan Mud
  • Finish the mask by painting the eye holes with Chaos Black ( I felt this gives the models a suitably soulless look appropriate for the Death Korps).
  • Paint the rims of the eyes with pure Chainmail 

Light Browns (Rolls, Boot Wrappings)

  • Start with a coat of Khemri Brown
  • Wash with Devlan Mud
  • Go back with Khemri Brown making sure not to cover the creases
  • Highlight the ridges with Kommando Khaki

Medium Browns (Boots, Belts, Suspenders, Backpacks)

  • Apply a coat of Calthan Brown
  • Wash with Devlan Mud
  • Go back with Calthan Brown being sure not to cover the creases
  • Highlight the edges with Bestial Brown

Dark Browns (Gloves, Pants, Gasmask tubing)

  • Start with a base of Scorched Brown
  • Apple a generous amount of Babdab Black
  • Highlight with Scorched Brown

Bronze Work (Buttons, Eagles)

  • Simply apply a smooth coat of Dwarven Bronze

Bright Metal (Lasguns, Entrenching Tools, Bayonets) 

  • Start with a solid foundation of Chaimail
  • Apply a generous amount of Babdab Black
  • Highlight with Chainmail once the wash is dry

Dark Metal (Helmets, Glove Armor, Shoulder Pads)

  • Mix a 1:2 ratio of Chaos Black to Chainmail and apply a base to the appropriate areas
  • Wash the areas with a generous amount of Babdab Black
  • Take Chainmail and apply a random jagged pattern to different parts of the helmet to represent scraps and dings.

At this point the model should be shaping up. Next simply paint your weapons black. The biggest step that will help tie everything together is the a good coating of grime. All the grime I plan to apply to this army will be done with Graveyard Earth. This should help keep everything looking suitably weathered. To do this I thin down Graveyard Earth with Vallejo’s Acrylic Thinner at a 1:1 ratio. I then spray the mixture around the base of the model giving everything below the belt a good dusting.

Now on to basing.  The base starts with a heavy coating of Scorched Brown followed by a heavy drybrush of Graveyard Earth. I usually drybrush the base twice with Graveyard Earth to get the color looking right. I finish it with a light drybrushing of Bleached Bone.

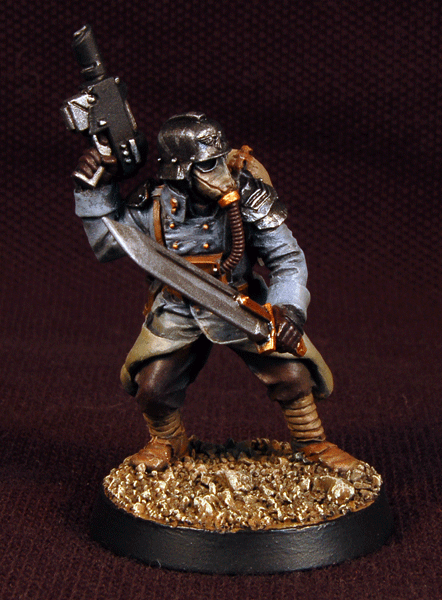
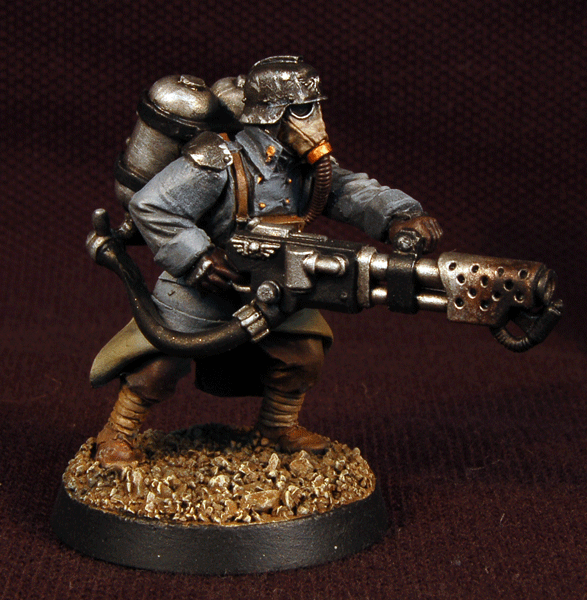
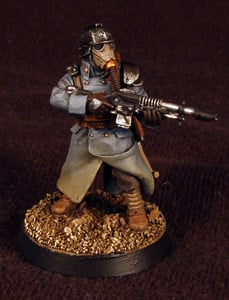
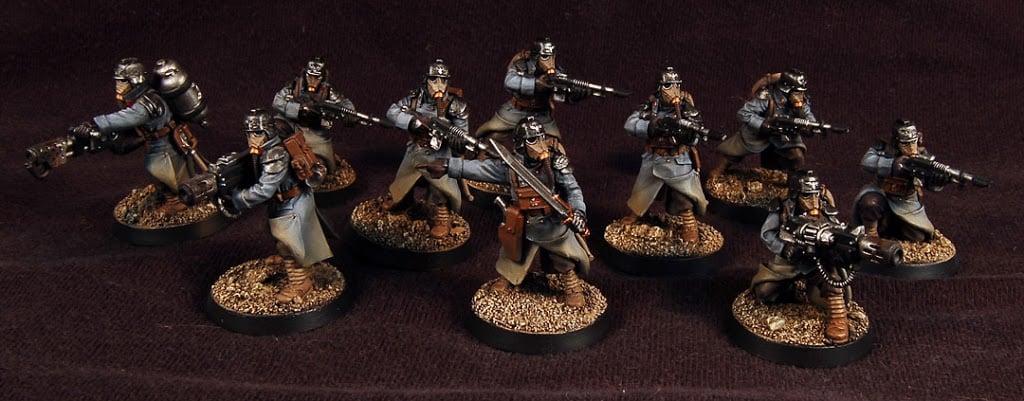
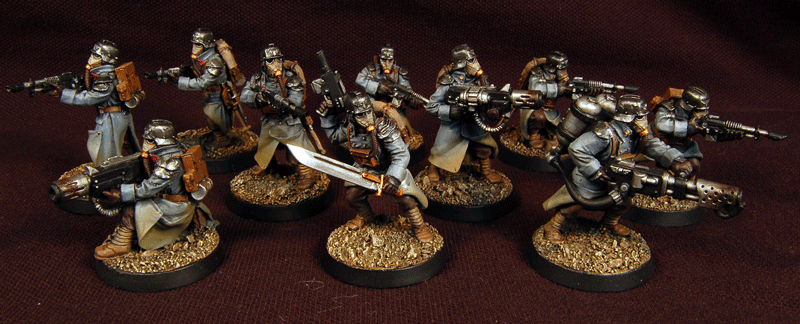
Next give the model a good coat of Vallejo’s Matte Varnish using an airbrush. I don’t thin down the varnish I just give it a straight spraying with my airbrush. This will dull down the metals a bit. To fix this I apply a coating of Pledge: Future Floor Wax with a brush to all the metal parts. It helps to make the armor pop a bit from a distance. The result makes the rest of the model look suitably dull and weathered. So that’s it! You now have some finished Death Korps on your hand! Here are a few shots of the finished product!

Advertisement

~ So that’s it guys ‘n gals. I’ve been working furiously on this army and I hope to have it completely finished by the end of summer. I’ll be tackling some tanks soon to take a break from the infantry. I picked up some oil paints and Forgeworld weathering powders. I plan to paint up a Demolisher using Forgeworlds Master Class techniques, I`ll be sure to document it and post it up here for you. As always if you have any questions regarding the techniques here feel free to email me at [email protected]. For more Death Korps of Krieg goodness check out my blog First Rank, Second Rank!

Avatar
Author: Guest Columnist
Advertisement
  • 40K TACTICS: Against the Imperium, Chaos Edition

    Warhammer 40K